Showing posts with label Crochet Pattern. Show all posts

Friday, 17 February 2017

Every Which Way Crochet Borders - Book Review 2

My companion, Elinor Gotland, telephoned me to express her disgust at last week's blog, a review of Edie Eckman's new book 'Every Which Way Crochet Borders'.
'Well, Beaut, that poor woman designed and charted 139 customised edgings. And what did you do? Stick one frill on a lampshade. Creating a lamp no-one in their right mind would switch on, for fear of burning the house down."
'That lampshade is perfectly safe. Wool is naturally fire retardant.'
A small snort breezed through my mobile phone.
'So, you've put that death trap back on the bedside table have you? Best of luck, Beaut. I can see the headlines now. "Blogger electrocuted by crocheted wire."
Fair play, that would be a sensational marketing strategy.'
'Don't be daft, Elinor. The power supply to the bulb is totally separate to the wire in the lampshade.'
'Then you've no chance of generating any decent publicity. Mark my words, up your game, or Storey Publishing won't be sending you any more free books.'

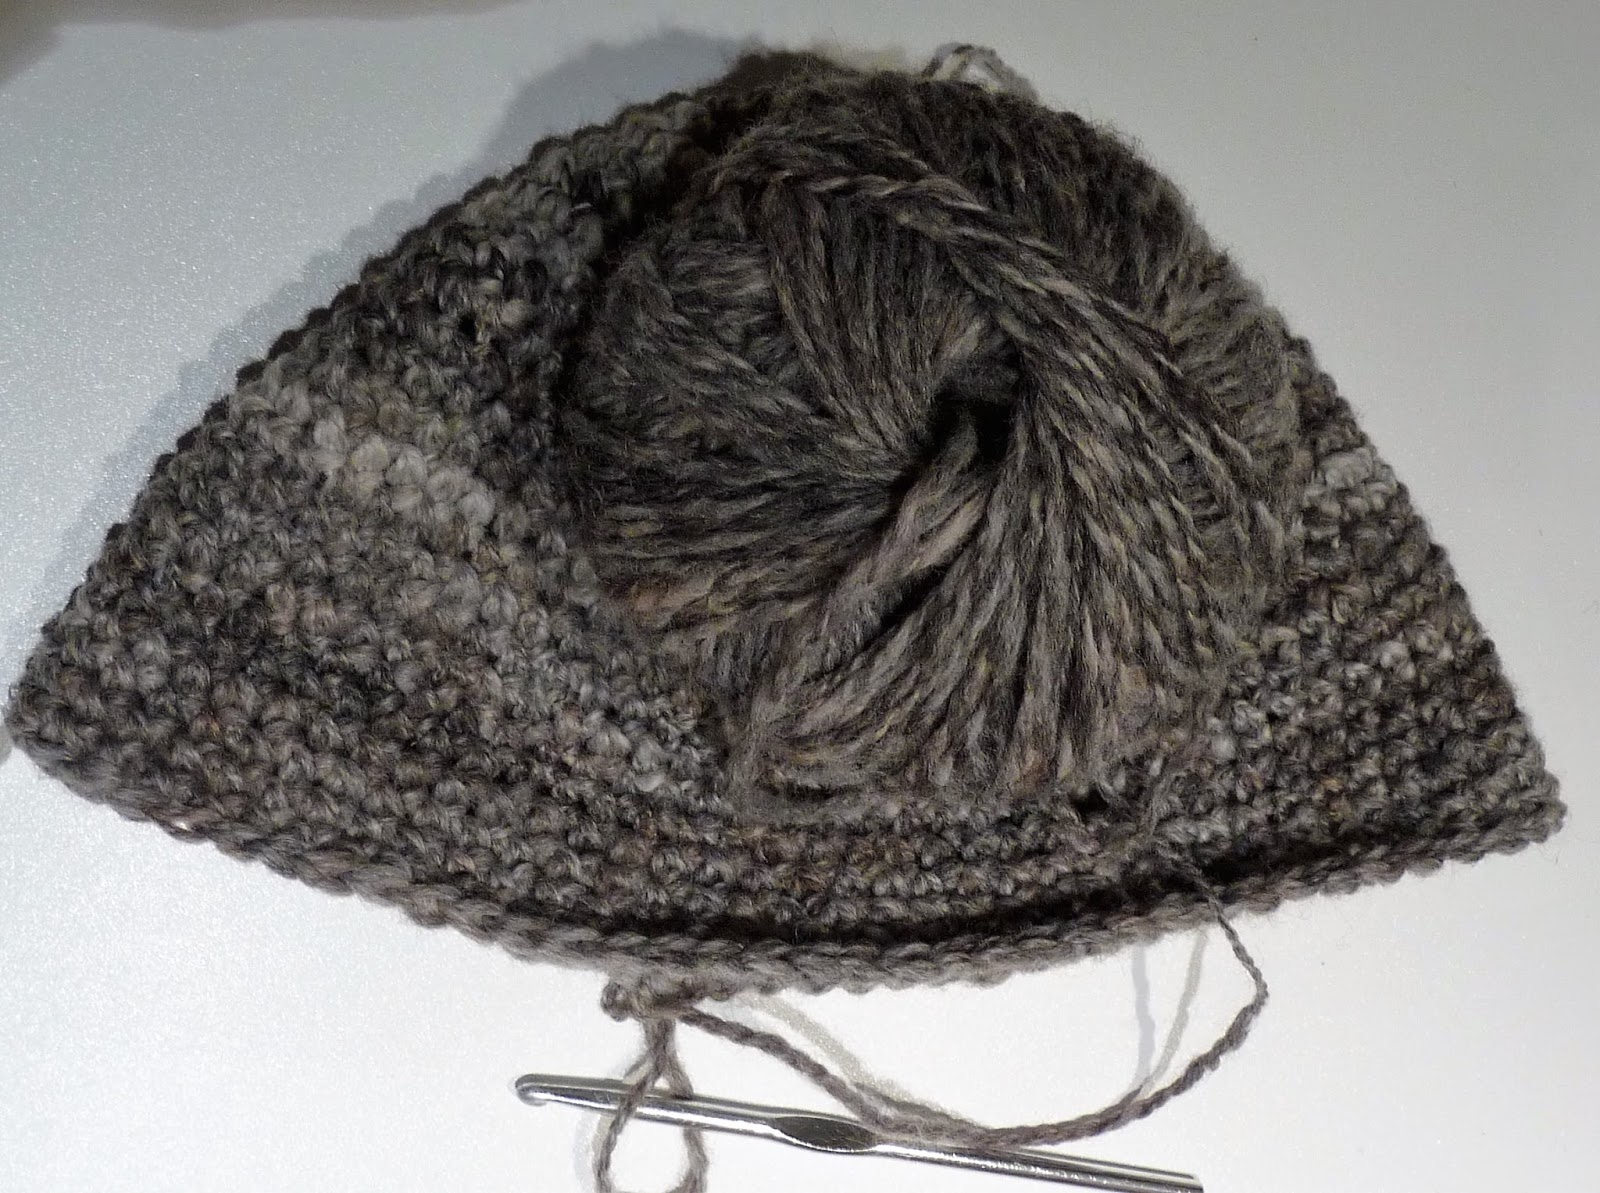
Actually. those lovely edging patterns in the Crochet Borders book had already got my mind whirring. As well as crocheted and knitted items, Edie Eckman explains how to put a base round for any crochet border into woven fabric. One option is to use a fine crochet hook to poke through the weave near the edge, fetching up a loop of yarn, completing each crochet stitch with a larger hook. I tried it on a tubular section of brown onion dyed silk jersey, using a 0.5mm hook to pierce the hem, then a 2mm hook to crochet one of her borders in laceweight merino, which had also been dyed with brown onion skin. Bit of a nightmare, painfully slow process and I had to borrow himself's reading glasses to manage the fine yarn.


To go round the opposite edge of my cowl, I tried Edie's other method, sewing a mattress stitch hem, then crocheting the base round into the top line of that. Still time consuming with tiny stitches and it meant one side looked different, but no-one will notice and happily, the mattress stitch did also prove elastic enough to allow the silk jersey to stretch.


With two borders completed on the brown onion cowl, I moved on to hemming another, dyed with red onion skins. The book has a section showing the elements of crochet borders, encouraging the reader to try building up their own designs. I did have a few false starts and rather a disaster on the second edge. Bloody dog chewed up my last little ball of laceweight, intended for the final round of the second border.


Nonetheless, I consider both my silk cowls very much enhanced by their crochet borders. This is a really practical book in every respect - solidly constructed, well organised, straightforward to use and it teaches a jolly useful skill.


Thinking of these things, I had stopped paying attention to Elinor bleating on at me down the phone. Eventually I cut in.
'Actually, I have used some of Edie's other border designs and I am going to post another blog about her book.'
'Oh, bore me, why don't you? Two tedious blogs about stuff you made. People might be more interested in buying their own copy if they could try out a border themselves.'
'Well, Storey Publishing did say reviewers can post one of the patterns in full.'
Here is border number 32. Click on the photo and you can read it in full screen size. 

'Why on earth didn't you do that last week? Of course, what you need to drum up trade for the book is a giveaway, a little competition, something fun. Since it's not safe to leave you to manage that by yourself, I shall have to come home on a rescue mission.'
'If you'd let me get a word in edgeways, I'd have told you. I'm not at home, I'm in America.' Silence followed. I enjoyed the moment, before continuing with my next revelation. 'I knew you'd be amazed. You'll never believe - I'm attending classes at the Madrona Fibre Retreat.'
'No .... what a nightmare!'
'How can you say that? It's my best Christmas present ever, from himself.'
'I'm thinking of my phone bill!'
The line went dead.

Anagram Competition

Rearrange these letters: 
A STITCH IN EDGEWAYS
 to make another sentence.

Doesn't matter if you have a few letters left over, the winner will be the sentence that makes me and Elinor laugh most.
To enter, email your sentence to me at tribulation2013@gmail.com before 31 March 2017
Storey Publishing will send a free copy of 'Every Which Way Crochet Borders' to the lucky winner, as long as they have an address in the UK, Europe, Canada or the USA.

Friday, 23 December 2016

Hyperbolic Crochet and the Pseudosphere


Warning - the author takes no responsibility for any sleep deprivation that may occur as a consequence of trying this at home.


I have a friend on Ravelry to thank for my hyperbolic journey into exponentially expanding surfaces. She posted a link to Gary Hayton's knitted felted Fibonacci Pseudospheres, which just beg you to imagine, wow, however did he make those? The title sent me off to rediscover the Fibonacci numbers and spend time pondering how they might be incorporated into a circular knitting pattern. 
Just as I was developing terminal brain ache, the same good friend explained that all you have to do to create a hyperbolic shape is to make increases at a constant rate. Starting with a magic loop of six double crochet stitches (single crochet in America), I began crocheting two stitches of heavy, inelastic tapestry wool yarn into every stitch, spiralling endlessly outwards.
The initially flat surface develops frills that wrinkle up together in three dimensions, mine formed a pseudosphere after about eight rounds. Watch this video and you'll see what I mean. Because I made two stitches into every one, the stitch count doubled with each round 6 - 12 - 24 - 48 - 96 - 192 - 384 - 768 - 1,526 - 3,072, so deciding to do the final round with crocheted picot edging in a colour change yarn took rather more time and yarn than I had bargained for. Running low toward the end, I finished the last stretch with a plain crochet edge.
Himself was pleased to refer to my new pet as 'The Golden Brain'. A bit more googling about led me through whole coral reefs created with crochet to the brilliant mathematician who made the leap from abstract hyperbolic geometry into tangible yarn constructions. In this lecture, she tells her story so simply, even I felt I understood negative curvature - until I tried to explain it to himself.

Much as I love my pet brain, I had no answer when asked what it was for. Daina made hers to teach students, the crocheted undersea world was intended to raise awareness of coral death due to pollution. Trying to dream up some function to justify my urge to go hyperbolic again, I crocheted a basic hat shape in coloured Romney handspun wool yarn.
Working two stitches into every one for a few rounds in a darker shade of the same wool created a frilly brim. All might have been well had I left it at that, only I carried on, using a wild skein of coreless corespun 'art yarn', only finishing at 2am, when I had used up the last of the wool.
Daina Taimina says in her lecture that Wolfgang Bolyai warned his son of the perils of pursuing non - Euclidean hyperbolic mathematics. 
The same might be said of hyperbolic crochet.
'For God's sake, please give it up. Fear it no less than the sensual passion, because it, too, may take up all your time and deprive you of your health, peace of mind and happiness in life.' 
Come on in, the water's lovely.

Friday, 15 January 2016

The Macduff Bag Crochet Pattern

I first made this bag using yarn spun by a friend of a friend, from the fleece of her sheep up in Swansea. Doesn't look much, but the qualities of handspun wool and the colours it turned during my early plant dye experiments strongly appealed to me.  Though most of the colour has long ago faded and the handles have stretched, it is still in everyday use. To my mind, that bag launched my present life and it has certainly survived a thousand trips.  Making another from recycled balls of heavy superbulky yarn from the Huxtable jumper was a way of keeping my own first handspun wool in use and hopefully, creating a better advert for my new status as sole trader of Rich & Strange Silk and Wool Work. 

Crocheted up by eye, more by luck than judgement, this shape of bag in durable wool has turned out highly functional. With the handles over one shoulder, it tucks comfortably under the elbow, as shown in this photo of one I made for my friend BG. When in a crowd, I bring mine forward, so the purse and phone pockets sit securely against the side of my waist. Packed with shopping, it is remarkably capacious and sturdy enough to carry pints of milk and bags of potatoes.  Once full, I  just hold the two handles in my hand and let the weight of the bag hang down.  The one below, which I made for my sister, in Herdwick wool, shows the basic bowl shape.  Having just made two more, this time, I have written out the pattern.

Macduff Bag Crochet Pattern


Materials
~300m heavyweight, durable superbulky yarn (5-6 wpi)
15m strong aran yarn
6mm and 3mm crochet hooks
This simple pattern is easy to adapt to any thickness of yarn and hook size, just make sure it is a good strong, dense yarn, as smooshy merino puff won't last long in service.
My tension came out at 10 dc stitches and 11 rows to 10cm squared.
Bag size ~ 94cm diameter, 18cm deep
ch = chain stitch
dc = UK double crochet/US single crochet
Method
Start with a magic ring, 8 dc into ring and slip stitch into first chain to close the circle. (8)
Every round hereafter should begin with a chain stitch, into which you place a crochet stitch marker (such as a safety pin).  Close each round with a slip stitch into this marked stitch, which also counts as the first dc of each round.

To make a saucer shaped base, dc into every stitch, putting two dc into some of the stitches in the following frequency:
1.  2dc into every second stitch (12)
2.  2dc into every second stitch (18)
3.  2dc into every third stitch (24) 
4.  2dc into every fourth stitch (30)
5.  2dc into every fourth stitch, which leaves 2 stitches at the end for one dc each (36)
6.  2dc into every fifth stitch, which leaves 1 stitch at the end for one dc (43) 
7.  2dc into every sixth stitch, which leaves 1 stitch at the end for one dc (50)
8.  2dc into every seventh stitch, which leaves 1 stitch at the end for one dc (57)
9.  2dc into every eighth stitch, which leaves 1 stitch at the end for one dc (64)
10. 2dc into every tenth stitch, which leaves 4 stitches at the end for one dc (70)
11. 2dc into every eleventh stitch, which leaves 4 stitches at the end for one dc (76)

The outer edge of the circle should be beginning to curl upward at this point.  If you are using a thinner yarn or want a bigger bag, just carry on adding 6 or seven stitches to each round until you get the base size you want, before steepening the upward curve by adding fewer stitches to the next few rounds. For this bag, add three stitches to the next six rounds as follows:

12. 2dc into every twenty fifth stitch, which leaves 1 stitch at the end for one dc (79)
13. 2dc into every twenty sixth stitch, which leaves 1 stitch at the end for one dc (82)
14. 2dc into every twenty seventh stitch, which leaves 1 stitch at the end for one dc (85)
15. 2dc into every twenty eighth stitchwhich leaves 1 stitch at the end for one dc (88)
16. 2dc into every twenty ninth stitch, which leaves 1 stitch at the end for one dc (91)
17 2dc into every thirtieth stitch, which leaves 1 stitch at the end for one dc (94)

For the next eight rounds, there is no further increase as the sides of the bag go straight up.  Add more rounds for a deeper bag.  To draw the top edge of the bag gently inward, on the next round, decrease three stitches, evenly spaced around the circumference like round 17 in reverse, then crochet a plain round, reduce three more stitches like round 16 in reverse, then crochet a plain round, reduce three more stitches like round 15 in reverse and finish with two plain rounds.  Break off yarn leaving a metre long end to sew the edge.  You can use the front or the backs of the stitches showing at the outside of the bag, as you prefer.  If using the neater front as the outside, roll the top round of stitches outward and sew them against the round below to create a rounded edge.

The bag handles are formed from one length of crocheted cord.  There are lots of options for making a cord, I think this spiral is the simplest.
Make a starting loop and chain 5 stitches, slip stitch into the first stitch to join.  Make one dc into each of the five chain stitches and carry on puting a dc into the outer thread of each dc stitch, round and round, endlessly spiralling upwards.  
For this bag, 170cm cord made my preferred size, pin your cord onto your bag and judge your handle length for yourself.


Place one end of the cord at the centre of the base.  Using the aran yarn and the 3mm crochet hook, push the hook through any loop on the cord, then through the front of a stitch on the bag and draw up a loop of aran yarn to the surface, keeping the other end of this yarn held hidden underneath the handle.  This will leave a chain of aran loops visible along each side of the cord, it's a fiddle at first, keep the loops large, it goes quicker once you have the hang of it.  Work along one side of the cord to the  top edge of the bag, across the width of the cord and down the other side, back to the centre of the base of bag.  Now place the other end of the handle at the centre point and crochet that against the opposite half to make one straight line.  Hold the bag up by this long single loop and find the middle.  With the bag upside down, pin the midpoint of the handle to the centre of the base of the bag, so that there is a handle loop on either side.  Crochet on the cord to make a cross shape at right angles.

Now double crochet oblong shapes to make pockets the size of your purse and your phone and sew them inside the bag, between the handles on opposite sides.  

Putting the bag through a 40 degree cotton wash cycle in the machine will felt it a little and even it out a lot.  The two bags in the photo show how the crocheted wool looks before and after the wash.  While it is damp, stuff the bag firmly with rolled towels to establish a nice round shape while it dries.
I have called my new bag Macduff, since its mid brown yarn was untimely ripp'd from a barely worn Jacob X Texel jumper with the dark brown yarn also ripp'd from another misguided project, a Black Welsh Mountain woolen hat that itched.  My Macduff came with me to the bank to discuss setting up a business account and its partner is now up for sale at Crafts by the Sea

Friday, 14 March 2014

Apple Bark Dyed Wool and Green Ginger Shopping Bag Crochet Pattern


A green fuse is running through the garden. Buds are exploding on the almond tree. Inspecting my new apple maiden whips, not much is happening yet. The wind was the force that tore down the fence, blasting the old apple tree roots.  
Safe behind the new garden wall, the young apples should sprout laterals, given time.  Apple bark can be peeled off cut timber, soaked in a bucket of cold water for a week, then simmered for a couple of hours to make a dye bath.  The wool does not need to be mordanted beforehand, because the tannins in the bark itself will make the dye bind.  I can take a pretty photo next to the daffodil shoots, but the resulting colour is undeniably beige.  Which is probably why a large quantity of durable, chunky Welsh Crossbreed wool yarn has been sitting in a basket for a very long time.
The balls are not so utterly dull.  I dyed yarn in two batches, kept one third of each the simple bark beige, gave another third half an hour simmer in an iron afterbath and the final third got half an hour in a copper afterbath. The iron takes the colour toward green, though my camera seems to miss picking out some of the green spectrum.  The copper brings up the ginger.  I already know these colours are stable, minimal fading since the day they came out of the bath.

What youth I have left is bent by the wintry fever, aching for spring.  A clear out to make space for fresh projects is the order of the season.  This yarn is hard wearing, but inelastic, heavy and harsh to handle, particularly after iron or copper afterbaths. Stiff as my sinews.  Got to transform it into something with a bit of give.

Here is the crochet pattern for a shopping bag I have called Green Ginger.  


Green Ginger Shopping Bag Crochet Pattern


Materials

Durable chunky yarn (8wpi) in three colours
Green 270m, Ginger 200m, Beige 200m 
670m total (this yarn weighed 1g/m so 670g)
7mm, 5mm and 3mm crochet hooks
Darning needle to weave in ends.

Tension and Final Size

In Three Colour Tweed Pattern, 13 stitches and 14 rows measure 10cm square
Final bag is approximately 33cm high, 28cm wide and 12cm deep when empty.

Front and Back Panels with 7mm hook

First starting row - in colour A, chain 42, turn
Second starting row - 1 dc into second chain from hook (1 chain, dc into second chain along first starting row) - repeat this to the end of the starting chain row.

From here on, use each colour yarn for a new row in turn, carrying the yarn of each colour up the sides of the work when it is needed again.

Row 1 Chain 1, 1 dc into first dc (1 dc round next chain space, 1 chain) repeat to last 2 stitches, 1 dc into final chain space, 1 dc into final dc, turn 
Row 2 Chain 1, 1 dc into first dc (1 chain, 1 dc round next chain space) repeat to last stitch and dc into last dc, turn

Work 28 rows.  On row 29, make gap for pocket by working first 7 stitches as Row 1, then chain 27, then complete last 7 stitches of Row 1.  On row 30, continue pattern across loose chain.

Work another 20 rows and fasten off yarn, weaving in the cut ends of all three colours.


To make the pocket lining, turn work upside down with the wrong side facing you.  Keeping the same colour sequence as the rest of the piece, working from the 27 chain stitch loose edge, crochet rows in the same pattern as above, until the pocket is as deep as you want.  Crochet or sew the lining to the wrong side of the work.  In the photo, my pocket lining changes colour, as I used up scraps of the same yarn from another dye bath.

Sides and Base with 7mm Hook


Take the beige yarn and make one dc through the top stitch of the left edge of one panel and make one dc round each open space, which occurs on every other row.  This will pull the edge in a little as the new row comes up shorter than the edge.  When you reach the last stitch on this side, dc into it, turn the work 90 degrees and dc into the same place.  Carry on along the bottom edge, working 1dc around each chain space, turn and come up the right side in the same way.  Flip the whole piece over and work back to the beginning of this row at the left top, making one dc into each dc.  As you work, let these new dc rows stand up at right angles to the back of the front panel. Change to the ginger yarn and make two more dc rows.  Carry the beige across the top edge of the side and make two more dc rows.  Carry the ginger yarn across and make one dc row.  Fasten off and weave in the ends.


Do the same to the other panel, but this time, do not cut the ginger yarn.  Holding the two side edges together, push the crochet hook through the middle of the first stitch on the other panel, then through the first stitch on the panel where the ginger yarn is attached and draw through a loop.  Push the hook through the next pair of matching stitches and draw up a loop of ginger yarn from the back.  Join each matching stitch in this way, so the two pieces are joined to make a bag.  

Continuing with the ginger yarn, make one dc into each chain space all around the top of the bag.  Being shorter than the tweed pattern, this row will draw the top edge in somewhat.

Handles made with 5mm hook and attached with 3mm hook.

To make a thick, dense cord that will not stretch too much, use a 5mm hook, make a loop and chain 5 stitches, joining the last to the starting loop with a slip stitch.  Chain 1. Work one dc into each of the five chain stitches then carry on working from the inside of the spiral, making one dc into the dc below.  Carry on til the cord measures 130cm and fasten off.  Make another one the same.

To attach each handle, hold one end of a cord against the middle of the bottom edge of one panel, at the line where it is joined to the base stitches.  Draw a loop of ginger yarn up from inside the bag by pushing a smaller, 3mm crochet hook through an outer thread of the cord and through a chain space on the body of the bag. Push the hook through another outer thread of the cord, through the next space 
along on the bag and draw the ginger yarn up from inside. Fasten off at the opening of the bag. Bring the other end of the cord round in a circle, to touch the fixed end. Work back in the opposite direction.  Sew the two ends together to complete the circle and neaten the join at the base. 


I took it shopping today.  I am satisfied that this yarn is robust and the crochet fabric is stretchy enough to make it capacious.  The pockets make it easy to retrieve purse and keys, no fishing around down the bottom.  They are also big enough to hold things I don't want squashed.
The sides of the bag draw in when it is empty, making it neat to have over my shoulder, but will concertina out as I hoped.  

The force that through the green fuse drives the flower, hooks my Green Ginger.


Friday, 15 November 2013

Butterfly Wedding Cowl/Infinity Scarf Crochet Pattern

Three small, but exquisitely coloured skeins of Japanese Indigo plant dyed wool have been burning a hole in my mind's eye.  I imagine the colours as representing Madama Butterfly. 
In Act One of the opera, she is a fifteen year old geisha.  Pinkerton is charmed by her, enchanted, but sees their marriage only as part of getting an exotic bit on the side. She is in love.


How to make something frothy and romantic with my little bits of jade and turquoise wool?  As it happened, I had some left overs of the same weight spinning wool, dyed pale shades of plum. Pink for Pinkerton and very cherry blossom for my jade diva. Just the combination to make what I think will be the first piece of a Madama Butterfly series - assuming I can propagate this year's Japanese Indigo seeds.

Lovers' Knots are a new crochet stitch for me, but hearing the name alone on a Ravelry post set me thinking of using them for the Act One project.  This video of the stitch is really helpful.  My pattern is the simplest possible use of Lovers' Knots, no turning corners with shorter loops or slip stitching up rows.  Even so, I drove myself mad trying to to avoid twisting the loops or accidentally joining in to the wrong knot and having to frog back.  The third row was a nightmare, as my beads only just slid along the yarn and got stuck on lumps in my handspun.  After that, I had the knack, finished the fourth and fifth stripes barely paying attention.  BG and I were more engaged in groaning over Wales getting thumped by South Africa in the first of the Autumn Rugby Internationals.
The edging firms up the fabric, just as rigging does a sail, and as I think a naval officer like Pinkerton would wish.  I tried making butterfly wing shapes in reference to those who begged him not to pull the wings off his Butterfly, but they looked fussy.  Too bloody clever by half, as my father would have put it.  In the end, I did a really simple repeat pattern along each pair of Lovers' Knots.


Butterfly Wedding Cowl


Materials

4 ply/fingering weight yarn about 14 wpi
  • 20m (9g) for each stripe of the body of the pattern = 100m (45g)
  • 50m (20g) for the edging
3.5mm crochet hook
40 beads
darning needle

Size/Gauge

After washing and blocking out
18cm wide x 132cm loop
10cm2 = 6 Lovers' Knots


Method

Make a starting loop in the 20m of yarn you want to use for the first stripe. 

Crochet a chain of 80 Lovers' Knots, then crochet two more, finishing the second stitch through the middle of the fourth knot back along the chain.  Keep the single thread of the three forming each loop nearer to the middle of the work and the paired threads lower.  Continue working back along the chain, finishing alternate stitches through every second knot of the original chain.  When you get to the end, fasten off, leaving a good tail for sewing up.  

Take  the next 20m of yarn, make a starting loop and finish the first knot through the penultimate (upper) knot on your first stripe. Make one Lovers' Knot then finish the next through the next free, upper knot on the first stripe. Continue in this way til you reach the end and return along the row you have made, just as for the first stripe.  


Thread forty beads onto the third 20m length of yarn.  Make the third stripe in the same way as the second, leaving a bead in the knot of each central Lovers' Knot.  Make the fourth and fifth stripes like the second.


Match the ends of the stripes together and thread the tails of wool onto a darning needle to sew each starting point into the knot at its opposite end. Hide the ends by fastening off into the knot.


Take the 50 m of wool for the edging and pull a loop through any of the outermost knots.  Make a double crochet stitch.  *Make two double crochet over the double strand of the next loop of a Lovers' Knot, chain one and make two double crochet over the double strand of the next loop of a Lovers' Knot.  Double crochet into the outermost knot.* repeat from * until you complete the circuit of the cowl.


Turn.  Double crochet into the top of the stitch above an outer Lovers' Knot. *Chain three,  double treble crochet around the next chain stitch in the first row.  Chain three and double crochet into the top of the stitch above the following Lovers' Knot.* repeat from * until you complete the circuit.  


Do the same on the other edge of the cowl.  Wash and block out to dry.


It may not offer seasonal warmth, but since I was aiming for bridal party wear, I have nothing to complain about. Now, which of my three nieces might enjoy a Butterfly Wedding?