Friday, 24 February 2017

Dyeing Wool with Alder Bark, Cones and Twigs

Alder trees are pioneers, among the first to colonise poor soil in wet areas. This lot are less than fifteen years old, I've watched them spring up along what was a bare flood gully down from the sand dunes to the river. In between spells of heavy rain, the ditch is dry and cluttered with debris of alder twigs and cones. It took no time at all to gather up a carrier bag full and while the dog was fossicking about after a rabbit, I peeled the bark from a fallen branch. I think I had about 500g material to soak in a bucket of water for a week, only I have been away and forgotten exactly. Alder is easy to identify because the dried out female cones stay on the tree all year.
In February, the purple male catkins are formed, though no leaves yet. After fermenting for a week, the water in the bucket of alder became acidic, pH 5. Transferred to a pot and simmered for an hour, left overnight then sieved through a colander, the dye bath looked a rich red-brown. Adding iron turned the fluid black, copper made it dark brown.


I dyed 250g chunky Cheviot wool and 25g merino yarn by simmering them for an hour in the straightforward alder dye pot and leaving them to soak overnight. Here they are, while still damp. I expected the merino would take up much deeper colour and was just grateful the Cheviot went a decent fawn, as I wanted to use it for knitting a bag. Two of the 50g skeins of dyed Cheviot were modified by a short simmer, one in half the original dye bath with a slug of iron water added, the other in the remaining half with copper solution. This picture shows, from the left, the unmodified alder dye on merino and then Cheviot, iron modified Cheviot, then copper modified Cheviot wool.


Deciding the copper gave the best colour, I modified the big 100g skein of dyed Cheviot too, then dyed two fresh 50g skeins in the two afterbaths, getting pale colours which I hoped would make a good contrast for helix stripe knitting. Once the bag was finished, I felted it by washing at 95 degrees Centigrade in the washing machine. Because washing powder is alkaline, the alder dye colours shifted.


Though the colours came out of the wash stronger, alkali modification reduced the contrast between the helix bands. Overall, I am pleased to have greater depth of colour and well chuffed with the bag, which has proved sturdy and functional during a fortnight's constant use while travelling. The Cheviot has bloomed and pilled a bit since this photo was taken and among the wool yarns I have tried, it certainly doesn't take up dye brilliantly. Nonetheless, I'll be happy enough to use up my last 400g Cheviot to make another bag. Can't resist finishing with a holiday snap from Tacoma. I had the best time, great people in such a hip cool gritty city. Listen to this - Stephanie Anne Johnson, she is even better live.


Friday, 17 February 2017

Every Which Way Crochet Borders - Book Review 2

My companion, Elinor Gotland, telephoned me to express her disgust at last week's blog, a review of Edie Eckman's new book 'Every Which Way Crochet Borders'.
'Well, Beaut, that poor woman designed and charted 139 customised edgings. And what did you do? Stick one frill on a lampshade. Creating a lamp no-one in their right mind would switch on, for fear of burning the house down."
'That lampshade is perfectly safe. Wool is naturally fire retardant.'
A small snort breezed through my mobile phone.
'So, you've put that death trap back on the bedside table have you? Best of luck, Beaut. I can see the headlines now. "Blogger electrocuted by crocheted wire."
Fair play, that would be a sensational marketing strategy.'
'Don't be daft, Elinor. The power supply to the bulb is totally separate to the wire in the lampshade.'
'Then you've no chance of generating any decent publicity. Mark my words, up your game, or Storey Publishing won't be sending you any more free books.'

Actually. those lovely edging patterns in the Crochet Borders book had already got my mind whirring. As well as crocheted and knitted items, Edie Eckman explains how to put a base round for any crochet border into woven fabric. One option is to use a fine crochet hook to poke through the weave near the edge, fetching up a loop of yarn, completing each crochet stitch with a larger hook. I tried it on a tubular section of brown onion dyed silk jersey, using a 0.5mm hook to pierce the hem, then a 2mm hook to crochet one of her borders in laceweight merino, which had also been dyed with brown onion skin. Bit of a nightmare, painfully slow process and I had to borrow himself's reading glasses to manage the fine yarn.


To go round the opposite edge of my cowl, I tried Edie's other method, sewing a mattress stitch hem, then crocheting the base round into the top line of that. Still time consuming with tiny stitches and it meant one side looked different, but no-one will notice and happily, the mattress stitch did also prove elastic enough to allow the silk jersey to stretch.


With two borders completed on the brown onion cowl, I moved on to hemming another, dyed with red onion skins. The book has a section showing the elements of crochet borders, encouraging the reader to try building up their own designs. I did have a few false starts and rather a disaster on the second edge. Bloody dog chewed up my last little ball of laceweight, intended for the final round of the second border.


Nonetheless, I consider both my silk cowls very much enhanced by their crochet borders. This is a really practical book in every respect - solidly constructed, well organised, straightforward to use and it teaches a jolly useful skill.


Thinking of these things, I had stopped paying attention to Elinor bleating on at me down the phone. Eventually I cut in.
'Actually, I have used some of Edie's other border designs and I am going to post another blog about her book.'
'Oh, bore me, why don't you? Two tedious blogs about stuff you made. People might be more interested in buying their own copy if they could try out a border themselves.'
'Well, Storey Publishing did say reviewers can post one of the patterns in full.'
Here is border number 32. Click on the photo and you can read it in full screen size. 

'Why on earth didn't you do that last week? Of course, what you need to drum up trade for the book is a giveaway, a little competition, something fun. Since it's not safe to leave you to manage that by yourself, I shall have to come home on a rescue mission.'
'If you'd let me get a word in edgeways, I'd have told you. I'm not at home, I'm in America.' Silence followed. I enjoyed the moment, before continuing with my next revelation. 'I knew you'd be amazed. You'll never believe - I'm attending classes at the Madrona Fibre Retreat.'
'No .... what a nightmare!'
'How can you say that? It's my best Christmas present ever, from himself.'
'I'm thinking of my phone bill!'
The line went dead.

Anagram Competition

Rearrange these letters: 
A STITCH IN EDGEWAYS
 to make another sentence.

Doesn't matter if you have a few letters left over, the winner will be the sentence that makes me and Elinor laugh most.
To enter, email your sentence to me at tribulation2013@gmail.com before 31 March 2017
Storey Publishing will send a free copy of 'Every Which Way Crochet Borders' to the lucky winner, as long as they have an address in the UK, Europe, Canada or the USA.

Friday, 10 February 2017

Every Which Way Crochet Borders - Book Review

While I like a bit of crochet, enjoy getting a free craft book and find reviews quite fun to work on, being a woman in specific need of a good bit of crochet edging, I was particularly keen when the offer came through from Storey Publishing to take part in a blog tour, promoting of Edie Eckman's new book, 'Every Which Way Crochet Borders: 139 Patterns for Customized Edgings'. 
It comes out this month (February 2017), priced at £13.99 for the hardback.

I am still not entirely certain how a blog tour works. Edie Eckmann herself will be blogging about the book here.

For my experience trying it out, read on below.


Before Christmas, when I got the pdf copy of the book, I was wrestling with hyperbolic crochet. Truly physical combat, attempting to crochet a pseudosphere from a reel of 0.5mm stainless steel wire.


While possible, it is bloody hard on the hands and once the whole 100m was crocheted, my wire looked more like a rat's nest than a thrilling exhibition of negative curvature. Having decided a long colour change yarn edging could be just the thing to highlight its structure, I dropped a heavy festive hint by emailing one of my brothers a link to Noro Silk Garden yarn. After Christmas, I settled down at the computer to read through 'Every Which Way Crochet Borders.'
The opening chapters are about choosing well, introducing concepts such as Form Follows Function - considering whether the main role of a given edging is to frame and stabilise an item or to enhance the look. For my crocheted wire, enhancement was the key, what was needed was a decorative continuation of the existing shape. 


Now in possession of two balls of variegated and textured Noro yarn, I did cringe inwardly on reading that a multicolour may confuse and muddy the design of an edging, a point well illustrated by nice big photo examples. Now I have a physical copy, I can tell you the book is solidly constructed with a spiral binding inside the cover. This means it looks smart while still staying open hands free. Whether flicking through pages or scrolling up and down a pdf copy, the thumbnail photos that form the directory of edgings at the back of the book are really helpful, as is a Table of Attributes. Using this table makes you analyse what you want from your crochet edging. I decided this project needed a reversible border of medium width, firm rather than lacey, so it would keep its shape and look good from all sides on my three dimensional piece, plus I fancied an undulating outer edge. An apparently overwhelming choice was quickly narrowed down to ten options within the table, from which I picked border number 125.


Edie advises a base round of double crochet - well she calls it single crochet, there is a table converting US to UK crochet terminology. The book includes all the nitty gritty of working out how many stitches to crochet along the sides, diagonal edges and round the corners of crocheted and knitted items - not for nothing is the book called 'Every Which Way'. My piece had one long outer edge, essentially a straight run, though frilled into apparent loops.
I found crocheting two wool stitches into every wire stitch looked about right and did indeed show off the hyperbolic curves. Making a decorative row on top was no problem in itself. Finding the wool peaks tended to curl up rather than act as a continuation of the structure, since washing and blocking wasn't an option, I crocheted the final round in 0.3mm stainless steel wire.
I hadn't chosen a complicated border and the written pattern and chart were both clear and simple to follow. The thinner wire was also considerably easier to work with than 0.5mm, still stiff enough to hold the wool in shape and I like to think finishing with wire rounded out the overall metallic effect.  


Just possibly, you are wondering whether this hyperbolic crochet creation has a purpose. It does. The glass shade on a bedside lamp had got broken and I thought its stem and leaf base suited an organic floral shaped replacement. My new lampshade throws organic shadows too.
Every Which Way Crochet Borders is a great resource book.  It offers not just 139 options, but the confidence to make informed choices among colours, yarns and edge designs. I feel inspired to look again at enhancing some plain items and try out some interesting new crochet stitches.

ISBN 9781612127408


Friday, 3 February 2017

Dyeing Wool with Silver Birch Bark

To dye with Silver Birch tree bark, I went looking for freshly fallen timber. I think Ladka is right, last week's bark dye probably did not colour wool as strongly as expected because the crab apple had died before I peeled its branches. Searching copse after copse of silver birches, it took me ages to find any wood that had definitely come down recently.


At last, a branch with a raw torn break from the tree, unsullied young bark, perfect to harvest for dye. Which I did, feeling in full sympathy with Robert Frost. 'One could do worse than be a swinger of birches.' Not that I wished to vandalise a living tree and as the poem points out, birch trunks are incredibly flexible, so I doubt I would be strong enough to snap one. Just that I, too, would like to get away from earth awhile And then come back to it and begin over. Anyway, although my tree climbing days are pretty much over, whatever else is going on, the dog still needs walking and there's always another plant dye to discover.


Once every scrap was peeled with a sharp knife, leaving only the heartwood, about 200g bark was carried home to soak in a bucket of cold water for a week. The fluid turned a pale brownish gold and its pH dropped to 5, even though the weather was freezing. When it had been simmered for an hour, left overnight and then sieved, the dye bath colour had deepened considerably.


Intending to dye yarn suitable for bags, during that week, I had been online shopping for some cheap, bulky, durable wool. Cheviot from World of Wool looked like a bargain. Once it arrived, I found the 'yarn' was a single with minimal twist, I'm sure I've seen pencil roving with more cohesive structure. Hey ho, it knits up ok. I divided a 200g skein into four parts, then soaked and simmered three of them for a hour in the birch bark dye pot. Seeing they were only pastel pink, I dropped a little piece of merino yarn in the cooling dyebath and left it overnight. The Cheviot darkened a bit, but the merino turned out much deeper pink, despite no simmering.
So, it doesn't seem that my Cheviot yarn was an ideal choice for dyeing, either. You can just see how much deeper dyed the bit of merino yarn, it's lying on top of the far left skein. Adding a teaspoon of alum to the dyebath, I simmered the fourth skein, hoping this might improve the uptake of colour. The wool came out just as pale, only more of a salmon pink.

No matter, the lighter colour might be a good foil for showing up the effect of modifiers. Pouring half the dye bath into another pot, I added a slug of iron solution to one half and copper to the other. One skein went back into each pot for half an hour's heating, before being rinsed and dried.


So, here are my silver birch bark dye results. From the left, the first skein was unmordanted and unmodified, the second had an iron afterbath, the third, copper and the last one was dyed with alum in the original dye afterbath. Pretty colours, but pale again, this time I think I'll blame the wool. I am tired of considerations and life is too much like a pathless wood. Wait for this, I bought a whole kilo of that Cheviot. Sigh

See this post for an improved method I developed in 2018

Friday, 27 January 2017

Dyeing Wool with Crab Apple Bark

The crab apple tree is susceptible to fungus and also, puppy attack. My uncle told me the bark tastes sweet, which may be why the dog ate it. I never noticed what she had been up to, until the poor crab apple barely blossomed last spring. Then I saw most of the bark low down on the trunk had been scratched and chewed away. When the tree finally died and was cut down in autumn, I peeled a pile of the wood and kept half a bucket full of bark soaking in water. I've had good dye colours from pruned branches in previous years.


That bucket has been sat in the garage for months. The Plant Dyes Calendar project for February is bark dye, so it seemed opportune for me to make an early start with Crab Apple. Hoping the mould on the surface wouldn't matter, I added more water and simmered the lot for an hour. Various sources all say bark dye comes out clearer if you don't boil it. 


Despite my care, the actual dye fluid looked cloudy. The bark must have fermented well, because the pH had dropped to 4. Though I can't remember the original weight of bark, I sieved out a fair amount and decided the dye looked strong enough to try dyeing 300g wool. One 100g skein was premordanted with 10% alum and the other two were left unmordanted, all were soaked overnight before simmering for one hour in the crab apple bark dye bath and leaving to cool overnight. The picture shows how they looked while still damp next morning, the alum mordanted skein more yellow and the unmordanted skeins beige.


Another three 100g skeins went into the afterbath for a one hour simmer. The alum mordanted one came out a paler goldy yellow, the unmordanted ones paler pinky beige, no real surprises there. My two alum mordanted skeins from the first and second batch had a good rinse and spin and were hung up to dry while I got on with the more exciting part - modifying the colour of the unmordanted ones with iron and copper. Half the remaining dye bath was poured into another pot. Adding a splosh of fluid from a rusty jam jar of iron had an instant darkening effect. 


Adding copper water to the other half of the dye bath seemed rather to reduce its depth of colour - this photo shows the original dye afterbath on the left, iron in the middle and copper on the right.


Bits of copper pipe have been sitting in this jar of water and vinegar for years. Although I top it up occasionally, the strong blue suggests there is plenty of copper in the solution. Well, anyway, time to see what would happen. Into both modified dye baths went one skein from the first dye batch and one skein from the second batch for 20 minutes heating.

After rinsing and drying, here are all six skeins. From the far right working backwards to the left - alum premordant from first and second batch, iron modified from first and second batch (slightly more green than the grey this camera shows), copper modified from first and second batch. The ginger colour shows the copper modifier was effective. I remember getting much more green from iron modification when I used this Crab Apple tree bark before, but then, I didn't ferment it half so long and probably pruned living wood in late winter, not dead wood in Autumn. 


Good to confirm that bark dyes are as I remembered - much more interesting to modify than their initial beige suggests. The results do harmonise comfortably, too. This bulky thick and thin yarn has been sitting in a bag waiting for a purpose for a long time. Though it is lovely and soft, the wool is too weighty to dye much of it with flower dyes at any one time, too liable to pill to make hardwearing clothes or cushions. I am knitting it up into a lap blanket and even working with this wool is keeping me warm these cold evenings.


Friday, 20 January 2017

Dyes from Red Onion Skins on Wool, Cotton and Silk

Though their own visible colour is a rather gorgeous purple, red onion skins are generally reported to give dull results when used for dyeing. None too thrilled by the dye results pictured out there on the internet, I've stuck to dyeing with the brown type of onion skins. However, having written an onion dye project for January in the Plant Dyes for All Seasons 2017 Calendar, I thought it was high time I checked the red skins out myself. With a mere 14g saved up in a paper bag, a small trial was all I planned. I made up a 10g skein of laceweight merino, cut a square of cotton from one of himself's old shirts, salvaged a little offcut of jersey silk and put them in a bowl of water to soak while I simmered the red skins for an hour in one of my casserole pots.  

The following day, I sieved out the skins. Though the dye bath looked an alluring deep red, I wasn't fooled. Dye baths that look red are sneaky buggers, I've never had red wool come out of anything but madder root dye, though I have had yellow, green and even blue from the wine red baths you get from simmering hollyhock flowers. My unmordanted samples were simmered for an hour and left in the dyebath overnight. Sure enough, no red to see next morning - here is what the results looked like.


The merino wool was an unremarkable brown, but the strip of jersey silk had taken on a rather lush shade of purple brown and how on earth did that cotton come out green, which is brighter in real life than my camera shows? I tried dyeing a number of small pieces of this cotton in the afterbath and they came out in a series of pale green to deeper green, depending on how long they had been simmered for. One more very successful rummage in a practically empty tray of red onions at the supermarket got me a massive 48g of red onion skins, enough for a proper dye project in my large dye pot. The thrill of this adventure dissipated as I pulled a lovely 50g of expensive silk jersey out of the simmering dye bath by degrees, revealing a gradient of plain brown, a colour much like the wool skeins. 


Later, a nice white cotton T shirt simmered in the afterbath just turned beige. I was sure it wasn't because of overheating the dyebath - my usual conclusion when I get an unexpectedly dull result. I had been scrupulous about monitoring the temperature for an exact hour of simmering. Where had that purple hue on the silk gone, why wasn't the T shirt green? Wondering if the green effect had something to do with the type of cotton, I guessed the previous cotton might have been mercerised.


Making a little test bath with a further 10g of red onion skins in a kitchen saucepan, I dyed small skeins of organic cotton yarn, mercerised cotton crochet thread, a strip of cotton T Shirt, a snippet of calico and another piece of the cotton shirt I had cut the original samples from. All of them came out red-brown, except the cotton shirt sample, which came out of the strong dyebath khaki green.

Well, this suggested the green did have something to do with that specific cotton shirt, but I don't know what. After my salutory experience with brown onions skins, which seem to dye best when boiled, I boiled up this red onion afterbath for a good long while with tiny skeins of laceweight merino wool yarn, bits of alum mordanted silk and short lengths of cotton yarn. Actually, I forgot I had left the gas on and damn nearly boiled the saucepan dry.


Boiling cleared the colour from the dye bath and put deep colour into the wool and pale colour into the silk, while the cotton came out with hardly any dye at all. Once again, not what I expected. I thought that silk took up dye best and would have been most strongly coloured and I can only suppose the wool sucked dye back out of the cotton.


Attempting to get some clarity through a standard set of experiments, I got my proper dye pans out to reheat these samples with alkali, which deepened the brown wool and turned the pinkish silk a shiny khaki, then iron and copper solutions, which darkened the colour, copper more so than iron. In the picture, the bottom skein is the unmodified original.

Scrubbing out my dye pots afterwards, I thought how stained they had got over the years. Then light dawned - that disappointing brown jersey silk colour had been simmered in a dye pot quite probably contaminated with residual iron from a previous dye session. Once I had collected another 80g red onion skins, I simmered them in a big cooking pot that has never been used for dyeing, as I am satisfied that onions are definitely food safe. 


Dyeing another piece of jersey silk, as I pulled out a little more from the simmering dye bath at frequent intervals, a gradient appeared that initially looked pink, deepening to red, with no sign of purple. As it cured over a few days, the colour on the silk shifted toward brown. Because it was a richer red shade than the first brown silk, shown on the right of this photo, I think that pot probably did have a bit of iron left in it. 


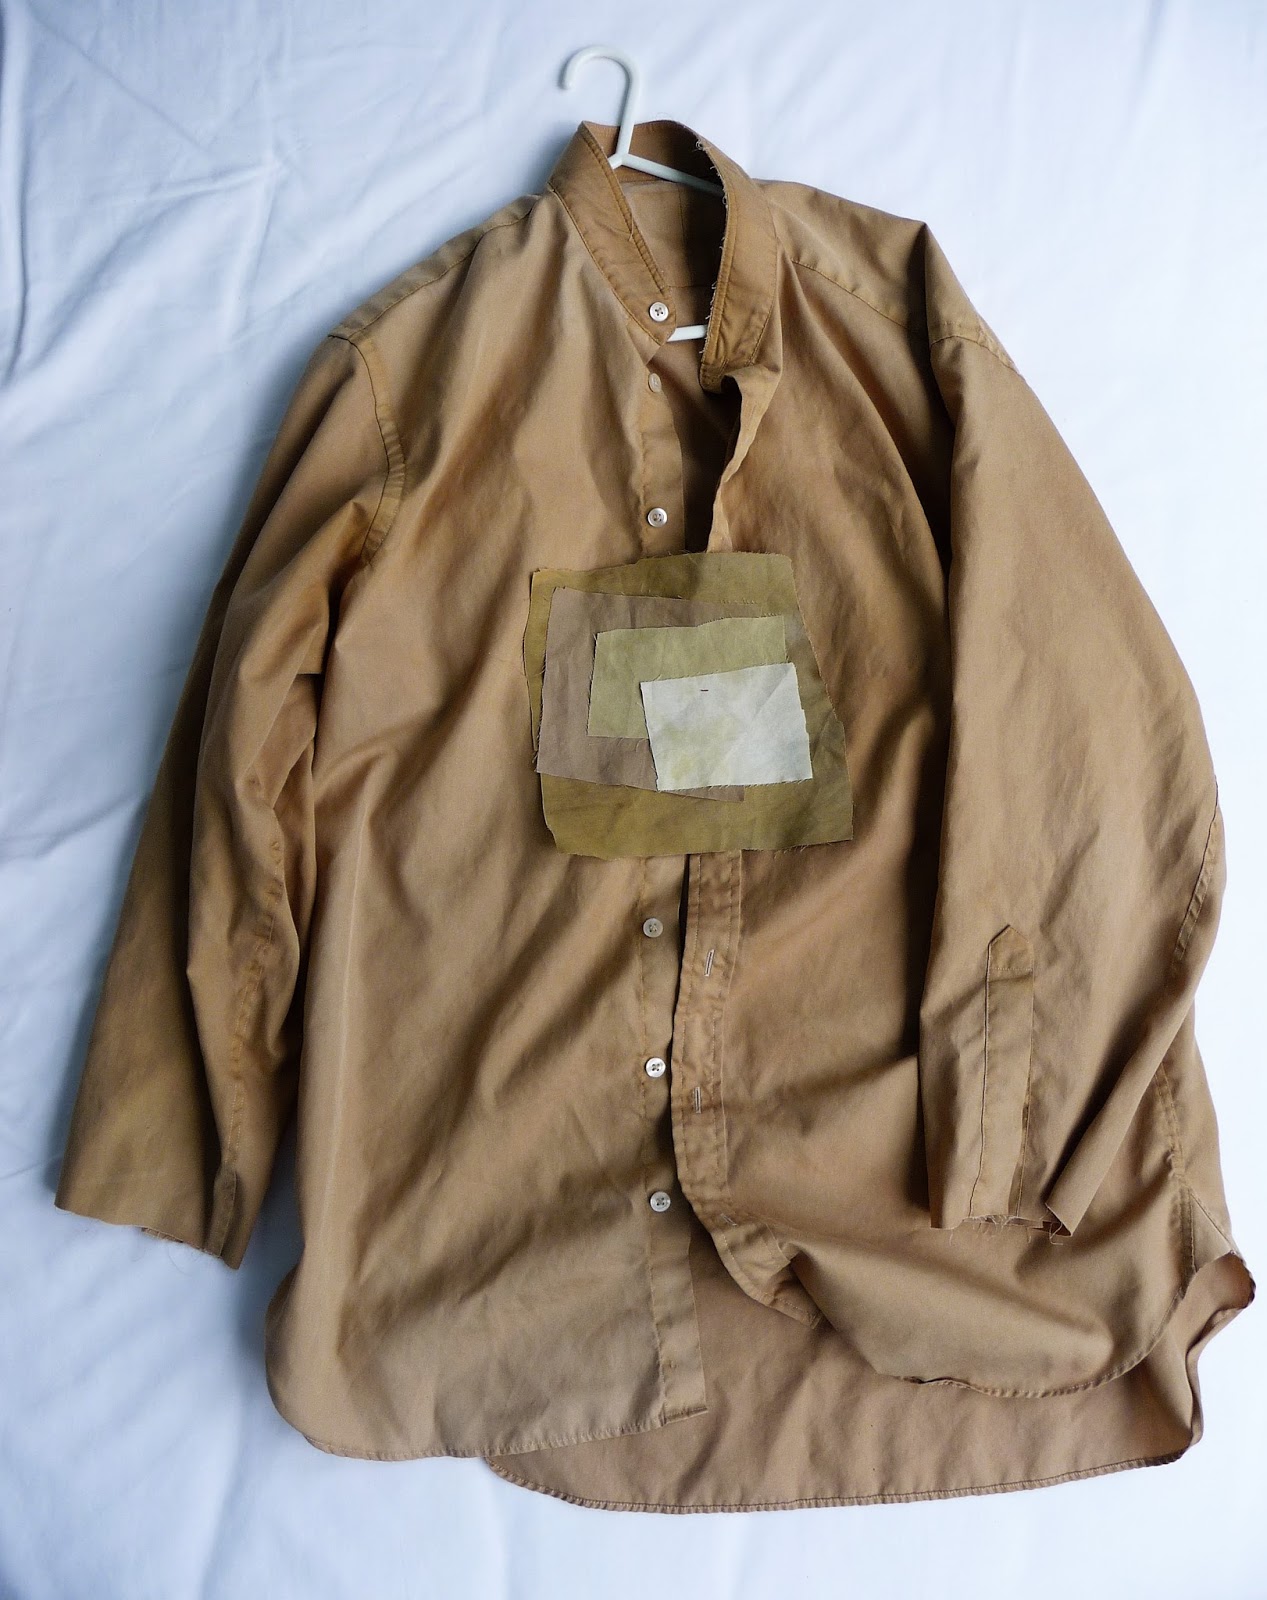
Dyeing a cotton shirt in the afterbath of the clean red onion skin pot, I got a khaki result, rather than the greens I had first time round.
Where did that purple and green go? Maybe the first small trial batch of onion skins came from a different kind of red onion. No way I can find out, the supermarket price tags always say simply 'Red Onions'. At any rate, onion skin dyeing has brightened a dark season. Here is a glamour shot, brown onion skin results on the left, red on the right. Change and decay, in all around I see. With no mordant, I wonder - how long will onion colours abide with me?