Friday, 29 November 2013

Making Lavender Heat Packs with Knitted Covers

First real frosts last weekend.  First time this autumn I have put a match to the woodburner in the kitchen.  Quite relish sitting by the fire, though I hate coming home from work in the dark, particularly as it is still nearly a month til the shortest day.  Which suddenly feels like no time at all when I remember I need to get Christmas presents sorted.

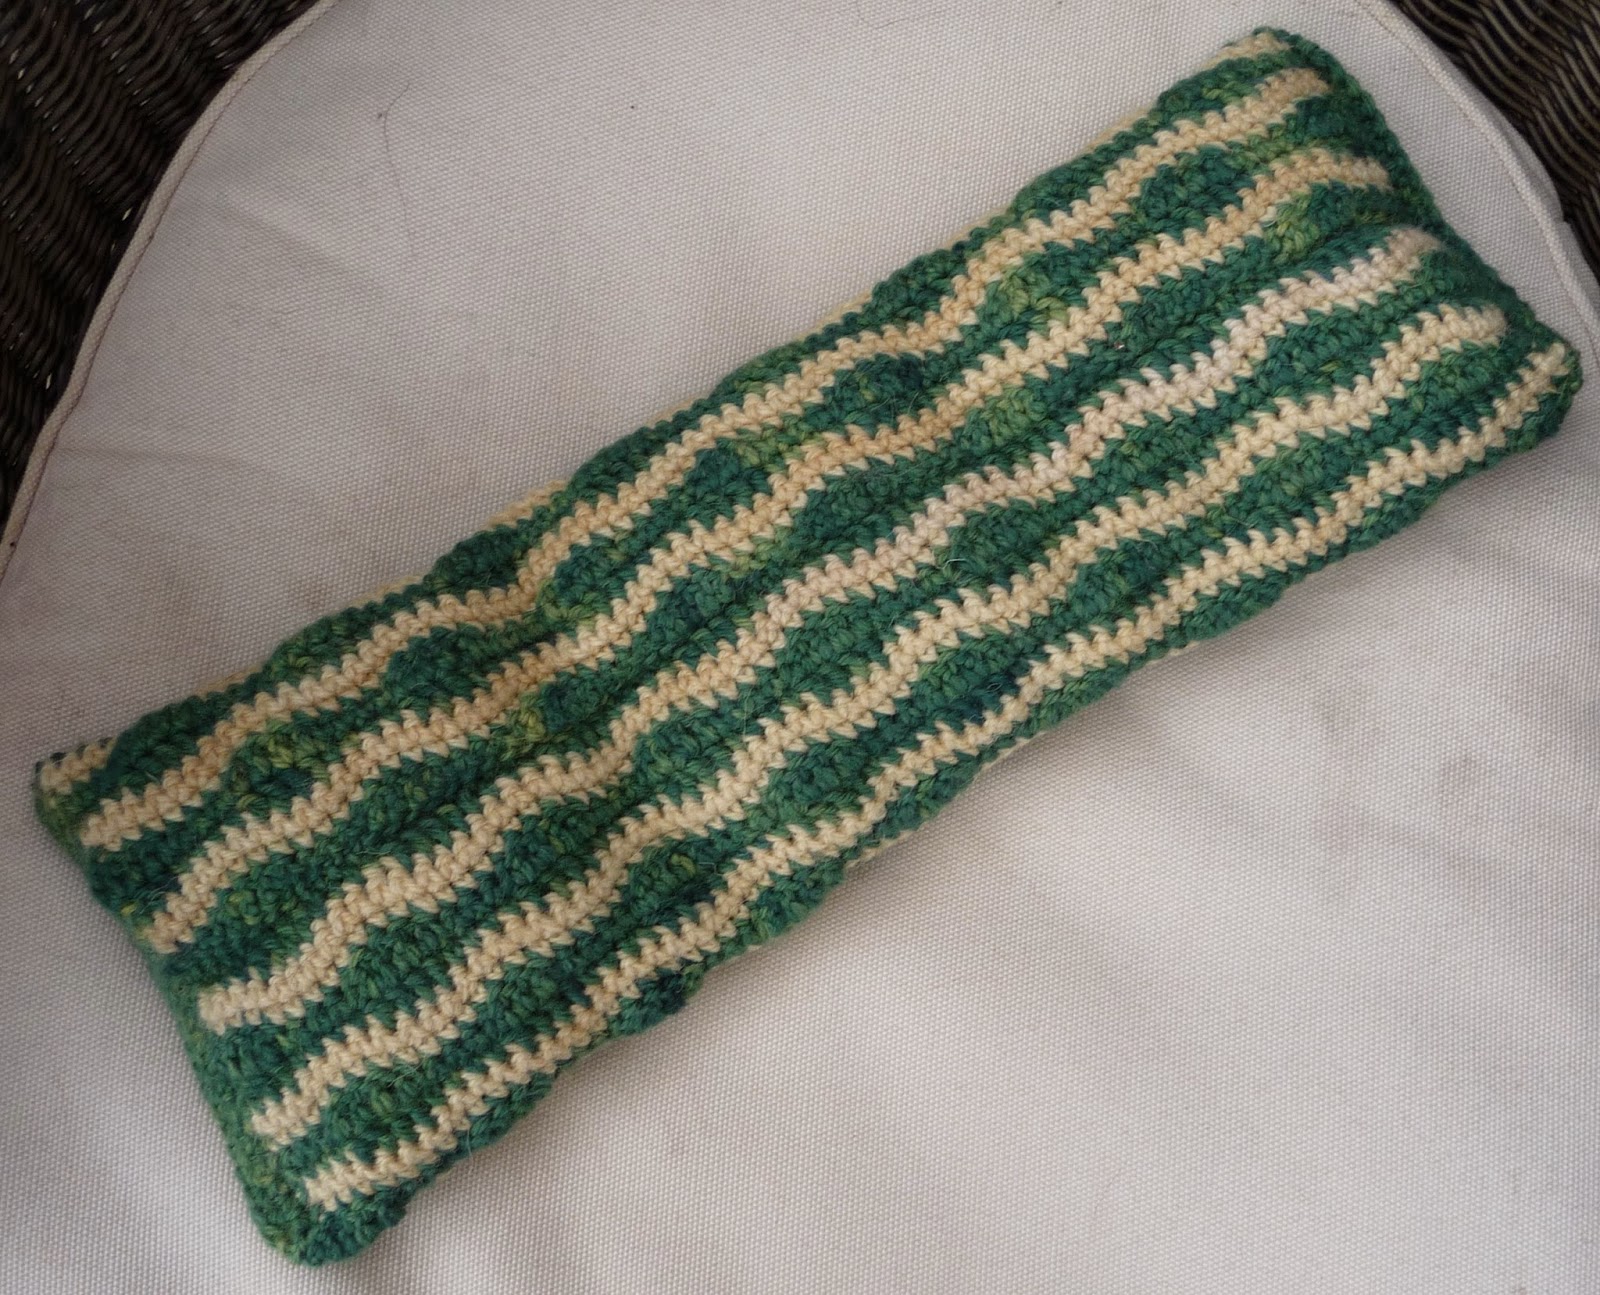
A lavender heat pack is an estimable project.  Apart from making welcome presents for anyone over forty, they are a great way to use small dyed skeins, test out ideas for fair isle patterns or practise new crochet stitches. 

The principle is straightforward. Knit a bag, then cut an old tee shirt up to make a slightly larger inner bag. Buy a bag of pearl barley or other grain from the value range in the supermarket and add your preferred dried herbs.  Fill the inner bag loosely.  If you are making a larger pack, sew  divisions to stop the barley all going to one end . 

Lavender is such a good tempered plant and so heavenly to brush past - I rarely pick the flowers in bud, like you are supposed to.  The scent is ideal for heat packs, soothing and calming.  It costs surprisingly little to buy a whole kilo of dried lavender.  Selotaped shut, my bag has lasted a couple of years and the remainder still smells wonderful.

made a full shoulder and neck heat pack while I was finding out how a Suffolk fleece would knit up in cable.  It turned out to be badly discoloured and too coarse for a jumper, but at least I had a functional item to show for the effort.

Last summer, I entered the following pattern in a competition. The rules said the project had to use less than 30g of alpaca dk yarn.  A small lavender heat pack to put in your pocket on a cold day seemed a cunning plan.  

The pattern below didn't win, but last week, I tried out the end result and it does work. The alpaca is wonderfully soft, not my own spinning, though I dyed half of it with woad.

Winter Pocket Warmer Pattern


Materials


23g double knitting alpaca
(11g for each piece and a length for crocheting them together)
4mm knitting needles
2mm crochet hook
Two pieces of fabric 16cm2
Needle and thread to sew them together
One mugful of pearl barley, or pearl barley mixed with dried lavender or other herbs
Optional – essential oil

Main Piece  – knit two


Cast on 27 stitches.
Row 1   K1 *P1 K1* repeat to end
Rows 2 to 4, as Row 1
Row 5   K1 P1 K3 *K2 together, yarn forward, K1* repeat to last 4 stitches K2 P1 K1
Row 6   K1 P1 K1 purl to last 3 stitches K1 P1 K1
Row 7   K1 P1 K3 *yfwd, K1, K2 together* repeat to last 4 stitches K2 P1 K1
Row 8   as Row 6
Repeat rows 5 to 8 seven times.
Repeat rows 1 to 4
Cast off loosely in K1 P1 pattern.
Sew in loose ends.
Wash and pin out to 14cm2  to dry.

Cut the cotton fabric so that it is at least two cm wider than the knitted piece – a margin of over 1cm all the way round.

Hem the two pieces together, leaving half the width of the bag open at the top, and turn inside out.  It is important that the finished bag is slightly larger than the knitted cover so that it fills it completely. 


One mug full of pearl barley will fit easily into the bag, do not overfill or it will not fit in a pocket or be pleasant to squeeze in an adult sized hand.   Some of the pearl barley can be replaced with dried lavender or other dried herbs, so that the bag becomes scented.  If you are using plain pearl barley, you could put it in a bowl beforehand, add a few drops of any essential oil and wait half an hour for this to be absorbed, before filling the bag.  Sew the bag shut.

Lay the two knitted pieces with their right sides facing, top edges adjacent.  Using a 2mm crochet hook, starting about quarter of the width from one corner, push the hook through matching edge stitches on the two pieces and draw up a loop of wool from underneath, leaving a short end to secure later.  Push the hook down through the next two matching stitches and draw up another loop of wool through the first.  Continue in this way, leaving a row of loops on the surface of the seam behind.  Once you get all the way round to the top, continue for quarter of the width, then crochet through one piece only.  When you reach the starting point where the two sides are joined, turn and crochet back along the other side until you reach the centre point.  Chain three crochet loops to make a button loop and continue crocheting through each stitch until you reach the end.  Sew a small button into the centre opposite the button loop.


Put the bag of pearl barley inside.  Before going out on a cold day, put this pocket warmer in the microwave on full power for one minute.  It should keep its heat for quite a while, making your coat pocket a scented haven for a frozen hand.


Had I written this pattern for two pocket warmers, it would have needed more than 30g yarn.  If you can't rely on always having someone to hold your other hand and you happened to have 46g double knitting wool to spare, you could keep both hands warm. 

Friday, 22 November 2013

Dyeing Wool with Galls, Acorns and Oak Leaves

I have been collecting oak galls, whenever I see them, with a view to using them for dyeing.  Their high tannin content is supposed to mordant wool at the same time as giving it colour.  While reading over this section of Jenny Dean's book, I saw she advises oak galls be used fresh. Mine were already pretty dehydrated in their dish on the windowsill, though I hadn't yet made any plan to use them. 
Part of my Dorset Poll fleece went through a suint vat that made it sticky and greyish, instead of cleaning it. Even after two goes in the washing machine, it was impossible to comb the locks out. Dried up galls and manky fleece - not much to lose on either count.


No careful advance soaking.  I bashed up the galls in an old envelope and boiled them in a small pan, stuffed about 200g of fleece in a big pot, filled it with water and poured in the brown fluid from the galls. Brought the lot to a simmer, only let it cool to 60 degrees, then drained the whole shebang into the sink, hoping the hot water and tannin might strip away some more of the grease on the wool.

About half the wool went back in the pot with hot water and a slug of iron made from rusty nails kept in a jar full of vinegar. Short simmer and the same again.  I rinsed the locks and laid them out to dry.  When I tried combing again, it did go much better.  Not light, relaxing strokes and easy drafting, but perfectly manageable.  I spun two fingering weight skeins, scoured them and had a good look at the yarn.  It was harsher than yarn spun previously from the best part of the fleece, but not bad.


I thought I would salvage the rest of the greasy wool and get a range of oak tones by going through the same process using a bowlful of crushed up acorns, then dyeing the remainder with a bucket of chopped up fallen oak twigs and leaves, come down after a big storm.  I did soak those for a week, while occupied with something else.  All the wool ended up very similar colours.
I'd reckon any tannin rich dye bath is likely not only to mordant, but also to degrease fleece.  After this experiment, I think it's possible you could go from dry, raw fleece to clean, dyed locks in one easy simmer. I do enjoy a measured, day by day process. Even so, this winter, I might try a shortcut or two with a bark dye bath and some raw Welsh Mountain Fleece.   


Steve has been angling for a new cardigan, bit of a pout when I said there wasn't enough of this wool, pink would not suit him and the iron dyed part was really too rough.  I tried carding rolags combining half silky, white Polwarth fleece and half the oak and iron dyed locks.  Spun with medium twist on the 10/1 wheel ratio and two plied to about double knitting weight, I got a soft yarn in pale brown shades.  
Though the combination worked out well, it was a bit of a pain in the arse to to tease out and card these locks.  I decided two balls of 50g each was as much as I wanted to do.

Looking for a scarf a serious cyclist could wear in winter, I found a free pattern called The Age of Brass and Steam on Ravelry.  I needed my knitting directory to make sure I did the yarn overs and the 'make one right, make one left' bits correctly, so it was slow going at first.  The way it all turns out is really cunning, easy when you have done it once.  

I call this The Age of Oak and Iron v The Age of Goretex and Lycra.
I used the fingering weight yarn I spun originally to make another kerchief on a smaller needle size, pictured here going back to its roots beneath the oak tree. 

Here are both my bat-like creations, returning to the wild.


Friday, 15 November 2013

Butterfly Wedding Cowl/Infinity Scarf Crochet Pattern

Three small, but exquisitely coloured skeins of Japanese Indigo plant dyed wool have been burning a hole in my mind's eye.  I imagine the colours as representing Madama Butterfly. 
In Act One of the opera, she is a fifteen year old geisha.  Pinkerton is charmed by her, enchanted, but sees their marriage only as part of getting an exotic bit on the side. She is in love.


How to make something frothy and romantic with my little bits of jade and turquoise wool?  As it happened, I had some left overs of the same weight spinning wool, dyed pale shades of plum. Pink for Pinkerton and very cherry blossom for my jade diva. Just the combination to make what I think will be the first piece of a Madama Butterfly series - assuming I can propagate this year's Japanese Indigo seeds.

Lovers' Knots are a new crochet stitch for me, but hearing the name alone on a Ravelry post set me thinking of using them for the Act One project.  This video of the stitch is really helpful.  My pattern is the simplest possible use of Lovers' Knots, no turning corners with shorter loops or slip stitching up rows.  Even so, I drove myself mad trying to to avoid twisting the loops or accidentally joining in to the wrong knot and having to frog back.  The third row was a nightmare, as my beads only just slid along the yarn and got stuck on lumps in my handspun.  After that, I had the knack, finished the fourth and fifth stripes barely paying attention.  BG and I were more engaged in groaning over Wales getting thumped by South Africa in the first of the Autumn Rugby Internationals.
The edging firms up the fabric, just as rigging does a sail, and as I think a naval officer like Pinkerton would wish.  I tried making butterfly wing shapes in reference to those who begged him not to pull the wings off his Butterfly, but they looked fussy.  Too bloody clever by half, as my father would have put it.  In the end, I did a really simple repeat pattern along each pair of Lovers' Knots.


Butterfly Wedding Cowl


Materials

4 ply/fingering weight yarn about 14 wpi
  • 20m (9g) for each stripe of the body of the pattern = 100m (45g)
  • 50m (20g) for the edging
3.5mm crochet hook
40 beads
darning needle

Size/Gauge

After washing and blocking out
18cm wide x 132cm loop
10cm2 = 6 Lovers' Knots


Method

Make a starting loop in the 20m of yarn you want to use for the first stripe. 

Crochet a chain of 80 Lovers' Knots, then crochet two more, finishing the second stitch through the middle of the fourth knot back along the chain.  Keep the single thread of the three forming each loop nearer to the middle of the work and the paired threads lower.  Continue working back along the chain, finishing alternate stitches through every second knot of the original chain.  When you get to the end, fasten off, leaving a good tail for sewing up.  

Take  the next 20m of yarn, make a starting loop and finish the first knot through the penultimate (upper) knot on your first stripe. Make one Lovers' Knot then finish the next through the next free, upper knot on the first stripe. Continue in this way til you reach the end and return along the row you have made, just as for the first stripe.  


Thread forty beads onto the third 20m length of yarn.  Make the third stripe in the same way as the second, leaving a bead in the knot of each central Lovers' Knot.  Make the fourth and fifth stripes like the second.


Match the ends of the stripes together and thread the tails of wool onto a darning needle to sew each starting point into the knot at its opposite end. Hide the ends by fastening off into the knot.


Take the 50 m of wool for the edging and pull a loop through any of the outermost knots.  Make a double crochet stitch.  *Make two double crochet over the double strand of the next loop of a Lovers' Knot, chain one and make two double crochet over the double strand of the next loop of a Lovers' Knot.  Double crochet into the outermost knot.* repeat from * until you complete the circuit of the cowl.


Turn.  Double crochet into the top of the stitch above an outer Lovers' Knot. *Chain three,  double treble crochet around the next chain stitch in the first row.  Chain three and double crochet into the top of the stitch above the following Lovers' Knot.* repeat from * until you complete the circuit.  


Do the same on the other edge of the cowl.  Wash and block out to dry.


It may not offer seasonal warmth, but since I was aiming for bridal party wear, I have nothing to complain about. Now, which of my three nieces might enjoy a Butterfly Wedding?


Friday, 8 November 2013

Evernia Prunastri Lichen Dye

My first attempt at dyeing with lichens proved troublesome. Curiously, more people have read that post than any other, so it was my most rewarding beige dye yet. The proper process for fermenting crottle remained a beguiling mystery, til this book was recommended by people on Ravelry.  It is old enough to give me a feeling of rediscovered tradition, but modern enough to follow.  Eileen Bolton sounds fascinating, I'd be driving up to North Wales to find her, if she hadn't died 25 years ago.  

Her book was reissued thanks to Karen Diadek Casselman.  I bet she'd be well worth meeting, too.  Since I shan't be in Canada any time soon, I have at least taken on board her thoughts on ethics.  Before cutting another swathe through the local lichens, I decided I really ought to do as she says and identify five lichen species.  Oddly, I found Eileen Bolton's hand drawn illustrations and descriptions much easier to refer to than photos, though I did use both.

Can't miss the orange one, must be Xanthoria parietina.  It grows all over the dry stone walls on the coast. The white one on a garden wall has to be one of the aptly named 'Chewing Gum' lichens, probably Leconora muralis. It's not mentioned in the dye book and heaven knows how you would scrape any off, the thin layer of lichen seems welded on.   


The real challenge was sorting out all the mixed species shown flourishing on the sea buckthorn below. The local lichens are not picky, much the same ones appear on birch, oak, apple and pine. After any blowy day, there are plenty to collect without violating the code of ethics, from fallen twigs or just lying loose on the ground.  


Three distinct types often grow together.  I think the grey-green filamentous bunches are probably Ramalinas and the wrinkly green lobed plaques are various subspecies of Parmelia.  Taking a magnifying glass to their hairy undersides helps pick out one from another. The most abundant one really caught my attention when I looked it up in the book.

Evernia prunastri, growing in shrubby bunches among the other types on the stick below, is alternatively named for its appearance as the Stag's Horn Lichen. Its white underside and smooth oval axils convinced me I had the identification right. 


Eileen says this is an orchil lichen which gives a deep plum colour with ammonia on wool.  I picked up bits every time I was out, let them dry, then rubbed them through a sieve.  Adding household ammonia diluted one to two with water made the powder swell up.  Stirring several times a day gave a pungent reek to the whole room.  Within days the colour changed from green to khaki.  By day 12, dark plum.   


One tablespoon should dye 50g wool, with no mordant.  This deserved my best skeins of fingering weight Dorset Poll.


The dye bath was not an instant success, no colour seemed to be going into the wool.  I gave it a good hour simmering and left it overnight.  Nice pale pink, maybe the lichen needed to ferment a bit more.  I used another tablespoon on Day 15 and Day 21, then put the last skein in with the remaining two tablespoons of now mud coloured lichen paste on Day 25.

I'd say this is a much better result than beige, even though it isn't deep plum.  Plenty of storms presently, think I'll keep picking up bits and do a stronger bath, one day.  Can't commit to another month of stirring stinky lichen til those at home with sensitive nostrils have got over this experiment.  


I used the after bath from the final dye to get a bit of variegation on the two middle colours, then crocheted this shawl.  The pattern is easier than it looks and I am very happy with the final result. Though you'd never imagine from the fermentation smell, the wool has a lovely fragrance.


The pattern is called 'Over the Willamette'.   I have called this shawl 'Plumette' in reference to both the windfall of lichen and the diminutive shades of plum it gave.


Friday, 1 November 2013

Making Japanese Indigo Dye from the Plant to the Wool

One lonely Japanese Indigo survived going out to the greenhouse last April.  Her name is Madama Butterfly, but there is nothing fragile about her.  The only seedling to tough out the freezing spring, she has burgeoned, shifting her pot size from tiny to biggest bucket.  
Here she is, lurking demurely at the end of August, having sucked up regular feeds along with the tomato plants.  Being my one and only plant, I was bringing her on with a view to saving seeds to sow, maybe a bit later next spring. Never mind exotic oriental blossom, there was not so much as a bud on her.

Reading up on Japanese Indigo, they say the indigo dye in the leaves is ready when an injury turns navy blue. Cruelly, I pinched one of her leaves.  Next day, the creases did look blueish. A savage harvest produced a measly 100g of greenery.  


I 'crammed the leaves' into my pot as per the instructions on my favourite dye website, Wild Colour.  After 24 hours steeping in warm water, I strained out the leaves, alkalinised the fluid with soda ash and aerated with a whisk. Then deoxygenated with Spectralite, waited an hour and dipped some wool.

Absolutely no colour appeared.  Either I did something wrong, or Madama Butterfly was an impostor.  Not the true Persicaria tinctoria, Japanese geisha and impassioned soprano Diva, but an ordinary, indigo-free Polygonum - some Slack Alice from the Rugby Club Karaoke Night. I may have kicked her pot, but I gave her the benefit of the doubt.  Rita Buchanan writes in A Dyer's Garden that Japanese Indigo never flowers til late in the season.  She recommends taking cuttings and keeping them to flower on the window sill, safe from frost.  These rooted very readily, so mid September, I potted on Madama Butterfly's Chrysalids, even though she was beginning to show white flowers, instead of the pink ones on this helpful dyer's blog.
Nearing the end of October, still no frost, but it must come soon.  Madama's seeds were appearing, but were they the right kind?
Time for an acid test - well, vinegar is an acid.  The Wild Colours website also gives instructions for a totally different method of dye extraction.  How this works chemically, I have no idea.  No mordant, no heat, no alkali and no deoxygenation.  

After the first failure, better to avoid squandering any more quality wool.  The machine washed part of my Dorset fleece had a fair portion with a blue farmer's mark.  I snipped off the stained ends, and because I am really enjoying combing and finer spinning, I knocked out three fine skeins of 15g each.  Scouring in Fairy Liquid did get rid of the last hint of colour in the wool, leaving an empty stage for Madama to inhabit.


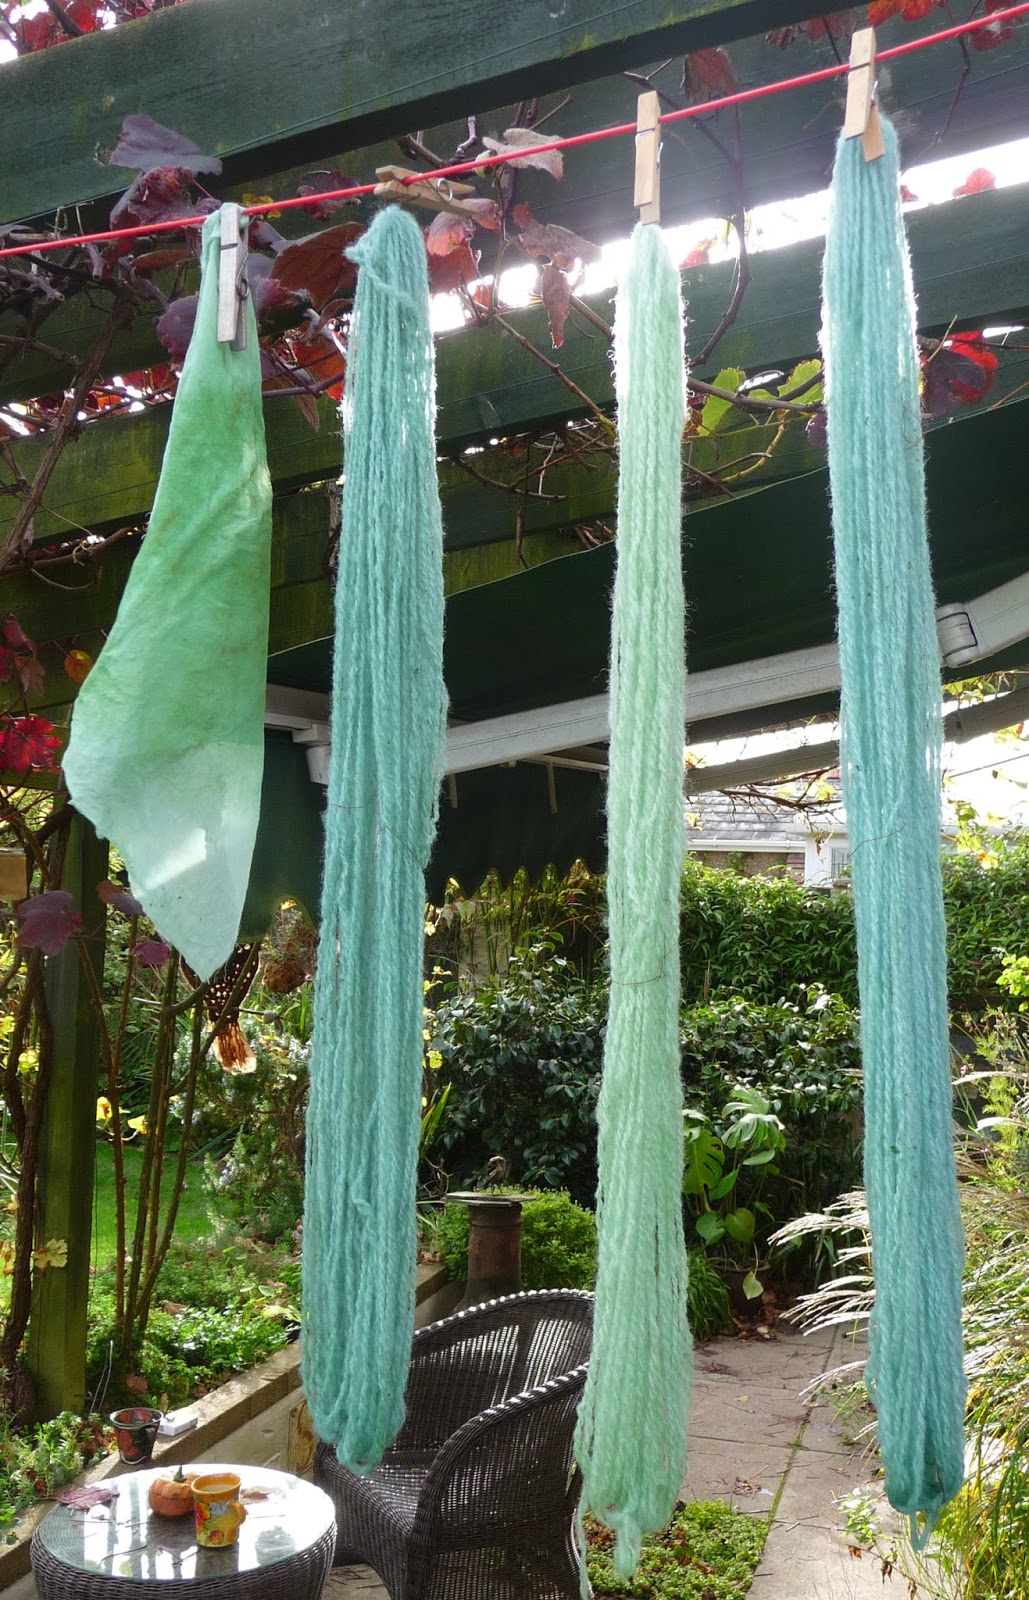
With water chilling in the fridge, I took the secateurs to Madama's autumn regrowth and got 250g leaves, shoots and flowers.  Into the blender with vinegar and water, pour through a sieve lined with silk - bit of a sludge fest, it goes through slower than I expected.  As I squeezed out the leaves, I noticed the dry skin on my hands going blue.  Fantastic!  There had to be indigo in there, even though the fluid didn't look nearly as dark green as the instruction photos showed. By the time I had soaked and squeezed and sieved the leaves out of their second vinegar and cold water bath, the first skein was clearly changing colour.  After 30 minutes, I took it out and put the third skein in.  Not long and all three were drip drying, along with the silk from the sieve.


I am enraptured by these colours, especially the pale jade green from the resqueezed leaves in the second bath.  I've noticed before that my photos are not so good at reproducing green shades.  This is like the bluer skeins, the jade I cannot match.   It absorbs my mind.  I think it sounds like this. Which is just as it should be.

Following the instructions, I left it two days before rinsing the wool.  The colours cleared of a slight muddiness, but have stayed fast.  Imagining Madama Butterfly herself as these jade shades, if one grants an analogy with the libretto/sound, the photo shows the opera in colours.

No death at the end of my Act Three, if I can help it.  


Madama Butterfly has come indoors, carried up to sit under the skylight where she germinated.  The Chrysalids have a sunny windowsill.  Heaven knows if I will get those colours again, but next time, I'll be dyeing silk. 

Un bel di, vedremo.