Showing posts with label Accessories. Show all posts

Friday, 3 May 2019

Re-lining a Sewing Box

"Enjoyed yourself at Wonderwool, Beaut?"
My companion, Elinor Gotland, hadn't waited for an invitation to go nosing through my shopping bags full of lovely new yarn and fibre. I finished wiping the dust and dirt off the most precious of my purchases.
"I always think Wonderwool won't be as good as it was last year, but every year, it just gets better." 
"And every year you go further over budget. That old box must have cost a fair bit more than the vintage rug bodger you came home with last time."
"This is a cantilevered sewing box trolley. It's priceless. The stuff of dreams."


I squirted a drop of oil into each castor and spun the wheels. 
"I've wanted to own something like this for nearly fifty years. I remember asking for a cantilevered sewing box for my tenth birthday and having to plaster on a happy smile when dad gave me a plastic tool box. To be fair, it has hinged trays that rise up when the lid is opened and I do still use it, very handy for keeping scissors and pins, but it's never been an object of beauty and it isn't nearly big enough. Once I've given my new sewing box a polish, it will be a marvel of utility and authentic art deco ornament."


"More like a marvel of 1960's repro, Beaut. Its original features include a salmon pink nylon lining - bit of a giveaway."
"Elinor, no!"
Too late. My companion had already stripped off the tasselled braid, torn out the lining and was inspecting the base of the box.
"As I suspected, vintage hardboard. Never mind, it'll fit in the sitting room, hold your knitting and you can stand a mug of tea on top." 
"My lovely sewing box!" 
It is difficult for Elinor to look sheepish.
"Come on, Beaut. Best we replace that nylon with some of your nice natural fabric."
I followed her upstairs. 
"Silk would be too thin, wool would collect dust and cotton is just ordinary and uninspiring."
"How about this silk and linen blend?"
Elinor pulled out the legs of a pair of trousers that I had unpicked and contact dyed with weld plants a couple of years ago. The fabric was just wide enough to cover an oblong of card the size of the base of the box. All very neat and professional. Using a hot glue gun to stick the other leg to the sides of the box, I burnt my thumb and welded a fold of fabric into a hard lump.
"Oh I've ruined it now." I slumped down to examine my blistered thumb.
"Don't forget you need braid to go round the top, that'll cover a multitude of sins." 
So I crocheted a matching trim of pink yarn dyed with silver birch bark and green yarn, possibly dyed with birch leaves. Gluing that on with UHU was easy enough.

All that remained was to transfer the contents of my old plastic tool box, rediscovering in the process such lost treasures as an envelope holding locks of my children's baby hair from their first haircuts.
"Oh, yuck, how Victorian can you get? No wonder your old tool box was always overflowing with crap."
I took the envelope from my companion's hoof.
"I think I'll just tuck it away down at the bottom of the new box. That's not a problem, this sewing box trolley is so capacious, I've got plenty of room for everything."
"Everything? In that box? Really?" said my companion, swinging open the door of the sideboard ....


Friday, 20 May 2016

Upcycling Old Woolen Suits

Last summer, I dip dyed two cotton cushion covers in a Japanese Indigo plant vat, overestimating the strength of the remaining indigo. Hoping the washed out blue result would pass for shabby chic, beach style, I put them up for sale in Crafts by the Sea.
"No takers, then, Beaut?"  My companion, Elinor Gotland, looked up from her knitting and caught me smuggling the dusty cushions back into the house.
"Well, business has been slow for everyone.  These just need to be spruced up."

"Face it, Beaut, shop soiled or not, those cushions are as dull as tea without sugar. Speaking of which, you really should try this lemon and ginger kind."  I can't much be bothered making ordinary tea, now I've sworn off sugar.  Elinor just hates waiting for a caffeine withdrawal headache to force me toward the kettle.  She stared at the cushion covers.  "I was thinking clouds, but no, sheep with a blue rinse, that's what those blotchy tie dye patterns remind me of."
Refreshed and revitalised by my fruit tea, I positively raced upstairs to find himself's old navy winter suit.  I went through a phase of buying 100% wool jackets from charity shops, certain the fabric would be marvellous for some future project.  This ended when I discovered that deconstructing them takes an age, so much interlining, padding and double seaming shapes a man's suit that they are probably bulletproof.  When you finally peel off the woven wool surface, much of it is rigid with stiffener, ironed on to the inside. Remembering I had saved that navy suit anyway, after some rootling in more likely spots, I found it in the boiler cupboard with all the others.

Iron on backing does mean you can cut out a shape from fabric and it won't fray at the edges.  Sew it on, add a couple of cuff buttons for eyes and some art yarn to be grass and voila, Blue Ewe cushions. Celestial sheep.
Rather than stripping a jacket down, it is possible to upcycle whole sections.  The intact garments survive a washing machine wool cycle and a press with a hot iron far better than the dry clean only label suggests.  Instead of being a beast to unpick, the pockets can prove useful. This file cover, with handy pen holder, was made by wrapping the complete lower half of a brown wool jacket round a file and oversewing the top and bottom edges. Adding elastic to hold on a pencil sharpener and a rubber was overkill, such things could just as well go inside the front pocket, really. Next, a pocketed cover on a notebook, decorated with extra buttons from the button stash, then a pocket on a pencil pot.

Exhilarated by all this Putting of Saved Up Stuff to Good Use, I could hardly bear to chuck out the scraps. Sew a couple of small squares together, stuff them with waste material, needlefelt on a scrap of wool and felt the whole thing in a hot wash. Stitch a brooch pin on the back and you have a wool badge.

I went to show them to Elinor.
"Mmm, try one on then, Beaut. Oooo, Suits Ewes."
"Oh, very funny.  Just wait til you see how I have woolified my sunhat."
"Well, this hat ticks all the boxes for Chelsea Flower Show.  To be the Belle of the Great Pavilion, all you need now is a ticket."
"Actually, Elinor, I have two."

Friday, 7 August 2015

Computer Printing Heavy Calico to make a Pinboard

"Compared to silk, this unbleached heavy calico fabric is so easy to work with.  No need to tack it before sewing, look, if I fold it. it keeps a crease just like paper."
Elinor paid no attention.  I tapped her on the shoulder til she pulled her headphones off.
"Calico creases like that when you wear it too, Beaut.  And the crumpled look is so last season. There's no comparison with silk."
"I bought the fabric to make a table cover, Elinor, not a frock.  It was ever so cheap."  But my companion had already plugged back in to her music.  I never was a fan of personal stereo.  Heaven knows what high tech gizmo Elinor bought herself when she was away in Canada, daresay I wouldn't understand if she told me.  I'm still not entirely sure what an app is, though I must admit, having survived without a computer printer for the last few years, now that we have a new one, I do find the performance much improved.

Despairing of generating many products to sell just by spinning and knitting, having a printer opened up the standard resort of the contemporary crafter. I had a go at doing greetings cards.  Not really cutting edge, when I showed off my hard won new command of 'word art', Elinor Gotland
just made sniffy remarks about the puppy getting into everything these days. Titting about one evening, I discovered that if you steam iron heavy calico nice and flat and cut it to exactly A4 size, the machine will print your photos out on it, giving an attractively textured and muted effect.  A4 is the maximum
width, but my printer will spit out a longer piece of calico. Having bought an A4 pin board in a stationery shop recently, I found it was mostly cardboard, the little hooks at the back weren't secure and the whole shebang was never worth a fiver. Here's how to make your own customised version. Cut a bit of old board to A4 size, drill two holes and poke a length of garden wire through, twisting the ends together to secure a loop to hang it from.  With the twisted wire side facing you, glue on a piece of 25mm thick polystyrene insulation board, which cuts easily to A4 size with a jigsaw.  Your printed strip of calico can be wrapped round the whole block and stapled on at the back, then all you need is some push pins. Seeing these, the calico suddenly became of interest to Elinor.
"Those Speckled Face Beulahs are just pushing and shoving to get themselves into the front of that shot.  I could look out a few things from my portfolio for you, if you wanted to use something more stylish and professional for your next pinboard, Beaut."
"Those sheep are Mary's flock, from Ty Cribbwr.  I took that picture when they were waiting to be scanned last January, it's a candid camera photo, nothing
posed.  Anyway, I'm going to try making covers for notebooks now."  Elinor was actually quite attentive while I fiddled about, cutting cotton interlining to pad the fabric out.  She even gave me a go of her earphones. 
"Tranquil piece you've been listening to.  What is it?" I asked.
"Sheep may safely graze. Which would be a fine thing in this house. I bet Bach would never have allowed his dog to worry sheep."
"Oh Elinor, I'll take Yarrow for a walk so you can chill out for a while." We got home to find her deep into some crafting therapy.
"Needlework is hard on the hooves, Beaut, but I've made a few book covers.  Making things to sell at the Glynogwr Show, are you?"
"Mmm, Mary asked me to sit and spin in the Wool Tent, where they judge the fleeces.  I'm doing a display all about wool, with a few


bits on sale.  She says the Show is very informal, but you aren't the only one feeling anxious."
"Ah, stage fright, always builds up before a show.  I'm a marvellous saleswoman, don't you worry about tomorrow, Beaut." Looking at her notebooks, the jitters come upon me and I cannot find this offer entirely soothing.  Best I listen to some Bach tonight.

Friday, 8 May 2015

Making Stitch Markers for Lace Knitting

I was told last year that lace knitting is not intrinsically difficult and have found it true that lace really does only use a limited range of combinations of stitches and forms of yarn over to draw in parts of a row of knitting and leave spaces elsewhere.  While the craft is simple, one lapse of concentration, one yarn over missed and everything thereafter is thrown out of kilter, scrambling into chaos instead of building harmony.  The second lace scarf I completed had me fascinated, despite the 
amount of time I spent unpicking it.  I'd say the art lies in imagining a new pattern, creating balance and intricacy within the final shape of a piece. The whole is greater than the sum of its parts. Which means following lace knitting instructions is a discipline leading up to the thrill of a result that cannot be fully anticipated. The plasticity of knitted lace amazes me.  Even when you have finished knitting, the lace effect cannot be properly appreciated until the piece is washed and blocked to stretch out the web. 

I have heard about 'life lines', where you run a thread through all the stitches of a row you are sure is correct, so that if you go wrong later, the work can safely be unravelled back to this level.  Somehow, I never could be arsed to set a life line up.  Luckily for me, I saw a friend's Dragonfly Wings scarf and thus discovered Boo Knits patterns.  The one above is called Sweet Dreams from the In Love Collection.  I call mine 'Root Map', because I started it on a road trip to Glasgow, changing from one shade of madder dyed yarn to another, every time we changed motorways.  Boo patterns not only come with reminders about how to do the stitches and yarn overs, but also advice on placing stitch markers.  These can be used to divide up the stitches into pattern blocks.  When you know there should be twelve stitches between markers, spotting an error tends to happen while working within that small section and if it doesn't, counting back soon shows where the problem lies.
First off, I just used safety pins or little loops of wool in bright colours as my markers.  I worked so slowly that the extra few seconds spent transferring each narrow safety pin or wiggly, knotted bit of wool from left needle to right didn't slow me up appreciably.  Then I was given a couple of pretty wire loops with beads dangling from them and I realised how much easier they were to slip across.  Only problem was, tiny jags of wire around the beads tended to catch in my loosely plied, low twist handspun wool.  So I asked Mum for some plastic, safety pin shaped markers for my birthday and they were a big improvement, though awkwardly rigid and not aesthetically pleasing.  It is a joy to use tools that combine elegance with function.  When I saw this truly beautiful oak yarn bowl on the HillTop Cloud stall at Wonderwool, I decided buying such a thing was not self indulgence so much as becoming a patron of the arts.  I said this to my companion, Elinor Gotland.


"If that bowl was art, there would have been an extra couple of zeros on the price tag and it would be up on a pedestal, not sitting on the carpet with your wool in it."
That ruddy sheep thinks she can play the cultural guru, just because she's actress.
"Elinor, if I call it art, then that is what that bowl is." 
"Ooo, who's come over all avant garde?  I'm afraid Grayson says that kind of statement only works if you are the person who made the thing and other people agree you are an artist."
"So a pile of bricks can be art, but my lovely, useful bowl can't?"
"Well, Beaut, it could be art if Mr Perry had made it, but HillTop Katie's dad hasn't won the Turner Prize.  Or been on telly."


 I myself have been suffering creative torment with the button machine, attempting to express myself through the medium of the stitch marker. I discovered that the little bar can be twisted out of the back of the button shells, leaving two holes for a loop to be threaded through, so the knot is covered once the top of the button gets clamped on.  My prototype was made with a fuse wire loop, like the beaded markers, but the knots in the wire unwound
themselves or broke after I flipped them about while knitting. Silk, wool and cotton loops do stay tied, but they are a bit too floppy to slide the tip of a knitting needle through quickly. Short loops keep the button head too close to the stitches and long loops are a pain to fetch back over on a purl row. By trial and error, I ended up with 2cm loops of necklace cord, the 1mm diameter kind is stiff enough to keep loops open and doesn't catch on the working yarn.  With a padding of cotton interlining, scraps of plant dyed silk cover the tops, each one different and all of them lovely.
"This is not a production line, Elinor, it's a limited edition."
"Well, Beaut, I'd believe that if I didn't know the bead shop just changed hands and became a dog grooming parlour.  You just keep up the artistic struggle and I'll find you another necklace cord supplier online."
"Ooo, could you get me some in white?  Or maybe green, to match the silk?"

I've now got two dozen pretty much perfectly functional stitch markers, light weight on the needle, yet substantial enough to shift about easily.  It takes that many to divide up the long rows at the end of the New Beginnings pattern.  This is undemanding lace intended for worsted weight yarn and I thought the instructions looked boringly repetitive, but suitable for the dentist's waiting room, where I have been spending far more time than I'd choose. The version in the photo on the right has the alternative ending with the lacy tips and I'm calling it 'Root Work'.  The cumulative effect of the simple structure pleases me immensely. So much so, I made another one straight away with more of my practice at handspinning straight from the end of Bond wool tops.  Which still isn't much finer than double knitting weight.
This one has the plain edge and it's for a bloke who makes silver jewellery and big forged sculptures.  I consider him quite enough of an artist to wear a bit of lace and I name the scarf 'Metal Work'.  Some of the copper wire he gave me is now bent into a holder to keep all my best stitch markers together.  

"What do you reckon, Elinor?  If I hang them on the wall and call them 'Neogenesis', does that make them art?"
"Maybe.  But you'd have to shave your head, get some facial piercings and never, ever let on about the knitting."

Friday, 20 February 2015

Making Silk Fabric Covered Buttons

I bought myself a new toy.  I'd say it was an impulse buy, only I must have lurked around looking at it on eBay half a dozen times.  Then I pressed BUY - impulsively selecting not just the button making machine, but also a die mould and a bag of button blanks to fit in it. Delivery from China was really quick, though coinciding with the festive season, so no chance to play about til the kids had gone.  Before Christmas, I made a couple of ties out of the silk scarves I contact dyed last summer.  The left over strips and scraps were too good to throw away, yet too small to make anything much.  This machine's only instructions were a series of pictures online.  When the tops of my first silk covered buttons popped off faster than I'd got them on, I cursed myself rotten for buying a pig in a poke .


Reading other websites, I guessed the button blanks needed a bulkier fabric to grip tightly, but the whole idea had been to use up my precious silk.  After potching about with other stuff from the rag bag, I discovered the silk would snap on securely when laid over thick cotton interlining left over from making curtains.  Mustn't have too much fabric trapped inside the shell for a proper closure, nor so little that an edge comes loose.  Forget cutting a perfect circle, make a square that is just a fraction wider than the outer diameter of the die mould and clip off the corners.  To shove the button shell down centrally with an equal amount of fabric round all sides, I used the end of a big wooden spoon.

The whole lot stays inside quite securely when turned upside down onto the base of the die, which has the button back inserted.  Crunch down the plunger on the machine and it clamps the two parts together.  Not quick or easy, but the buttons are sound, very neat and pleasing.


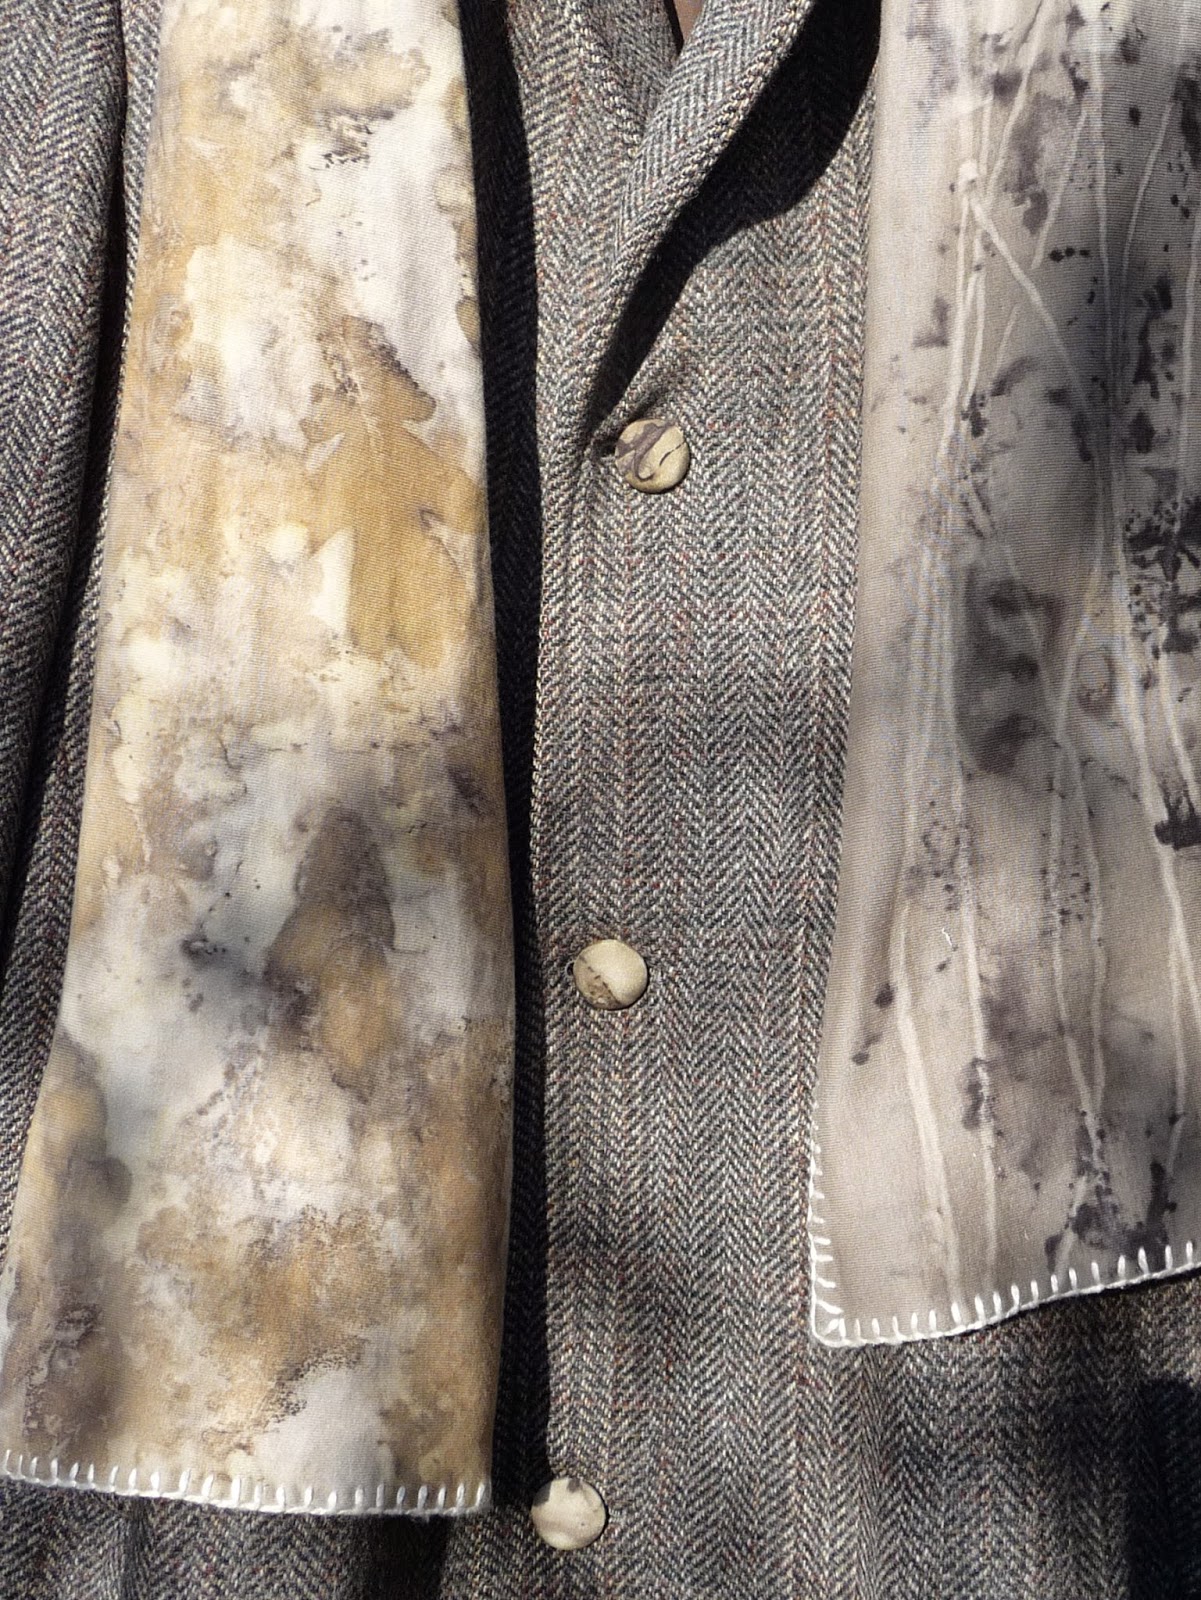
It is a rare thing to find a quality cast off in our local charity shops, but I like to have a nose about on a Saturday morning while himself is doing something manly, like going in the bank or having a haircut.  He has ceased to loiter impatiently on the pavement and will even come in with me, trying on this huge coat, which proved too big across the shoulders.  Since it was made with yards of real woollen twill, at £10 it was a bargain for me to carry home in triumph.  The fabric survived a much needed turn in the wool wash cycle and after a press with the steam iron, I decided to repair all the ripped lining and keep it as a greatcoat.  Who ever owned it had had hard wear out of it.  Must have been a big bloke who got bigger, because all the buttons had been cobbled back on right at the edge of the front opening. Such an intimate thing, a coat.  The right hand pocket had been used most, because that was torn out.  I pictured the previous owner striding

over a stile ripping the lining above the back kick pleat and pulling the right shoulder stitching out while manhandling stock.  Though I sewed back a good few seams, the twill fabric had no tears at all.  Incredible stuff, wool.  I haven't any idea how old this coat may be, it has no label except a tag to hook it up which says Made in Britain. Let's call it twentieth century.  Now it is back in action with handmade buttons, ankle length on me.  How my vintage look impressed the seagulls while I was out beach combing, oak leaf dyed silk buttons glimmering in the wintry sunlight.  

Only now, himself has decided that with a jumper underneath and the buttons in the line where they were supposed to be, the coat is a good enough fit for him.  
After all, he did see it first.