Friday 11 August 2017

Contact Printing a Cotton T Shirt with Dye Plants

The project for August in the Dye Plant Calendar 2017 is contact printing with fresh dye plants. Half a page summarises an essentially simple process, though I have come to realise there is a great deal more one could usefully say about all the monthly projects. 
Following chat online about ecobundles, I understand there are a great many methods suited to different plant materials and different print effects. I enjoy the gardening aspect of plant dyeing so the process I've developed is essentially making freshly picked dye plants, the classic kind that contain intense concentrations of dye, print with their own dye.

Over the years, I've blogged about various successes and failures trying this and that with plant prints. At the risk of becoming monumentally dull, this particular blog will be a (very) detailed description of what I am currently doing to make prints like the one on the T shirt shown above. I'd hesitate to call it 'ecobundle'. Maybe I should be explicit, the process doesn't use vinegar or soy milk or iron blankets and does rely on the cotton being treated first with a chemical mordant, aluminium acetate, which I buy from Wild Colours online shop. This is not the same stuff as alum, which is only a mordant for protein fibres like wool and silk. I use aluminium acetate because it is a straightforward, fairly quick, one step treatment for plant derived fabrics like cotton and linen, it does not add any colour of its own, but does reliably enable the adjective plant dyes to fix on and stay bright, rather than fading fast.


Since this is intended to be an exhaustively thorough reference blog which will save me giving lengthy explanations in future, I will add, though I expect this is obvious anyway, when you are mordanting and dyeing with plants, do not use kitchen equipment you intend to use for food and while working, take safety precautions, bearing in mind that dye plants themselves may be toxic or allergenic and aluminium acetate, iron and copper are none of them fit to eat. 

I'm no seamstress, so I begin by buying a 100% cotton T shirt (second hand, of course). The thread used to sew them together is usually polycotton which doesn't take up plant dyes well, so I have to live with any visible stitching remaining undyed. An accurate weighing scale is ideal, if you don't have one, to give you a rough idea, a cotton jersey women's medium size of decent quality and thickness would weigh about 140g. To clean off or scour the fabric, my T shirts go through a 60 degree centigrade wash cycle with no powder or conditioner in the washing machine, though you could equally well thump one about in hot water by hand. While it is washing, I weigh out 5% of the weight of the T Shirt in aluminium acetate, which is a fine white powder, one heaped teaspoon is about the 7g needed to mordant a 140g T shirt.
 

Put the aluminium acetate in a jam jar, pour in hot water, stir well and leave to stand. Fill a large pot, at least 10 litres capacity, with warm water and stir in the dissolved aluminium acetate. Now add your T shirt, still wet from the wash, squeeze out any trapped air pockets, bring the pot to the boil, simmer for an hour and leave to cool. Give the fabric one rinse in plain water and either use it straight away or dry it to dye later. There will still be half of the aluminium acetate left in the pot, so you can save the fluid or just add another 3.5g (half a heaped teaspoon) to mordant another T shirt.


In the meantime, make a plant dye bath to give colour to the parts of the T Shirt that are not included in the print roll. I often use the afterbath of a plant dye bath that has already dyed some wool. Otherwise, I pick whatever flowers are plentiful - August is a great month for yellow cosmos, coreopsis and Dyer's Chamomile, earlier in the summer I'd go for meadowsweet - and just put them in the dye pot with water, so they can release their dye while the printing bundle is simmering. Adding a bit of brown onion skin peps up the orange and yellow tones. To my mind, the resulting uneven, splotchy background rather suits these prints. 


Here is a table set up with my contact print equipment. One aluminium acetate mordanted, soaking wet cotton T shirt. One section of sawn off plastic drainpipe 26cm long (a little less than the width of my dye pot). A ball of undyed cotton string. Four mugs. A roll of greaseproof paper (aka baking parchment). A jar in which rusty nails have been dissolving iron into a mixture of water and vinegar and a similar jar with dissolving bits of copper piping.
Vinegar contains acetic acid. This will dissolve rust, which is iron oxide, to make iron acetate. It will also dissolve copper oxide to make copper acetate, though much more slowly. If you can't wait for weeks, you can buy ferrous sulphate and copper sulphate as crystals which dissolve instantly, but read up on safe handling, because metal sulphates are more toxic than homebrewed acetate solutions.


Unlike fine silk, cotton jersey is thick enough to prevent plant dyes from penetrating cleanly right through. The prints will be much clearer on the side of the fabric touching the plants, so turn the T shirt inside out. Some dye will pass through the fabric, so the next step is to keep the plant prints distinct and prevent the colour from the main dye bath reaching the printed area.
Tear off a length of greaseproof paper a little wider than the T shirt and as deep as the section of pipe, or the stick, or whatever you will be rolling your T shirt around. Lay the inside out T shirt front side down over the strip of paper. Now put two cups in through the sleeves and two at the bottom opening to open some space to work inside the T shirt.


Hooray, at last you can skip around the garden, harvesting dye plants. The ones that I have found contain intense concentrations of dye sufficient to print their colour and shape directly are the flowering spikes, stems and leaves of weld and coreopsis tinctoria and madder roots. Double maroon hollyhocks, yellow cosmos and Dyer's Chamomile will make blotches of colour, though they are unreliable at making recognisable flower shapes.
Dip the weld flower spikes and leaves in the iron solution, shake off the excess fluid and lay them inside the T shirt where you want them to print. The small amount of iron will modify their natural yellow luteolin dye into green, which shows up better, in my opinion. You could do the same with the Dyer's Chamomile flowers.
Lay the sprigs of coreopsis tinctoria inside, just as they are. The dark red flowers give a dusky halo round the orange print of the centres, the petals with more yellow don't always show up. Coreopsis leaves wilt within minutes, so lay them in before they flop, because the prints they make are beautifully crisp.
Thick madder roots can be chopped up to make a sprinkling of little red dots on the cotton, though I think the fine wriggly roots are used to their best for making contact dye prints. I lay on the splodge plants last - you can see one double magenta hollyhock and yellow cosmos on the top layer, the cosmos flowers get a dip in the copper solution to bring up their colour.
Take out the cups and gently straighten out the T shirt, ready to roll the working area with the plants inside and the greaseproof paper underneath, like a Swiss Roll, round and round the pipe, then bind it firmly over the outermost layer of paper with lots of string.

Here's a good video for learning one handed, quick release knots.
Submerge the roll slowly into the dye pot, making sure the water flows inside the pipe so it won't bob to the surface. Bring to a low boil and simmer for a couple of hours, then leave it overnight. Thick aluminium pots are harder to clean than stainless steel, their advantage is that they keep the heat for hours longer. I buy mine second hand on eBay. You could keep an eye out for anything 28cm wide or bigger, between £20 - £30 per pot including p&p is pretty good, they do last forever. 


Anyway, here is the roll in the pictures above, which I pulled out of the pot to drain this morning. Impatient as I am, I know that if I unroll it and wash it too soon, the prints will be paler. I shall give it a few days to dry slowly, then a few more days after unrolling to fix before I wash it in the machine at 30 degrees centigrade with a pH neutral detergent and finally give it a hot steam iron. 


Here are some I made earlier. It's a gloomy morning for taking glamour shots and they look considerably more vibrant in real life. I nobly resisted the temptation to use the enhance function on this photo - it annoys the tits off me when I can tell other people have done that. Last question, will these prints last? I can say with confidence that if I have a flower dyed T shirt displayed in the shop window of Crafts by the Sea, exposed to full sun every afternoon, the colours will dim considerably over the course of the summer. The ones I keep in a drawer to wear and wash myself are good for years. Shirts made of cotton and linen blend take plant dyes even better. Here's one I filled with plants before folding it up to roll around the pipe. It was photographed on a brighter day, you can come and have a look at the real things if you happen to be passing through Ogmore by Sea. The shirt's in the shop for £30, the T shirts will be taken down there on Sunday and will be for sale at £20 each.


Friday 4 August 2017

Hand Spinning Speckled Face Beulah Sheep Fleece

My companion, Elinor Gotland, caught me sighing over old photos of my friend Mary’s Speckled Face Beulah sheep.
"You're going to miss those Beulahs, Beaut."
“I am, and Mary, too."
"She's gone to a better place."
I bridled at that.
"It may be less rainy in France, but I wouldn't say it was better."
"You think sunshine and grape vines are less appealing than sodden fields and foot rot?"
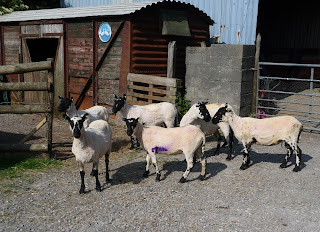
"Even so, it must have been a real wrench to sell the flock after all these years. Don't they look lovely?"
“Fair play, the Beulahs are photogenic.”

I took this picture the January Mary first invited me to Ty Cribbwr Farm. Which is pronounced ‘Tee Cribboor’ - you’ll have to make what you can of Welsh place names when I tell you that for over a hundred years, Speckled Face Beulah sheep have been pure bred on the hills of Eppynt, Llanafan, Abergwesyn and Llanwrtyd Wells. Less hardy than the true Welsh Mountain sheep, which may spend all their lives out on high ground, Beulahs are bigger and comparatively manageable. Importantly for the farmer, they are excellent mothers. That day, the vet had come to scan Mary’s ewes. Many were carrying twins or triplets and though it pained me to mark their fleeces, my job was to paint spots on their backs to show which ones were going to need extra feed during pregnancy. 

Mary’s flock started when she was given a Beulah ram lamb triplet to bring on, because his mother couldn’t manage to feed three. He was nicknamed Boots, seeing as his legs were black to the knee and white above. The next year, she bought him a harem of ten Beulah ewes and by the time I met her, the flock had grown to more than a hundred sheep.

I did love lambing.
"There's a deep satisfaction, watching wet, new born lambs struggle to their hooves for the first time."
"And a hell of a struggle delivering the ones that get stuck at three in the morning. Alright for you, you only did the day shifts. It's all that free wool you'll really miss, Beaut."

True enough, waiting til summer for the shearing was a perfect agony of anticipation. The clippers buzzed, sweat beaded and bald ewes bounded away.  Beetling about, rather frenzied myself, skirting and wrapping the fresh fleeces, I had golden opportunities to compare and contrast fibres from several local breeds living on the farm. All Down types, the Beulah felt far, far less bristly than Welsh Mountain, though a Lleyn fleece just edged it as the softest wool in the pile. After skirting, the quality of wool and staple length across each whole fleece varied only modestly from an average of medium soft locks, about 10cm long, coarser and straighter over the breech.  Elsewhere, the crimp was tight, but disorganised, with a low lanolin content.  Not only resistant to felting in the wash, the clean locks were a pleasure to comb for spinning worsted and even the raw wool was light work to hand card for long draw spinning, which is my preferred method.

“I do love it when you can just get straight into a freshly shorn fleece and spin away with hardly any waste, Elinor. In my opinion, Beulah would be an ideal choice for a beginner. I had no trouble with any of the preparation and the fibres are good and grabby to spin.”
“No trouble with preparation? You rarely did any and you’re fooling no-one, you Slack Alice."
Last year was grievous, a spell of flooding kept the ewes on limited grazing for several weeks, which caused a weak point in the staple. This summer's shearling fleeces were excellent quality, I have just finished spinning one for the Tour de Fleece and am torn whether to snaffle just one more, before the woolsack goes to the Wool Board.

I did do proper sampling and studying, a few years ago when I brought home my first Beulah fleece. The wool was easy to manage and straightforward to spin, from high twist, worsted fingering weight to low twist, woollen chunky.  Pale cream rather than bright white, all types of yarn were much softer than I anticipated, being accustomed to Welsh hill breeds, which are best suited to making bags and rugs. As you would expect, given more time and effort, combed worsted yarn came out slicker and smoother, knitting up with a bit of a gleam and more drape. Minimal kemp meant no itchy ends were exposed by simply hand carding rolags from the whole locks and Beulah seemed at its best as a woollen yarn, full, bouncy and elastic, knitting up into a thoroughly cuddly fabric.

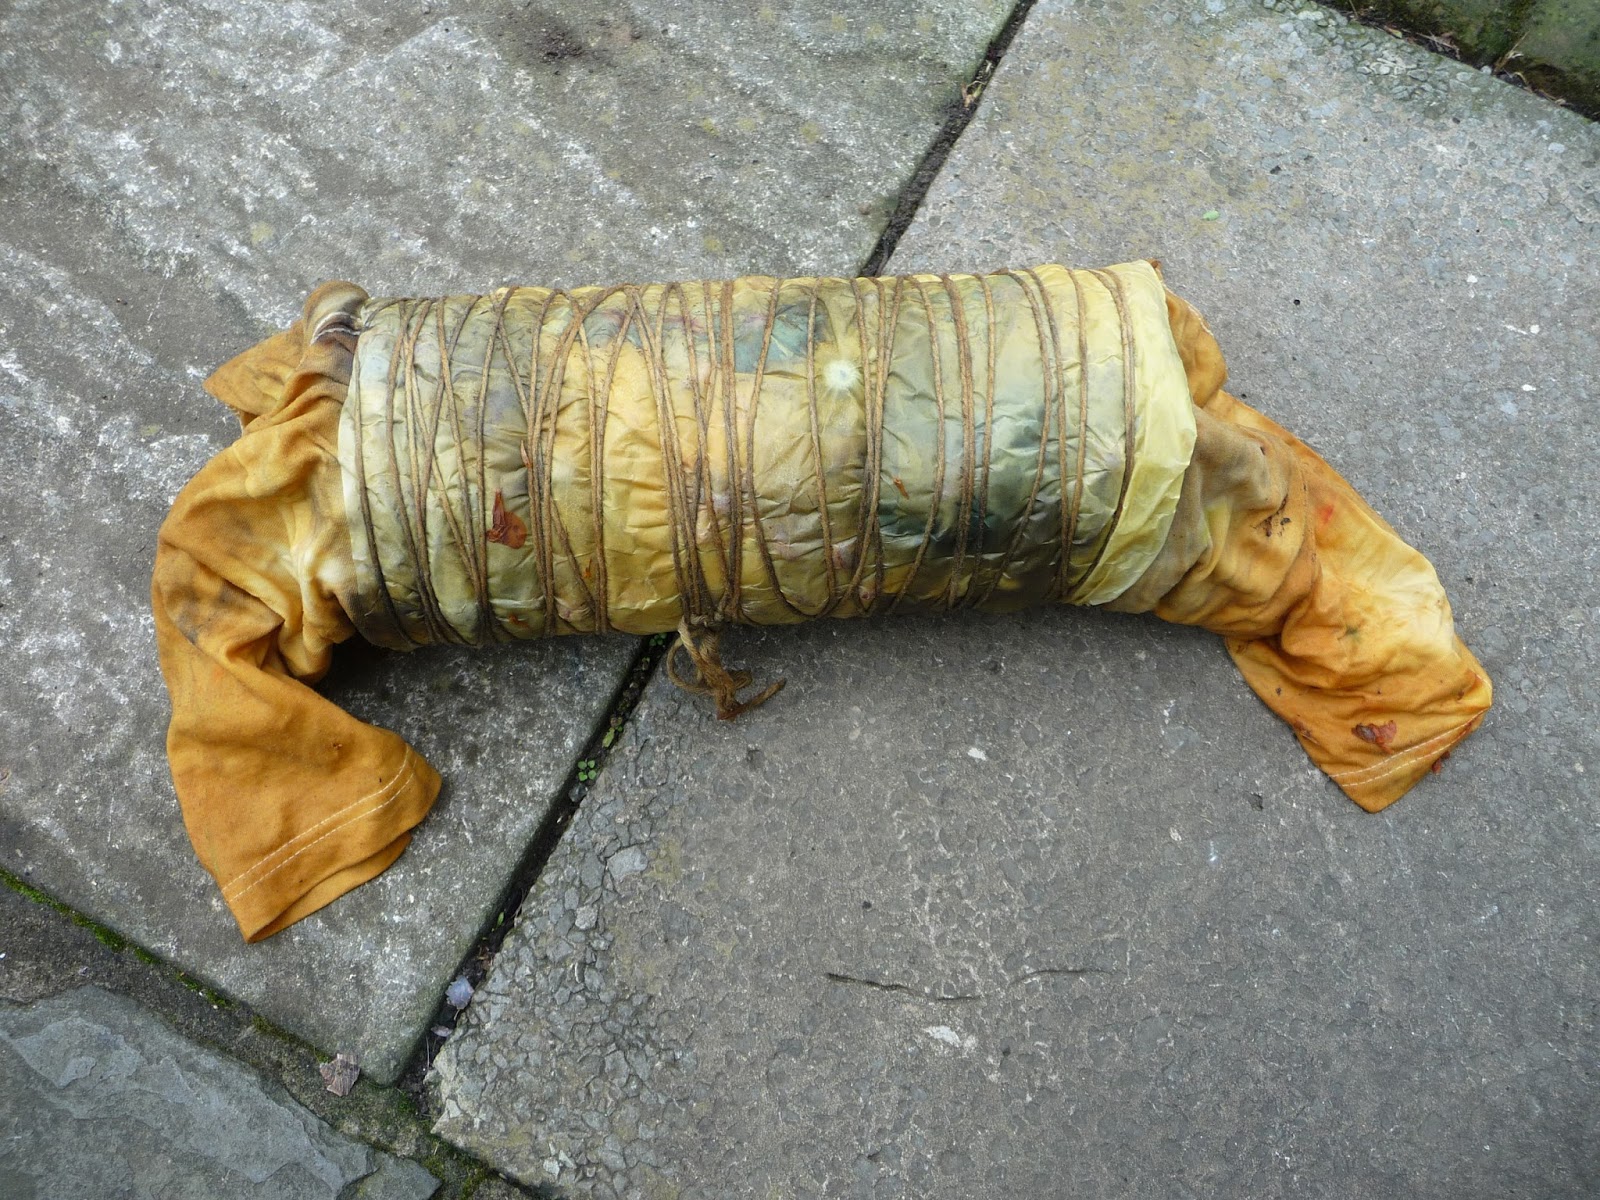
"Maybe Mary will wear that Beulah jumper I knitted, if it gets cool in the evenings, sitting on her French veranda. Maybe the meadowsweet dye will remind her of her damp Welsh valley."
Elinor looked at me.
"Meadowsweet loves it wet, but face it, Beaut, Mary doesn't."