Friday 28 September 2018

Plant Dyeing with Autumn Leaf Printed Colours

Having a plant contact dye plant bundle ready to unroll adds a fine frisson of expectation to my morning cup of tea. I've been experimenting with a technique new to me and trying out the effects of various leaves when laid on plant dyed fabric and steamed with an iron blanket - here's the method I've been using.
This silk was mordanted with alum and dyed with Yellow Cosmos flowers. The warm orange colour the flowers gave the fabric is modified to a duller, darker shade where the iron blanket was pressed against it. Some leaves, like this sycamore, have diminished the colour of the silk, while protecting it from the iron blanket, leaving only a dark halo of iron around their edges.
Other types of leaves simply act as a resist, keeping the colour from the Yellow Cosmos unchanged beneath them, and a few leave their own dye colours. So far, none I've used have printed more powerfully than this purple from a red grape vine leaf, which has even printed its dye onto the cotton of the iron blanket. 

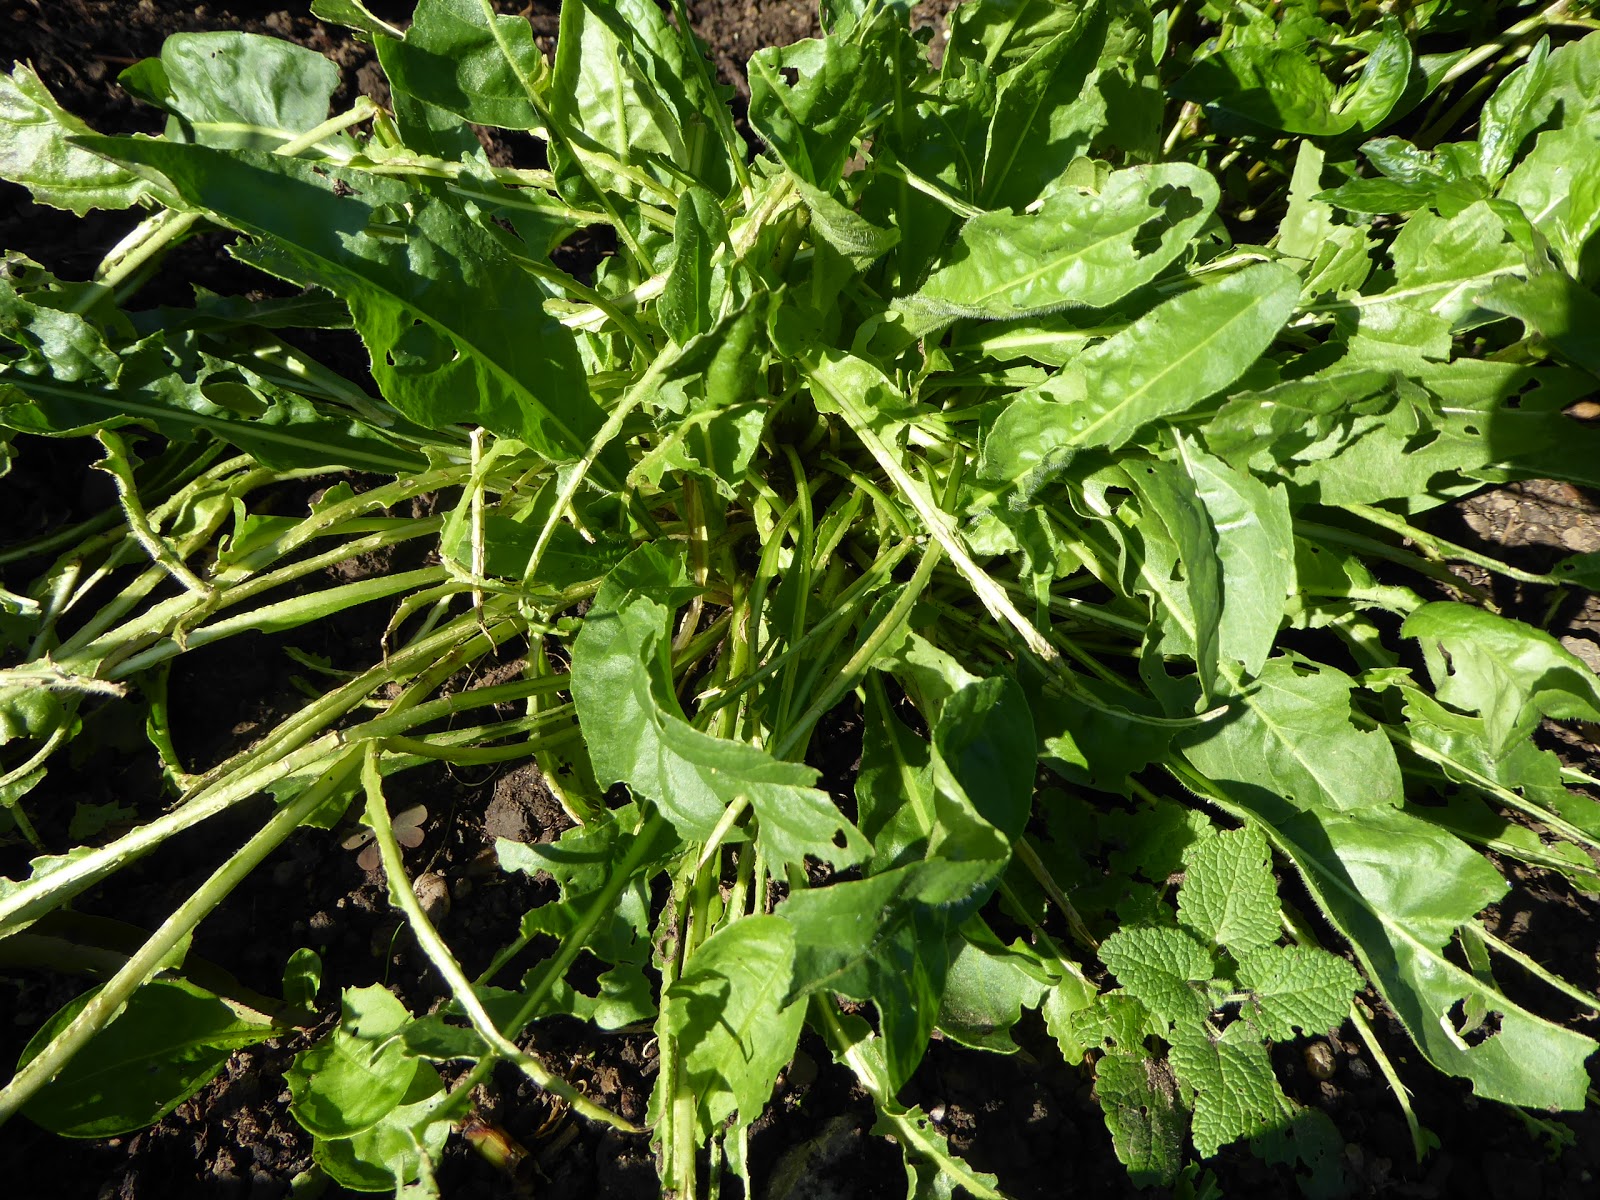
The grape vine leaves are green in early summer, darkening to red in August and already falling this September, though we have yet to have any properly cold nights. Sweeping them up after a week of high winds, I thought I'd try picking some of the remainder and simmering a big handful in an old saucepan for an hour. The water turned deep red and testing with indicator paper showed the dye was strongly acidic.
Taking out three samples from the pot, adding vinegar to one made it slightly more red, while adding soda ash to another instantly shifted the colour to a green brown.
These effects seemed much like those I've seen with berry dyes, which I have found wash out and fade rapidly when exposed to light.

I sieved out the grape leaves from the pot and added a short length of alum mordanted wool tops blended with some silk. After gentle heating and an overnight soak, the wool had turned a beige shade while the silk fibres had gone pink, which I've seen once before, when dyeing with deep pink hollyhock flowers


On that occasion, a hot steam iron instantly reduced the colour.

I thought I'd have another look at the first vine leaf printed silk, only to find my companion had been wearing it to go swanning around Cardiff.
"Make the most of that purple leaf print while it's still there, Elinor. When I wash and iron the silk, I don't think the dye will last."
"Just give it a little rinse. You've nothing much to do today, hand wash it for me and it'll be fine."
I put the scarf through the delicates cycle in the washing machine at 30 degrees centigrade with a pH neutral detergent. To my surprise, the colour only dimmed a bit and survived a steam iron. My companion scooped it back up and slung it round her neck. She twirled for me to admire her outfit.
"Off to Cardiff again, are you?"
"We can't all be playing in the garden all day. Some of us have to work, Beaut." 
"Ooo. Have you got a part in another film, or is it TV this time?"
Elinor posed as if to leap into the shrubbery with two guns blazing.
"Starring in a video game, Beaut. Today I shall be shooting aliens in the face."
"In a silk scarf?"
"In Virtual Reality, anything is possible. The computer nerds think purple leaf prints are hip, so #@me next time."
I stared at her.
"You want me to dye another scarf for you?"
"Activate Beast Mode, Beaut. Those leaves will soon be gone."
Which I took to mean yes.

I reckon the purple colour in these leaves must be an anthocyanin. Reading around on the internet, it seems that anthocyanins cause the dramatic colour change seen in some autumn leaves. Fugitive dyes, such as those from berries and red cabbage and hollyhocks are also made by anthocyanins. While it was too soon to say much, the first grape leaf print had at least performed better than berry dyes in the wash. I think this is unlikely to be because of tannins in the leaves, because blackberries have a high tannin content too. Maybe the iron blanket helped, or maybe grape vine leaves contain a different type of anthocyanin.
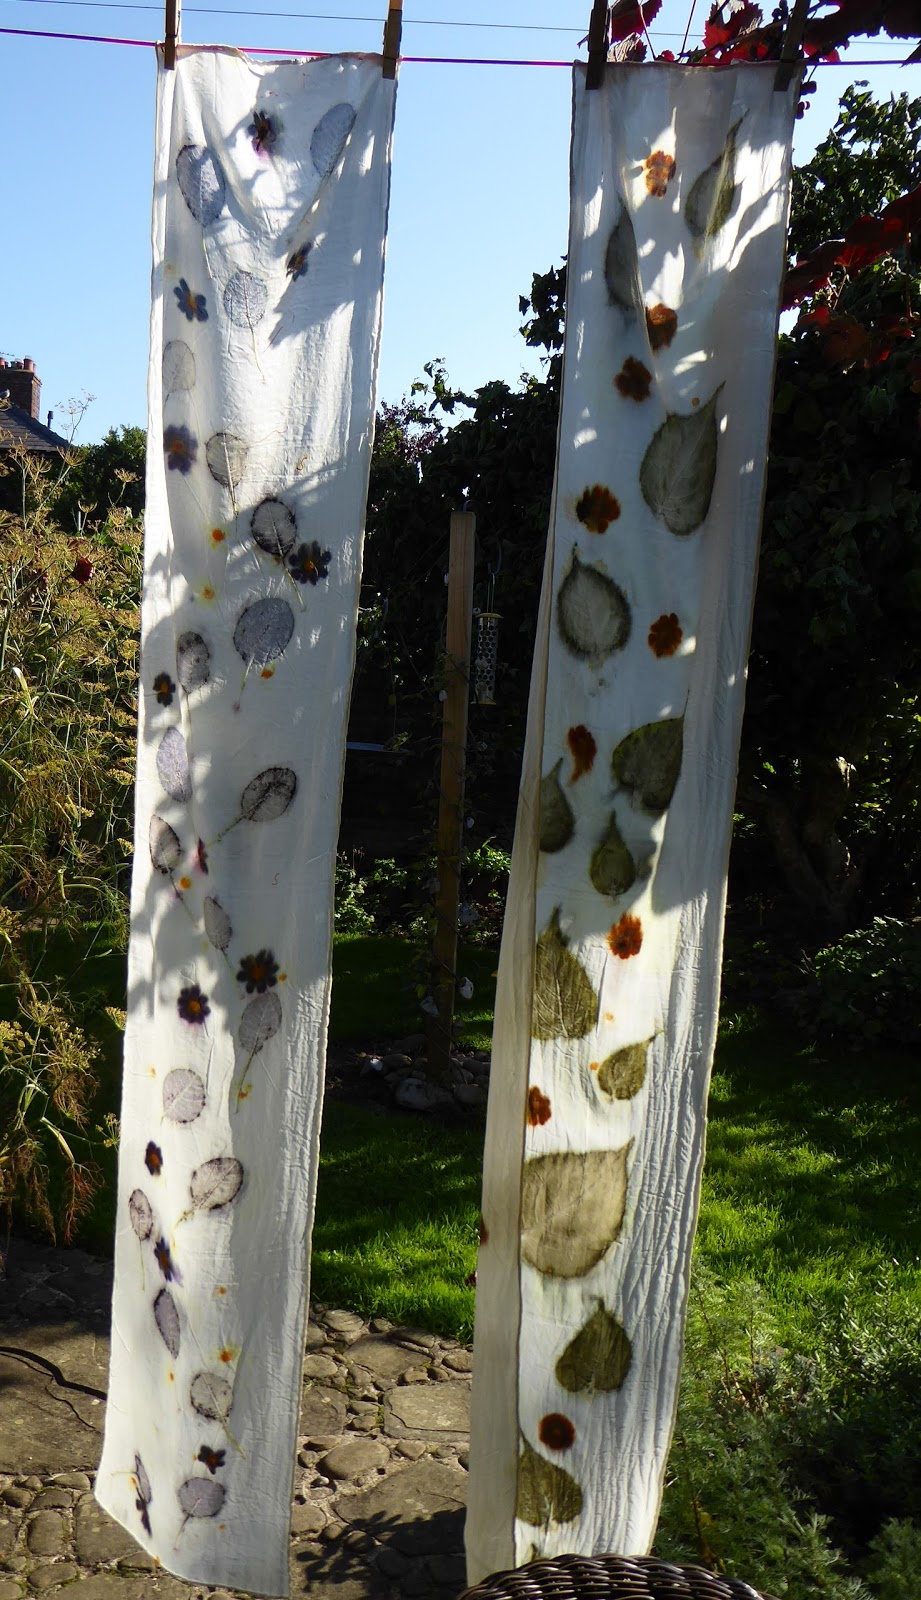
Anyway, I have printed two more silk scarves, alum mordanted but with no base layer of plant dye. One was was laid out with leaves dipped in a dilute iron solution (right) the other was rolled with an iron blanket (left). Both had a few of the last coreopsis flowers scattered among the leaves.
I think the reason most of these prints are paler than last week is because now, most of the leaves are withering and curling up on the vine. Very pretty, though. I'll just have to wait and see how well the anthocyanin pinks and purples stand up to washing and wearing. Not to mention shooting aliens in Beast Mode.

Friday 21 September 2018

Japanese Indigo Plant Dyeing and Overdyeing

This week, here are my reflections on dyeing with Japanese Indigo plants, overall, very happy, as the plants have loved a hot summer in Wales. During the heat wave, they didn't mind surviving on one good watering each week and dry or damp, they never get eaten by slugs, which is such a bonus in my garden. I'd say not only have the plants grown a bit larger, but also, there has been more indigo than usual in each leaf. I can wedge about 2kg leaves and stems into my dye pot and looking at this year's results, I have had perceptibly more indigo blue out of each dye session than I have in previous, cooler damper years. 


Much as I prize the continuity of use of woad, which stretches back into prehistory, sometimes I wonder why I bother growing it. Mostly, mine has provided lunch for slugs. Half the woad plants have been munched to extinction and the remainder are looking lacey. Hopefully, they will survive to flower next May so I can save seeds and keep the stock going. 
The Japanese Indigo plants seem robust enough to take over the garden, except they always get killed off by cold weather before they can set seed. I've found their dye content diminishes as autumn sets in, so this month, I've been uprooting plants from the border, steeping pots of fresh leaves and hunting my cupboards for more things to dye blue.
Using the method on the Wild Colours website with dithionite to deoxygenate the vat, I can get fairly deep blues from the first dip and then medium blues with repeated dips, but achieving a consistent shade is beyond my powers. This is a whole kilogram of chunky yarn I dyed to knit into a jacket. You can tell the finished object is going to be as stripey as ever.
Despite repeated dips in the vat, the shades I get tend toward baby blue and I'd prefer a colour with a bit more guts. I have tried overdyeing naturally coloured wool with indigo and I think greys turn out better than browns. These skeins were millspun from white Llanwenog sheep, blended with increasing amounts of Black Welsh Mountain fleece to create the two tones of grey. Each skein was divided into four 25g portions. From the left, you can see the results of dipping the first portion of each shade while the indigo vat was moderately strong, the next three skeins were dipped when the vat had been partly used up and the next three were dipped when it had become very weak at the end of the session. The final three skeins on the far right show the original, undyed colours. The overall effect reminds me of the colours of both sea and sky - on a typically wet Welsh day. Note to self, for clothing, I think I'd like the lighter grey with an indigo overdye.


My experience of overdyeing other plant dyes with indigo has been fraught with misjudgement. Whether I dye with indigo before or after dyeing with a yellow, balancing the strength of the two colours is a bit of a nightmare, particularly given the unpredictability of the strength of fresh plant dye baths. Usually, I have too much blue and the wool ends up turquoise.


This year, I dyed some tops with a strong yellow weld dye bath (right) and then overdyed with different strengths of indigo (left, only I didn't try overdyeing any tops with that deepest blue at the top). The three shades of Lincoln Green didn't come out too bluish, but I still can't say I'm thrilled with the colour.
Comparing the overdyed Lincoln Green yarn on the left of this picture to the iron modified weld dye on the right, I think I prefer the latter. Blue adds freshness to the green, but loses warmth. And anyway, with a single dip, the dye I get is always patchy, with repeated dips, the blue gets too strong and I am back into turquoise territory.
Lately, I thought I'd try steaming an indigo dyed silk scarf with oak leaves and an iron blanket, same method as this post, only with a few of the oak leaves also dipped in a weak iron solution. It's been very blowy this week, great for collecting leaves, not so great for working outdoors in daylight. Still, the colour in this photo taken in my kitchen shows what I remember starting with, a fairly light blue, uneven indigo dye. I expected the iron from the blanket to add a grey overlay wherever it had been pressed against the silk.
When I unrolled the bundle, the oak leaves had taken up an iron halo and left a yellowish shade of their own dye, but far from darkening to grey, the indigo blue background looked much paler. Maybe the heat of steaming destroyed some of the indigo? Apart from those silhouette effects, there isn't much evidence of the iron blanket having been there.
All very interesting, there's always more to learn. I can dip the silk in another vat, if I decide the blue is too anaemic. There's still plenty of Japanese Indigo growing in the garden and no sign of cold weather yet. Plants in the greenhouse are flowering and I think the seeds are maturing early, so I may not need to take cuttings.

Thursday 13 September 2018

Dyeing with Iron Dipped Leaves Steamed in a Bundle

Last week, I wrote about using half the leg of a pair of linen trousers in a trial run at printing leaves in a bundle with an iron blanket. This week, you will learn the fate of the other half a leg. The linen had been mordanted with aluminium acetate and was soaked, squeezed out and smoothed over a layer of baking parchment ready for its test. I have used leaves dipped in iron in plenty of dye bundles before now. The thing I wanted to look at was the effect of steaming the bundle, rather than using my usual process of simmering bundles in a plant dye bath. All the leaves were dipped in a weak solution of iron before being laid out.
Untied after being steamed for two hours and left to cool, it was pleasing to see dark iron prints from the underside of the oak leaves and no surprise to find the oak leaves laid face down had left little trace. Interesting to see that halo around the outside of the sycamore leaves, though. That doesn't happen with iron dipped leaves.

The whole piece looked quite exciting while wet, but on reflection, I realised much had been added to this appearance by both iron and yellow chamomile dye, seeping up through the greaseproof paper from the iron blanket trial piece, which had been rolled underneath it and steamed in the same bundle. Once I had realised the limitations of a greaseproof paper barrier, I had much more success using cling film with iron blanket bundles. It seemed well worth using a cling film barrier to have another look a steaming leaves dipped in iron.


I laid out leaves on a silk satin scarf, mordanted with alum. The linen results had at least suggested that lycestra, purple smoke bush and maple leaves could print their own dye as well as an iron outline. I dotted on a few Dyers Chamomile and coreopsis flowers to add a bit more colour, just in case. The scarf was rolled up together with its layer of clingfilm, tied with string and steamed for a couple of hours.


The leaf colours did show up much better this time. Quite a thrill, especially that purple/blue from the smokebush leaves, but the edges of many of the prints were blurred, as if stretched downwards. After washing and ironing, it was clearer that the stretching effect was worse in some parts of the scarf than others. I reckoned the fabric must have been too wet, allowing the plants' dyes to run. Which is an odd thought for someone who usually completely immerses dye plant contact prints in a dye bath. Steaming is a whole new ball game for me, worth pursuing because I do like the cleaner look and clearer background, though using clingfilm irks my conscience.
My next attempt was on two more alum mordanted silk scarves, this time wringing them out firmly after soaking to reduce the amount of water sealed under the clingfilm during steaming. It worked, there was little or no bleeding of dye around the edge of each leaf or flower. Oddly enough, though clingfilm prevented iron from seeping through the layers, a little of the intense dye from the coreopsis had got through, making paler dots on the silk rolled in the layer above and below each flower. Dye molecules must be smaller than iron and clingfilm must be a semipermeable membrane. I am going to find some reusable plastic sheets for future tests, maybe thicker plastic will confine the plant dyes more completely.
My companion, Elinor Gotland, realised I was ironing silk and trotted over.
"Fair play, Beaut, those scarves are classy. Not like your usual jumble of colours at all."
"Mmm. Haven't I been restrained, just using one kind of leaf and one kind of flower?" 
She just looked me up and down and sighed.
"To be honest, there's not much point me explaining the aesthetics of elegance to a woman wearing her husband's old clothes."
"It's my Bohemian look. Arts and crafts vibe."
"Hoobydouche. If you were an artist, you'd understand about negative space." 
Elinor shook out the first scarf with those bleeding edges on the prints. I waited for some sharp rebuke for wasting good silk, but she scooped it up in delight. 
"OMG, I'm having this one. It's practically Salvador Dali."

Friday 7 September 2018

Iron Blanket in a Plant Dye Bundle - A Better Method

It's over a year since I first wrote a post about using an iron blanket. I remember doing more bundle dye experiments when all the leaves changed colour in 2017 and I did get closer to the iron blanket effects I hoped for
A couple of weeks ago, noticing some of the oak leaves were already falling, I managed to find the pieces of cloth I printed last year, but really couldn't bring to mind quite how I had done it. Unfortunately, last autumn I had little headspace to spare and wasn't blogging. To save me forgetting again, today I'm writing a reference blog about how I have now retraced my steps and moved a bit further forward.
Taking the steps in order, first scour some natural fabric by washing it with soda ash to take off any oils, waxes or stiffeners. Next, mordant wool and silk with alum, cotton and linen with aluminium acetate. Then dye it by simmering the fabric in a plant dye bath. This picture shows linen, silk and wool pieces, all dyed with Dyers Chamomile flowers.

Now the iron blanket. Home made iron acetate solution, made by leaving rusty metal in a mixture of water and vinegar for weeks or months, is inevitably of variable and unknown concentration. I'd say that in practice, the results of using the contents of my rust filled jam jar suggest my homemade solution is usually pretty weak. For the purpose of investigation, I made up a measured solution of ferrous sulphate, pouring 100ml boiling water on 10g of the powder and stirring, so that I would know 10ml contained 1g of iron. Using a syringe, I drew up 20ml and added it to a washing up bowl half full of water. By eye, that 2g of ferrous sulphate gave the bowl a very pale orange colour. My blanket fabric was a fairly thick cotton, cut from an old curtain. It was soaked in the bowl of iron solution for several hours and squeezed out just before using it.


My dyed fabric had been dried without rinsing, straight from the dye bath. I put a piece of linen (half the leg of some loose trousers) to soak in plain water and collected a selection of leaves from the garden, plus oak and sycamore from the trees down the road. I unrolled some baking parchment on the table, smoothed out the wet dyed linen on its surface, laid out the leaves, some face down and some face up, then placed the iron blanket over the top. All the layers, baking parchment, dyed linen, leaves and iron blanket, were rolled up around a section of plastic drainpipe, then bound firmly with string.
The completed bundle was stood on a trivet inside a very large pot with water in the bottom, the lid was put on and the pot was heated to the boil before turning the gas down low to keep steaming the bundle for two hours. I left it overnight to cool and next day, unrolled it. Below is a photo of the dyed linen and the iron blanket, laid out side by side. Not a ravishing success, but much can be learned from looking at it. As expected, the leaves varied in their affinity for iron, which I believe may be due to the amount of tannin each species contains. Most had made blacker shapes where the underside of the leaves faced the iron blanket than where the underside of the leaf had faced the dyed cloth.


This effect showed up even more clearly once the iron blanket had dried out. What happened on the dyed linen is less obvious, though much more important. I decided that the central oak leaf in this photo had worked best as a resist by being laid with its underside facing the iron blanket, as the yellow is brighter than the adjacent oak leaves which had been laid with their undersides facing the linen. I had rather hoped that where the iron blanket had been in direct contact with the linen with no leaf in between, the iron would have modified the chamomile dye to a warm green. As you can see, the yellow actually went more of a dark khaki.

Unexpectedly, the Japanese Maple and the ginkgo leaves seem to have sucked the yellow dye out of the linen. I had read people recommending both of these types of leaves in the past and been disappointed that I couldn't get any dye or iron dip print from my trees. I am delighted to discover that the damn things actually work by 'exhausting' other dyes :)


The hardy geranium aka cranesbill leaves had left beautiful, if subtle prints, full of detailed edges and veins. I grow several varieties, because they make lovely prints in contact dye bundles when dipped in iron. In spring, some types will print with their own yellow dye. Sorry, I don't know the names of the different kinds, but this is what the plants look like at the moment.


Anyway, since they will soon die back when the cold nights come, I thought I would include cranesbill leaves in the next test piece, this time a good silk scarf. I laid the leaves on densely, hoping for pale shapes from the exhaust effect of maple and ginkgo leaves, fine patterns from the cranesbill and bold yellow resist shapes from the oak.
Unrolling the first turn of the bundle looked great. Unrolling more turns revealed much darker silk and far less clarity of leaf prints. Time for a cup of tea and a fag and a careful think. I decided that the baking parchment wasn't preventing iron from the blanket soaking through to the layers rolled underneath and there was just too much iron everywhere. 


First modification of the technique was to reduce the amount of iron. For my next silk scarf I used an iron blanket cut from a thin, worn out cotton bed sheet. It was soaked in the same washing up bowl of iron solution, but wrung out firmly after soaking. I had read before about people using layers of clingfilm in their bundles, but never fancied the idea.
Clingfilm isn't biodegradable or reusable and anyway, I thought it might melt during the steaming and weld itself onto the bundle. Funny how buggering up an expensive piece of silk has changed my attitude, I felt quite ready to give cling film a go. After steaming, the bundle looked as though it had been shrinkwrapped.
Happily, the clingfilm peeled off with no trouble. It had confined the iron from the blanket, allowing it to work only on the single layer of silk against which the blanket was pressed. With less iron available from the thin cotton blanket, the background colour looked much less gloomy, though you can see deeper lines where the string had squeezed the dyed silk most tightly. Taking away that shroud of darkness made it much easier to examine the actual leaf impressions. The ginkgo had had the most powerful exhaust effect though I could now see that the sycamore had also reduced the strength of the chamomile dye on the linen.
With the clingfilm there to keep all the dye localised under the leaf, for the first time in my experience, the Japanese maple had left its own pink dye and the purple smoke bush had added a blueish green. Thick oak and fern leaves had acted purely as resists, keeping the iron blanket off the silk but neither exhausting nor adding anything to the dyed linen.
I am truly delighted to have made a good iron blanket printed silk scarf. With less iron in it, even the effects on the iron blanket looked more interesting. Comparing the baking paper roll against the clingfilm, I shall have to weigh concerns about their relative biodegradabilty against my preference for sharp results.

Anyone got a great idea for recycling steamed clingfilm?