Friday 27 December 2013

Knitting Socks

'Socks for Christmas' sounds more like a threat than a promise. Hand knitted pairs spread the love better than a multipack of sports socks, but even so .... they look misshapen. This is not because the knitter was at home to Mrs Cock Up. Custom made woolen socks fit in a way that elasticated tubes simply don't.
These are Hollyhock Socks, stripes knitted with the small skeins of double knitting wool I dyed with hollyhock flowers last summer.  I gave them to my daughter for her eighteenth birthday - only as part of her present, I'm not completely deluded about how marvellous they are.  

I made a right performance of knitting gloves and long ago gave up trying to manage anything suitable for the human hand.  In magazines, sock patterns with fabulous cables and lacework have me sighing and turning the page.  For me, turning the heel, shaping gussets for the instep and grafting the toes guaranteed I'd get stuck and end up stuffing the ufo to the bottom of the stash, a thorn in my side forever.

Then I came across this phototutorial by Sally in Wales on Downsizer.  The title 'Socks Demystified' was most encouraging.  Unlike so many others, the pattern is for aran or chunky wool.  Thanks to the photos and explanation, at last, I understood the grand scheme of sock anatomy.  I managed to complete a pair of socks for my husband, using Suffolk Fleece dyed with yarrow. He wears them often. Substantial and successful.  Notice the special stitch for the heels to take hard wear in boots   Most satisfying.

The Hollyhock socks were made following a very similar pattern for double knitting wool. I found using double knitting wool took a great deal longer to make a sock, but then, I am fairly new to double pointed needles.  I imagine it would be a massive undertaking to knit a pair in 'sock wool', which looks about fingering weight.  The pattern is free here, also has helpful guidance for beginners, including step by step instructions for grafting the toes with Kitchener stitch.  The website invites you to donate to Medecins sans Frontiers, which is a timely suggestion, after the funeral this week of the British doctor who tried to help the sick in Syria.  

Steve's socks impressed my sister, who suggested I make a really thick pair for her partner, who will wander round the house in stockinged feet.  Welsh Mountain fleece is durable stuff, should take a battering.  I had some left after making a jumper, so I dyed part of it with coreopsis plants.  These are annuals and had flowered til November, but were on their last legs.  I read that the whole plant gives dye, not just the flowers.  It seemed a shame not to wring every last drop out of them when clearing the border.  While the colour is not the rich orange of summer flowers, this golden bronze from stems and leaves was not half bad.   Fun to spin chunky and a really quick result, as I reduced to 30 stitches cast on. Wrapped up with the latest Uhtred book from Bernard Cornwell, that was one Christmas present sorted.


My latest sock offering has taken forever to complete. Serious knitting in the run up to Christmas.  Steve has had to volunteer for the risky 'sock of death' manoeuvre - still not long enough?  No, it is not a trick of the light, the socks are slightly different colours.  One is made of wool dyed with bracken tops picked later in the summer than the other. Happily, my youngest brother habitually wears odd socks and would actually feel uneasy in an identical pair.  I am pleased that neither skein has faded after six months or so in the wool basket.  Making a very concentrated bath has given better dye fastness than I got last year.  The green is bracken overdyed with woad.


Socks for Christmas.  Perhaps I should have put a satsuma and chocolate coins down the toe end.

Friday 20 December 2013

The Knitted Work Bag Fiasco


My friend BG prefers to be surrounded by saucers with dried up blobs of paint and half empty glasses from which she accidentally swigs turpentine. Things do not go wrong in her projects, they just develop in unexpected directions.  Mostly toward a distinctively BG style of uncanny beauty.


I prefer to feel organised, but my knitting patterns don't always work out as intended.  I struggle to regard such accidents as 'happy'.  BG's Christmas present was meant to be a tote bag with a draw string top, to keep her craft stuff safe when she comes round to my house.  I have rarely known her go out without at least three bags, all of them inadequate and one near to bursting.  The work bag wasn't a bad idea, it just turned out to be one of those projects plagued from first to last.

First, the wool was dyed with weld, a trusty source of bright yellow.  Lovely.  Then I dabbled in the less predictable alchemy of woad.  Overdyeing did not give the deep shade of Lincoln Green I intended.  Over optimistic about the amount of woad in the available leaves, I ended up with paler greens and yellows. Well, it still looked ok.  Unfortunately, the skeins were hung up to dry next to some other wool dyed with coreopsis.  The wind blew them all into a tangle and random orange stains leaked into the green.  Bugger.
Knitting a square base seemed like a good start.  Making some increases in the middle of the straight edges was supposed to make it more capacious and rounded, but actually came out awkward.  Hey ho, too late to frog it, I've still got socks to finish before the festivities.  Not to mention purging the fragrance of old dog from the sitting room before guests arrive.  
Knitted furiously round and round on a long car journey, the bag came out too short, even though I used up every scrap of dyed wool.   Chunky yarn on 4.5mm needles does give a good firm fabric, only less of it than I expected. 
The final straw - I found the drawstring wouldn't close the top properly.  That firm fabric does not scrunch up much.  Right - to the washing machine. Time for the old 'Reshape while damp'. 

Like Alexander Fleming's laboratory assistant, peering at the mould killing off the bacterial colony in his petri dish, I think the result could be A Good Thing After All. 
I shall present BG with the last word in needlefelter storage baskets for bits of fleece and scrap yarn.  At least she can see what is in it without emptying the lot onto the floor. It will be called 'Who Left the Lid Off?'


The pattern can stay on the back of an envelope.  If I manage not to lose it, this trial and error might come in handy for some future design.  

In the meantime, it makes a homely nest for a needlefelted bird.

Friday 13 December 2013

Making Needlefelted Flower Brooches and Hats

I recently discovered that Dorset Poll fleece needlefelts quickly into an open, bouncy fabric. Having made a brooch for a Herdwick hat,  I needlefelted another flower directly onto a bag I crocheted with the rest of the fleece. 
Herdwick yarn does not try to felt together when you scour a skein.  I put a small crocheted piece through a 95 degree centigrade wash cycle with some old towels and it barely shrank at all.  If this hat got dirty, it could go through the wash with no trouble, as long as the brooch was unpinned first.  It is good to know which fibres won't pill or felt with hard wear.  I've had a go at needlefelting with Herdwick and find it will mat up quite readily into a very open, hairy brooch.


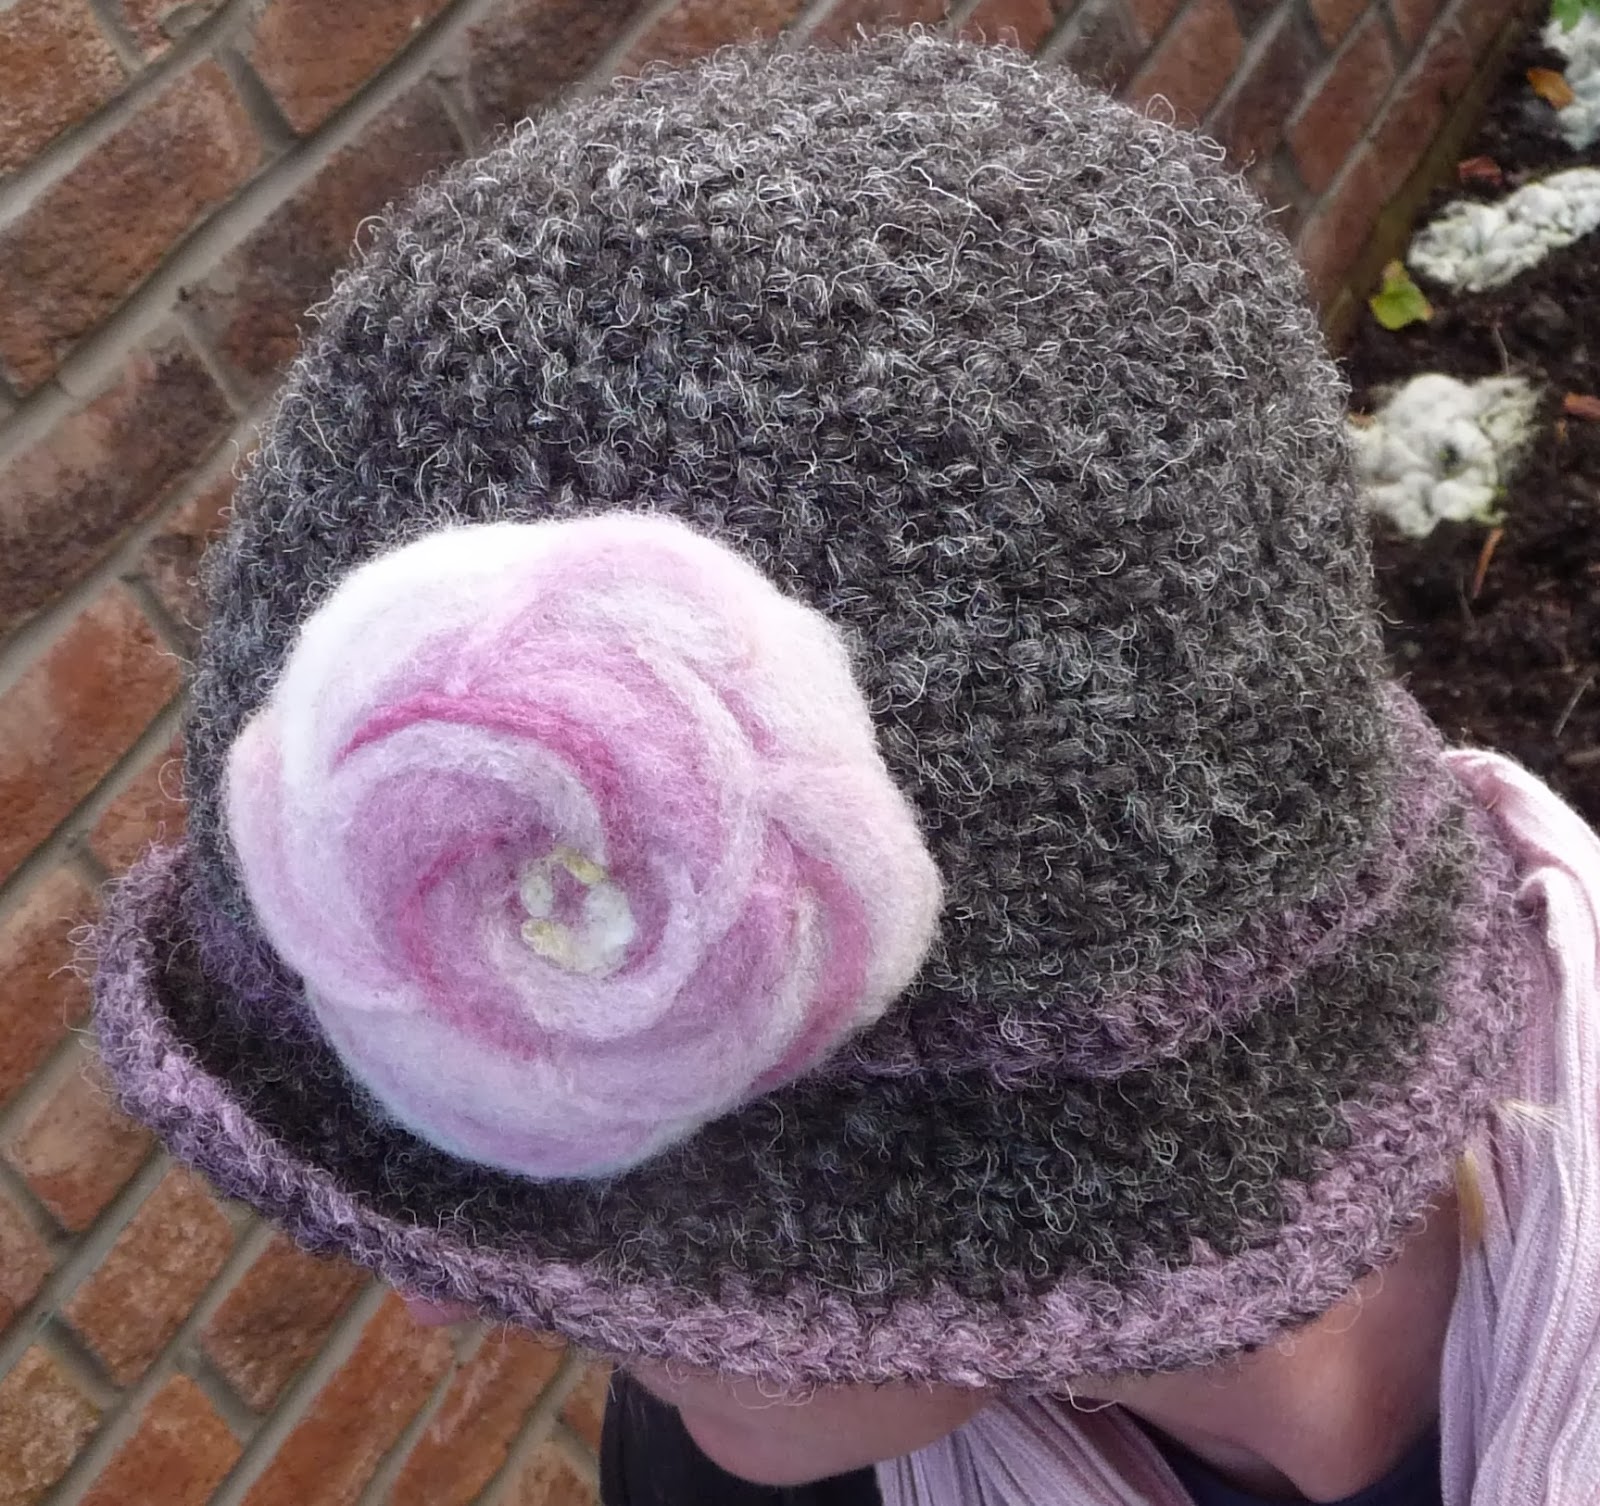
Needlefelting the Dorset Poll gives a full bodied, but smoother effect.  After kind encouragement when I showed off the hat on Ravelry, I decided to blog about how I made the flowers. Inspiration for the general idea was a picture of a peony.  The needle and brooch back are from Adelaide Walker, roving was combed from the back end of my Dorset Poll fleece dyed with lichen. Felting onto the curved surface of a child's sponge football means the finished brooch has a three dimensional bulge, which works well for a blowsy blossom.


First,  stab the needle through the tail end of a darker shade of roving, curl the roving round, not aiming for a perfect circle, felting it on lightly.  Overlap slightly with an outer band in a lighter shade of roving, needlefelting round until you have the size you want for your brooch. Peel it off the sponge ball before it gets too stuck and needlefelt from the opposite side to firm it up.
Turn it back to face you.
Add shorter segments of pale roving over the top, a bit like the petals in the picture, then add darker curves like the shadows.


Attach the brooch back by felting a short stretch of roving first through the three holes in the bar, then along its sides. Finish by felting on stamens.


It occurred to me that I could make a hat by felting a whole half of the football.  A basic skullcap crocheted in yarn from the same fleece was stretched over the ball as a base.


Then roving was felted over the top in much the same way as the brooches.  I got a bit carried away with doing swirly 'petals'.  What started as a simple, if very pink, winter hat, turned into a madly exotic peony.   
My sister Pip is probably the only person who would wear this, so I gave it to her straightaway.  It actually works, if a bit liable to fall off.

The more pedestrian stuff is getting packed up for Christmas.


Friday 6 December 2013

Hand Spinning and Dyeing Herdwick Sheep Fleece

This is not just any Herdwick sheep, this is UK564083 00014. She is a two crop ewe, (three years old) and had two lambs on 10 May 2013.  On 14 May she was shorn and on 24 October, I bought her fleece for £4.
It arrived in a box, carefully rolled so it was easy to lay back out again.
Fully skirted, hardly a twig or seed left in her wool, the locks were open with no matting, all the greys from almost black to practically white.   I have never received such a beautifully presented fleece, let alone had the opportunity to pick one from a selection of photos or been given details about the sheep themselves.  If you would like to buy a Herdwick fleece, I recommend you contact scocha on Ravelry.  She keeps other breeds too.  The photo above is shown with her permission.


The long fibres are crisp and wavy, rather than tightly crimped, with a shorter, finer layer at the base.  Though this sheep lived in Scotland, the breed originated in the Lake District. I had read that Herdwick sheds water more efficiently than other fleece and can confirm that scoured skeins dry out in no time.  What a good strategy for a rainy climate - instead of producing oils to waterproof their wool, Herdwicks simply don't get wet. Visions of UK564083 00014 tossing aside an umbrella and giving it a bit of the old Gene Kelly - Singin' in the Rain.  Anthropomorphism?  Beatrix Potter, eat your heart out.


Combing the locks did not go well. The undercoat got separated out with other shorter fibres, but drafting roving off the comb was frustrating.  The fibres did not want to drag a continuous flow behind them, so I kept getting handfuls of one staple length.  


Carding makes a bouncy rolag. Using high twist, it is quite feasible to woolen spin a fingering weight yarn. 

Being such clean, dry open locks, spinning from the fold was a delight.  First time I have been able to spin without so much as flicking tips with the dog brush. No preparation was needed before spinning an 'artistic' aran or chunky wool - what a pleasure to work straight from the fleece! All credit to scocha, who clearly knows what a spinner values.


I divided the wool into darker and lighter halves.  As the top photo shows, darker locks came from the chest and shoulders and the dark yarn proved softer.  I've done very little dying on naturally sheep coloured wool, which is lovely anyway. However, I did wonder what the effect might be on the lighter yarn.  I had just fermented the lichen I collected after the October storms.

Since the dye was ready to use, I brewed up a vat for a couple of the paler skeins.  The picture above shows the three colours and weights of yarn I had to choose from.

A good looking hat was featured in this month's Purl Two Together news.  This struck me as the perfect purpose for wool that doesn't get wet.  Better still, the Novi Hat pattern by LThingies is free.  I used the softer, darker wool spun about aran weight, coming down to a 4mm hook to get the right tension. The needlefelted brooch is made with Dorset Poll fleece from the same dyebath, so you can compare how the grey fibres sadden the colour relative to the effect on white fleece. Some comparisons are odious.  There will be no comments about the wool looking better on the sheep.


Friday 29 November 2013

Making Lavender Heat Packs with Knitted Covers

First real frosts last weekend.  First time this autumn I have put a match to the woodburner in the kitchen.  Quite relish sitting by the fire, though I hate coming home from work in the dark, particularly as it is still nearly a month til the shortest day.  Which suddenly feels like no time at all when I remember I need to get Christmas presents sorted.

A lavender heat pack is an estimable project.  Apart from making welcome presents for anyone over forty, they are a great way to use small dyed skeins, test out ideas for fair isle patterns or practise new crochet stitches. 

The principle is straightforward. Knit a bag, then cut an old tee shirt up to make a slightly larger inner bag. Buy a bag of pearl barley or other grain from the value range in the supermarket and add your preferred dried herbs.  Fill the inner bag loosely.  If you are making a larger pack, sew  divisions to stop the barley all going to one end . 

Lavender is such a good tempered plant and so heavenly to brush past - I rarely pick the flowers in bud, like you are supposed to.  The scent is ideal for heat packs, soothing and calming.  It costs surprisingly little to buy a whole kilo of dried lavender.  Selotaped shut, my bag has lasted a couple of years and the remainder still smells wonderful.

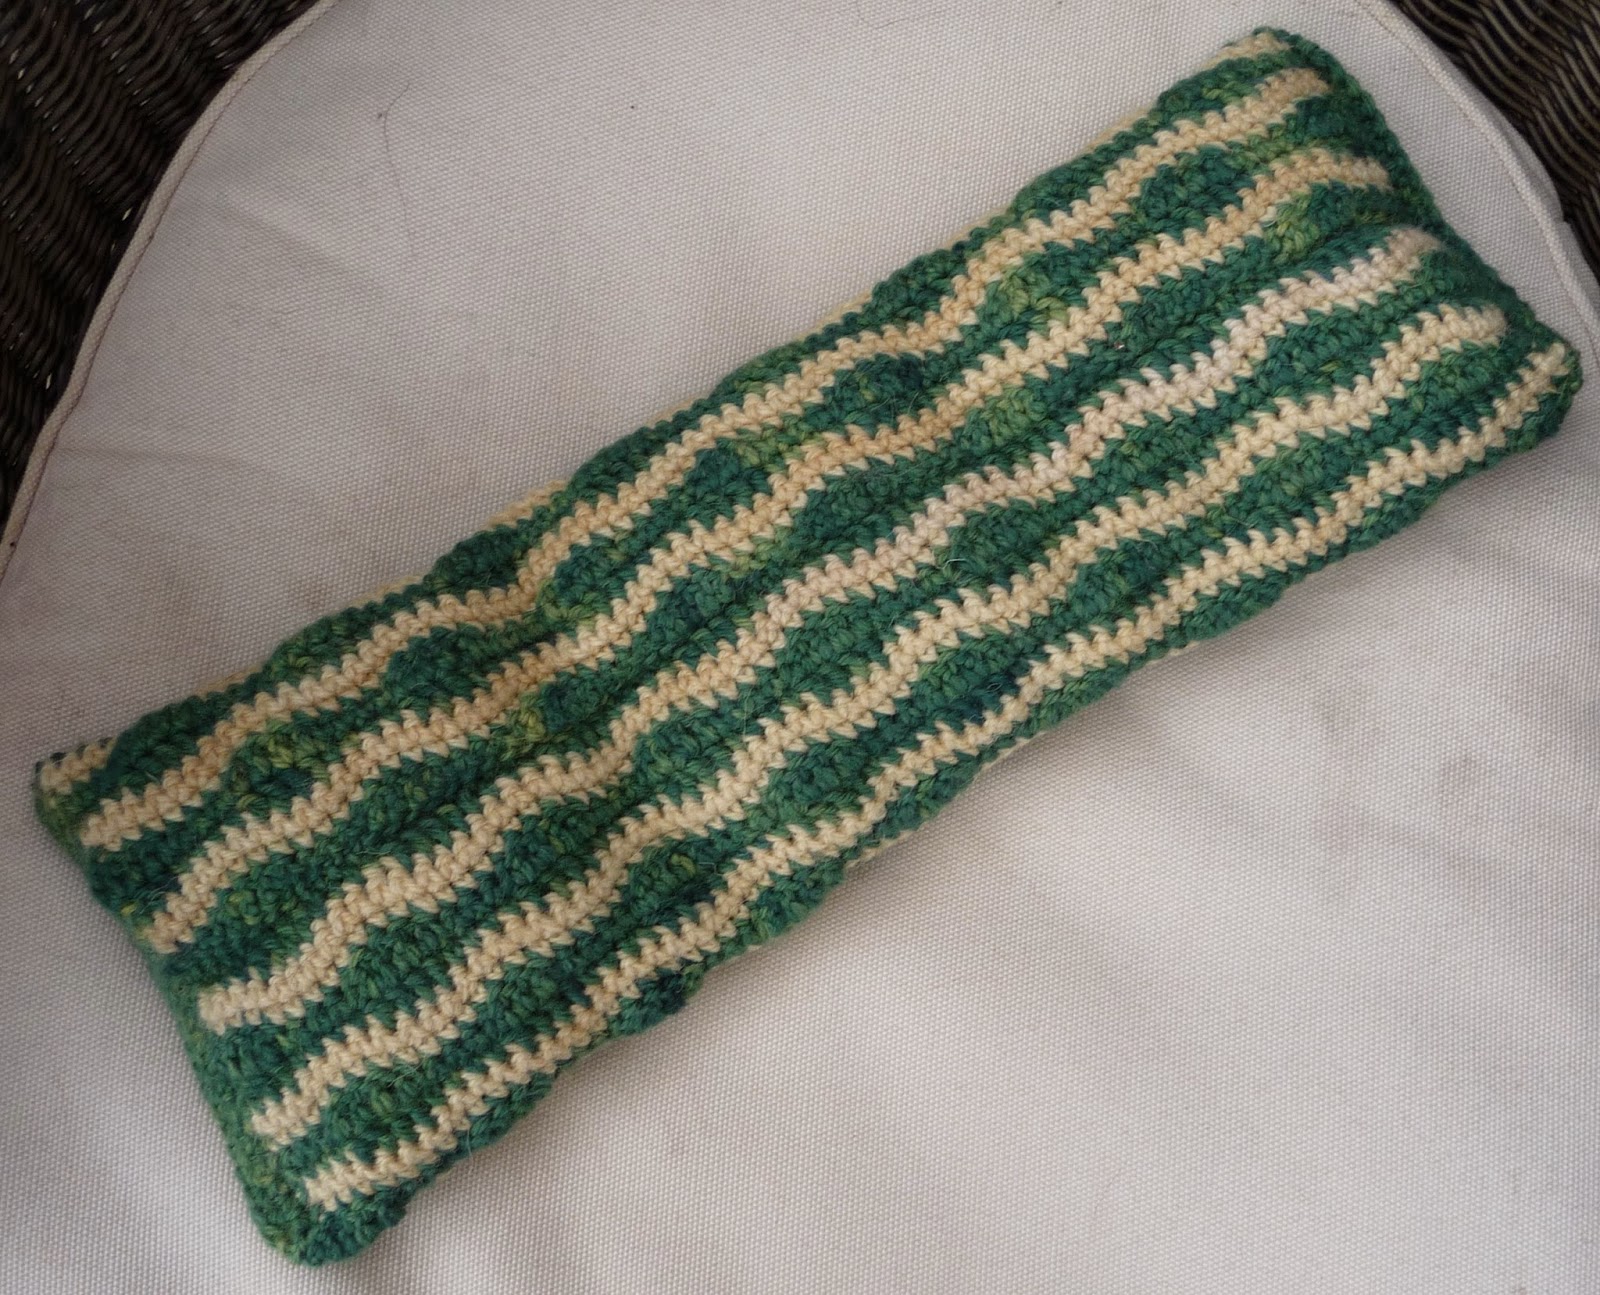
made a full shoulder and neck heat pack while I was finding out how a Suffolk fleece would knit up in cable.  It turned out to be badly discoloured and too coarse for a jumper, but at least I had a functional item to show for the effort.

Last summer, I entered the following pattern in a competition. The rules said the project had to use less than 30g of alpaca dk yarn.  A small lavender heat pack to put in your pocket on a cold day seemed a cunning plan.  

The pattern below didn't win, but last week, I tried out the end result and it does work. The alpaca is wonderfully soft, not my own spinning, though I dyed half of it with woad.

Winter Pocket Warmer Pattern


Materials


23g double knitting alpaca
(11g for each piece and a length for crocheting them together)
4mm knitting needles
2mm crochet hook
Two pieces of fabric 16cm2
Needle and thread to sew them together
One mugful of pearl barley, or pearl barley mixed with dried lavender or other herbs
Optional – essential oil

Main Piece  – knit two


Cast on 27 stitches.
Row 1   K1 *P1 K1* repeat to end
Rows 2 to 4, as Row 1
Row 5   K1 P1 K3 *K2 together, yarn forward, K1* repeat to last 4 stitches K2 P1 K1
Row 6   K1 P1 K1 purl to last 3 stitches K1 P1 K1
Row 7   K1 P1 K3 *yfwd, K1, K2 together* repeat to last 4 stitches K2 P1 K1
Row 8   as Row 6
Repeat rows 5 to 8 seven times.
Repeat rows 1 to 4
Cast off loosely in K1 P1 pattern.
Sew in loose ends.
Wash and pin out to 14cm2  to dry.

Cut the cotton fabric so that it is at least two cm wider than the knitted piece – a margin of over 1cm all the way round.

Hem the two pieces together, leaving half the width of the bag open at the top, and turn inside out.  It is important that the finished bag is slightly larger than the knitted cover so that it fills it completely. 


One mug full of pearl barley will fit easily into the bag, do not overfill or it will not fit in a pocket or be pleasant to squeeze in an adult sized hand.   Some of the pearl barley can be replaced with dried lavender or other dried herbs, so that the bag becomes scented.  If you are using plain pearl barley, you could put it in a bowl beforehand, add a few drops of any essential oil and wait half an hour for this to be absorbed, before filling the bag.  Sew the bag shut.

Lay the two knitted pieces with their right sides facing, top edges adjacent.  Using a 2mm crochet hook, starting about quarter of the width from one corner, push the hook through matching edge stitches on the two pieces and draw up a loop of wool from underneath, leaving a short end to secure later.  Push the hook down through the next two matching stitches and draw up another loop of wool through the first.  Continue in this way, leaving a row of loops on the surface of the seam behind.  Once you get all the way round to the top, continue for quarter of the width, then crochet through one piece only.  When you reach the starting point where the two sides are joined, turn and crochet back along the other side until you reach the centre point.  Chain three crochet loops to make a button loop and continue crocheting through each stitch until you reach the end.  Sew a small button into the centre opposite the button loop.


Put the bag of pearl barley inside.  Before going out on a cold day, put this pocket warmer in the microwave on full power for one minute.  It should keep its heat for quite a while, making your coat pocket a scented haven for a frozen hand.


Had I written this pattern for two pocket warmers, it would have needed more than 30g yarn.  If you can't rely on always having someone to hold your other hand and you happened to have 46g double knitting wool to spare, you could keep both hands warm. 

Friday 22 November 2013

Dyeing Wool with Galls, Acorns and Oak Leaves

I have been collecting oak galls, whenever I see them, with a view to using them for dyeing.  Their high tannin content is supposed to mordant wool at the same time as giving it colour.  While reading over this section of Jenny Dean's book, I saw she advises oak galls be used fresh. Mine were already pretty dehydrated in their dish on the windowsill, though I hadn't yet made any plan to use them. 
Part of my Dorset Poll fleece went through a suint vat that made it sticky and greyish, instead of cleaning it. Even after two goes in the washing machine, it was impossible to comb the locks out. Dried up galls and manky fleece - not much to lose on either count.


No careful advance soaking.  I bashed up the galls in an old envelope and boiled them in a small pan, stuffed about 200g of fleece in a big pot, filled it with water and poured in the brown fluid from the galls. Brought the lot to a simmer, only let it cool to 60 degrees, then drained the whole shebang into the sink, hoping the hot water and tannin might strip away some more of the grease on the wool.

About half the wool went back in the pot with hot water and a slug of iron made from rusty nails kept in a jar full of vinegar. Short simmer and the same again.  I rinsed the locks and laid them out to dry.  When I tried combing again, it did go much better.  Not light, relaxing strokes and easy drafting, but perfectly manageable.  I spun two fingering weight skeins, scoured them and had a good look at the yarn.  It was harsher than yarn spun previously from the best part of the fleece, but not bad.


I thought I would salvage the rest of the greasy wool and get a range of oak tones by going through the same process using a bowlful of crushed up acorns, then dyeing the remainder with a bucket of chopped up fallen oak twigs and leaves, come down after a big storm.  I did soak those for a week, while occupied with something else.  All the wool ended up very similar colours.
I'd reckon any tannin rich dye bath is likely not only to mordant, but also to degrease fleece.  After this experiment, I think it's possible you could go from dry, raw fleece to clean, dyed locks in one easy simmer. I do enjoy a measured, day by day process. Even so, this winter, I might try a shortcut or two with a bark dye bath and some raw Welsh Mountain Fleece.   


Steve has been angling for a new cardigan, bit of a pout when I said there wasn't enough of this wool, pink would not suit him and the iron dyed part was really too rough.  I tried carding rolags combining half silky, white Polwarth fleece and half the oak and iron dyed locks.  Spun with medium twist on the 10/1 wheel ratio and two plied to about double knitting weight, I got a soft yarn in pale brown shades.  
Though the combination worked out well, it was a bit of a pain in the arse to to tease out and card these locks.  I decided two balls of 50g each was as much as I wanted to do.

Looking for a scarf a serious cyclist could wear in winter, I found a free pattern called The Age of Brass and Steam on Ravelry.  I needed my knitting directory to make sure I did the yarn overs and the 'make one right, make one left' bits correctly, so it was slow going at first.  The way it all turns out is really cunning, easy when you have done it once.  

I call this The Age of Oak and Iron v The Age of Goretex and Lycra.
I used the fingering weight yarn I spun originally to make another kerchief on a smaller needle size, pictured here going back to its roots beneath the oak tree. 

Here are both my bat-like creations, returning to the wild.