Friday 30 November 2018

Filoplume Shawl by Bex Hopkins - A Review

A Tale of Two Filoplumes.

Hearing the hoofsteps of my companion, Elinor Gotland, I clicked off the Ravelry page and opened my email. She leaned over my shoulder.
"Can't fool me, Beaut. You've been looking at shawl patterns again, haven't you?"
I stopped pretending to renew the car insurance.
"I haven't knitted a shawl for ages and all my friends are talking about the new designs. Really, I'm just trying to use up my stash - there's a couple of variegated skeins of yarn just crying out to become something lovely."
Elinor was unmoved.
"You don't need another shawl."
"I'm thinking of Christmas presents."
A remorseless hoof prodded me toward the kitchen.
"You've already given at least one shawl to every woman you know who would wear one and several who wouldn't. Anyway, engage brain, think about your priorities for just one moment. Start doing beaded lace knitting now and it'll take you til Easter to finish. If you've got enough spare time for Christmas preparations, you can defrost this freezer." 

The worst thing about my companion is her good advice. Of course, I sneaked back to the computer later on, just to catch up with the gossip on Ravelry. When I saw that Bex had published a new shawl pattern called FiloplumeI was intrigued by its angled spine. And the name - a filoplume turns out to be kind of tufted feather, specialised for sensing a bird's flight speed and the wind direction. Donna had test knitted the shawl in a rainbow gradient as glorious as a peacock's tail display and it proved quite irresistible.  I pressed that 'Shop Now' button and Elinor arrived just in time for the printer to drop the pattern onto her head. She picked up the sheets of paper and gave me one of her 'disappointed but not surprised' looks.
"It's not lace, this one's an easy knit, Elinor, I'll have no trouble getting it done before the holidays." I sprinted upstairs to fetch my prettiest yarn.

Two false starts later, I wished I wasn't such an impulsive wool shopper.
"I might have to buy one of those cakes of gradient yarn, Elinor. This more subtly variegated skein just looks muddy in garter stitch ridges and the vibrant one I tried first was too lively all by itself. No-one could wear that much zing, I think I'll have to save it to be an accent on a solid background. Maybe I should buy some soft mid-grey."
"You are NOT buying any more yarn. What about all your handspun skeins, keeping them as a Christmas treat for the moths, are you?"
"A shawl has to be supersoft and luxurious. My spinning is mostly ... well, characterful yarn from British breeds of sheep."


"What about that cashmere you blended on a board years ago? That was lovely and soft. What became of that?"
"I spun it three ply, lace knitting is better with two ply."
"You said this wasn't a lace shawl."
"No, but I can't remember how much yardage there was in those balls of cashmere."
"That doesn't matter, look, the Filoplume pattern tells you how to weigh your yarn so you have exactly enough to finish the shape for any size of shawl."
"But it's BORING BEIGE yarn. I did start knitting with it years ago and lost the will to go on. It's all in a bag somewhere."
"Fetch it out and use it up."
"Ohhhh. This shawl will be small and dull and no fun at all. Is that ringing any bells, Elinor?"

The Filoplume pattern is well thought out and highly satisfying, as I said to my companion while showing off my progress.
"I love the nifty trick with two stitch markers that means you never have to count rows to find out when to make the increases and you can see at once where you've got to when you pick your knitting back up."
"Shame you've purled a row back there and spoiled the garter stitch."
"Oh, bugger." I stared at the flat line of the accidental stocking stitch row. "Actually, I think I'll do that again. With such a bland yarn, I can afford to vary the texture."

Even with smoother stripes, my mottled beige yarn wasn't going to highlight the construction, so I added a few garter stitch ridges in dark brown alpaca. Section one forms a symmetrically expanding arrowhead shape.


Here's where I had got to just after the weight of the yarn remaining told me I had to move on to section two of the pattern.
The finished item aka 'The Cashmaplume' had 15 increases in section one, the whole thing measures 140cm across the long side and weighs 116g. A few more stocking stitch stripes and alpaca ridges show how section two develops asymmetrically to resolve the shawl as an obtuse triangle.


"I'm so glad I decided to go with a neutral colourway."
Elinor did a double take. 
I went on. 
"You do realise I haven't knitted an undersized shawl, this is the ideal shape and length to be a rather classy, formal, cashmere men's scarf. Himself has already taken a fancy to wearing it under his coat. I think I'll knit another one for my brother. More casual, thicker and bigger, a scarf to wear with jeans and jumper. I'll use some of that double knitting merino yarn I dip dyed in an indigo vat last summer."


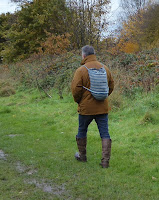
Here's The Indigoomaplume, modelled on the dogwalk, rather than the catwalk, knitted in dk on 4.5mm needles, 9 repeats in section one, 160cm long and weighing in at 150g.

I recommend the Filoplume pattern unreservedly, not just because I know Bex and she is lovely. Thanks to her, I have had fun knitting, got two Christmas presents sorted remarkably quickly and quite a bit of stash used up. I might even have to go wool shopping again soon. 

Friday 23 November 2018

Liquidambar Leaf Contact Prints on Silk

For some years, I have pored over tantalising online images of fabric eco printed with Liquidambar leaves. I've never found any growing locally, and believe me, I've looked. Hard to miss, with those simple, five pointed leaf shapes and rich red autumn colours, a Liquidambar would stand out among the yellow and brown Welsh woodlands. The tree is an American native, also known as a sweetgum. In its natural habitat it can grow 50m tall. 
When I planted the one in this picture, my companion, Elinor Gotland, feared her days of sunbathing on the back lawn would soon be over.
"You want your head read, Beaut. That tree will overshadow the neighbourhood, never mind the garden."
"Chill your beans, Elinor. This variety is called Gum Ball and it won't grow more than a couple of metres high."
She gave me a sceptical look.
"That's what you said about the clematis that took over the back of the house. What's that stuff you're putting down the planting hole? Don't go feeding it too much manure."
"It's ericaceous soil. I'm digging it in to acidify our alkaline clay earth. Acid conditions will help the leaves develop a good autumn colour."
"One little bag of the ericaceous stuff will be about as much use as lace knickers on a frosty night. You'll never shift the pH of that whole border."
I stopped to lean on my spade.
"You start saving all your used tea bags and we'll have a cubic metre of acid mulch by Christmas."


The Gum Ball survived a wet and bitter cold winter and this autumn, the display of leaf colour has been a tribute to Elinor's capacity for tea drinking. I have been picking a few leaves for contact printing by rolling them up on plant dyed cloth with an iron blanket and steaming (details of method here) and found my home grown leaves do make decent iron blanket prints, clearly outlined and often filled with their own dye colour in a pink, brown or purple shade. This photo shows a couple of their five pointed leaf shapes on a silk scarf previously dyed a pale yellowy green in an ivy leaf dye bath.
Where they really stand out dramatically from the other leaves is shown in the very dark prints they leave behind on the iron blanket. As deep as oak leaves, so perhaps Liquidambar contains a lot of tannin.

I decided to have a closer look at Liquidambar leaves by dipping them in dilute iron solution and printing with them by steaming in a roll of plain white silk. At the same time, I could try to find out how much their visible autumn colour predicted their dye print colour and compare their prints with sycamore leaves, which you can see lined up on the lower row on this alum mordanted silk scarf.


The iron dip enabled both kinds of leaf to print silhouettes with patterns of veins. After washing and ironing, I'd say the iron prints look more delicate from green leaves, deeper from leaves that have changed from green to yellow and deepest from the red ones.


Of course, the darkness of the iron does obscure any dye colours. I think the Liquidambar leaves which had developed red autumn colours did leave a pinker cast within the shades of grey. I've often noticed people talking about spraying on vinegar before ecoprinting fabric. Alright, yes, I do know vinegar is not a mordant, but I did think maybe its acidity might modify and enhance red anthocyanin dye from the leaves. Here are two scarves after printing and allowing a couple of weeks to cure before washing and ironing. The one on the right was soaked in white vinegar before printing, the one on the left was just soaked in plain water.


I'd say the vinegar increased the yellow halo, which I assume comes from leaf dye tracking through the damp silk during steaming. It does look as though vinegar did slightly deepen the pinkish brown colour from the red Liquidambar leaves. All in all, not fabulous results, I think I'll overdye these scarves with some flower prints next summer. Next autumn, I'll try a similar experiment using a iron blanket instead of dipping the leaves in iron solution. As Elinor Gotland pointed out, some of the old cotton sheet I've cut up to make iron blankets this autumn looks more attractive than the silk I'd hoped to print.


Friday 16 November 2018

Ginkgo Leaves for Dyeing and Contact Printing

"The end is nigh, Beaut." 
My companion, Elinor Gotland, addressed this apocalyptic comment to my backside, as I bent to gather up yet more leaves.
"It's too late for me to start repenting. I'm too old. Must be nearly twenty years since I planted this ginkgo tree."
"The end of Autumn is nigh, not the end of the world. Or you, you mad old trout."
I straightened my back and sighed.
"Actually, I am repenting, Elinor, regretting my lack of forward planning. I never thought about how tall that ginkgo seed would grow, in another twenty years this could be an enormous tree. I should have pruned off at least a branch or two before the new greenhouse was put up."
"Oh, don't be so gloomy. I meant the end of falling leaves is nigh. The end of sweeping them up."
"And the end of my autumn leaf contact printing. There were so many more experiments I meant to do. Winter is nearly here, why didn't I use more of these leaves while I had the chance?"
"Oh, for goodness sake, do be a bit more positive." Elinor shinned up the tree, stripped a branch clean, filled a small pan with the leaves and plonked it in front of me. "Look, there's plenty in there to make one of your smelly little dye baths."

Which wasn't quite the experiment I'd been thinking of, but wasn't such a bad idea.
Rolled and tied in a bundle of mordanted cloth, whether simmered in a dye bath or steamed, I have found that ginkgo leaves don't release enough dye to make a visible contact print
However, when they are laid on fabric that has already been plant dyed, then covered with an iron blanket and rolled up, after steaming the bundle, ginkgo leaves do seem to reduce the colour of the original dye on the fabric underneath. This photo shows how pale a shape they left on Dyers Chamomile dyed, alum mordanted silk. Some of the other leaves have also reduced the yellow background and a few kinds have added their own dye colour, but the net result is that the ginkgo leaf silhouettes are the most strikingly pale.


One of the experiments I did get round to was trying a copper blanket. Rather than soaking a strip of cotton in dilute iron solution, I soaked one in a bowl of water with a splash of fluid from my jar of copper piping which has been soaking in a mix of water and vinegar. No idea how much copper was in that splash, enough to turn the water and the cotton fabric pale blue.
This silk had been dyed pink with silver birch bark, which turns a deeper, purple pink when modified with copper in the dye bath. I  laid my copper blanket over the ginkgo leaves and also some oak leaves, which had been dipped in iron solution, rolled all the fabric up with a layer of clingfilm and tied it firmly.
I hoped that after steaming the bundle for an hour or so, I would achieve a lovely deep pink where the blanket had pressed against the silk and a paler pink where the ginkgo leaves reduced its background colour. In practice, the ginkgo leaves worked as expected, but the copper blanket didn't really modify the birch bark dye half as strongly as copper in a dye bath would have done. I think the dark iron oak leaf prints look too heavy and clumsy on the pastel background and I must have dripped iron solution here and there and made unwanted grey marks. 
Good job, there's always overdyeing, because another experiment with an iron blanket on wool fabric didn't go well either.
I spread the dyed wool with a whole range of leaves and flowers and madder roots before steaming, but the result was a feeble shadow of the effects the same leaves have produced on silk. If you look at the bottom right corner, you'll see a ginkgo print which had a flower pressed underneath it. I have noticed before that these flowers print blue at neutral pH and turn purple after an acid rinse. Since this flower had printed purple, it was my guess that the ginkgo leaf had released a considerable amount of acid during the steaming phase. I've read people calling the process by which some leaves reduce the colour of a plant dyed fabric background as an 'exhaust'. Which does give an idea of the result, but doesn't explain how it happens. I suspect that 'exhaust' leaves are acidic and that they don't remove or destroy dye so much as modify it. Many flower dyes and bark dyes look much paler in acid conditions and strengthen if you add an alkali, like soda ash.


Meanwhile, back in the kitchen, the ginkgo leaves gave off a distinct tang as they were simmered in the dye pan for an hour. Once it was cool, I sieved out the leaves and poured a little of the fluid into three jam jars. I added white vinegar to the first, left the next just as it was and added some dissolved soda ash to the third. Testing with indicator paper showed that the pH of the original dye bath was naturally acidic, coming up at about pH5. Adding vinegar to increase the acidity made no apparent difference to its faint yellow colour, whereas adding soda ash turned the dye a much more powerful yellowy green.


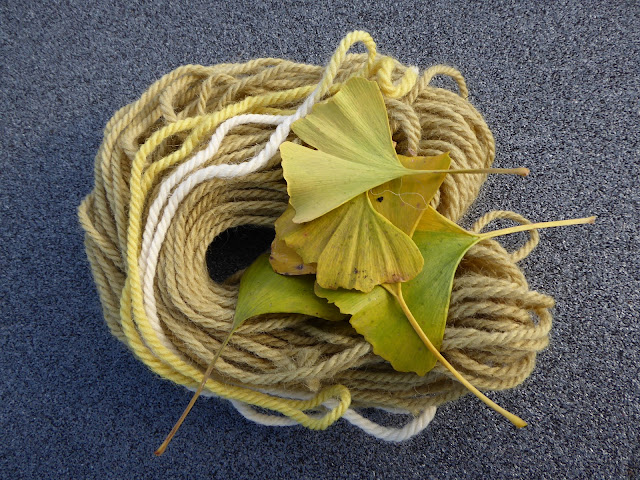
The original weight of dry leaves had been 150g, I put 30g of alum mordanted wool yarn into the pan (a 5/1 plant/wof ratio), simmered it for an hour and the result was ... slightly beige yarn. So ginkgo does not work like ivy leaves, which give colour to wool despite making a pale and acidic dye bath. Thinking I'd take advantage of the acidic conditions to modify the yarn with copper solution. I added a small splash and warmed the dye bath again. There was still precious little colour on the wool until I added enough soda ash to the cooling bath to bring the pH up to neutral. Here's a picture of the finished skein of alum mordanted, copper modified, pH neutralised, ginkgo dyed wool yarn. On top is a length of wool I took out before modifying with copper. One end was soaked in the soda ash alkali jar, which made it bright yellow, the other end remains off white/beige.


In conclusion, I don't think I'd bother dyeing with ginkgo leaves per se. They needed so much alkali to bring up a strong yellow that the wool fibres felt harsh and damaged, and the copper modified khaki I got at neutral pH is not a colour I'm wildly excited by. Judging by the way it behaves, I'd guess the dye in the leaves has much in common with luteolin, which I can source from weld or a wide range of wild and cultivated flowers. The reason to be cheerful and not to regret having grown a ginkgo tree in my garden is the 'exhaust' effect of the acid released by the leaves during contact dyeing. And of course, the tree itself is a lovely sight. Soon to be minus a couple of branches.

My companion and I stood in the garden, sizing up the job.
"You can't regret planting a tree, Beaut."
"True enough, Elinor, I guess this one will outlive me."
"It could outlive your great, great, great grandchildren and then some. There are ginkgo trees in China said to be over 2,500 years old."
"Wow, that's amazing. Nice to think I really started something when I germinated that ginkgo seed. I'd better be careful not to harm it when I do this pruning."
"I reckon it will survive even your worst efforts, Beaut. Ginkgo trees are 'living fossils', they've been around for more than 270 million years and made it through major extinction events. Gone one better than the dinosaurs."
"Ooo. I shall name this one Betty, after Great Great Aunty Betty. I'm glad to have it here, growing old with me."
"You'll be even more pleased when you start to lose your marbles. Research says an extract from the leaves could help treat Altzheimer's. In the meantime, you could dose himself up on ginkgo tea and see if that lives up to its reputation." Elinor performed a short, but seductively suggestive fan dance with one of the leaves. 
"I think I'll just knit him something."

Friday 9 November 2018

Mainbrace Kitbag Knitting Pattern

"We're underway - hip, hip, hooray, three cheers for me - salty dog knits twelve seascape colours into one nautical kitbag."
"Pipe down, Beaut, doesn't look like it's going to be all plain sailing. Ready by teatime, you reckon? Or should I say, the 'dog watch'?"

"Well, ok, it won't be finished today, but I'm edging forward on the right tack and this seabag is definitely in the offing."
My companion, Elinor Gotland, regarded my basket of knitting with some scepticism.
"You can tell that to the marines, Beaut."

I had the devil to pay working twelve balls of wool in every round of a twelve colour helix, but I fought and I conquered, again and again. I enjoy the helix knitting technique, it gives a pleasing spiral effect and is an effective way of combining colours and using up lots of small amounts of yarn to make one larger item.
Helix colourwork is much less hassle than cutting and running then sewing in all the ends of individual single row stripes. It actually took over a week to knit this kitbag. Even with the balls of wool laid out shipshape and Bristol fashion in a flat basket, which I kept turning in the opposite direction to the knitting, occasionally the balls of yarn did get fouled up. I'd say the finished object fits the bill and I might well knit another, so here's the pattern for me in the future and you, in case you'd like to try it.


Mainbrace Kitbag Knitting Pattern

Materials
12 x 50m double knitting yarn.
3.5mm circular needle on a 50cm cord
Darning needle
3m soft rope cord for the handles
3mm crochet hook
My yarn was originally 100g white Llanwenog and 2 x 100g Llanwenog/Black Welsh Mountain wool blended to make two shades of grey, which I had overdyed with Japanese Indigo. I didn't have to knit to the bitter end, there was 70g left over, so I think you could get away with 40m of each colour except Colour A, which has to knit the neck and the fastening cord as well as the helix.
Tension
After washing, 20 stitches and 30 rows = 10cm square
I knitted a swatch of 24 stitches and 35 rows then a few rows of 2x2 rib and sewed it inside the finished bag to make a pocket for phone, keys and so forth.

Size 
The finished bag is approximately 45cm long and 70cm in circumference

Method
Starting at the top opening of the bag, in Colour A, cast on 120 stitches, place a marker and join to work in the round. 
Knit 4 rounds.

Working The Helix

First Round
From the stitch marker at the beginning of the round, continue knitting in colour A for 10 stitches. Leaving a 20cm tail of each new colour for the sewing up at the end, use colour B to knit the next 10 stitches, colour C to knit the next 10 stitches and and so forth until you use the twelfth colour L to knit the last 10 stitches back to the marker.
Second Round
Continue knitting with colour L for 10 stitches.  Here, you will find the yarn from the ball of colour A dangling below the 11th stitch. No twisting the yarns round each other, just drop colour L, lift up colour A and adjust the tension on the last colour A stitch so it is just the same as all the other stitches.  If you leave it too loose or pull it tight as you start to use it again, you will end up with a seam running vertically up the knitting. Knit 10 stitches with Colour A, to where you find Colour B dangling down.  As before, check the tension on the last stitch of colour B and use B to knit 10 stitches, then pick up and use Colour C to knit 10 stitches, continuing in this fashion until you arrive back at the round marker with colour K.

Always continue knitting with the same colour you are using at the end of the round for the  start of the following round, then pick up and use each colour in turn as you reach it.

Rounds 3 to 11 will increase the diameter of the bag from 120 to 150 stitches by increasing one stitch in alternate colour intervals on alternate rounds.

Third Round
*Knit 5 stitches, make one stitch left, knit on to the next colour change, knit the following colour with no increases to the next colour change* repeat from * to * five more times to end of round (126).
Fourth round
Knit the helix, changing colours as you reach the next yarn waiting
Fifth Round
Knit to the next colour change, with the new colour, knit 5 stitches, make one stitch left and knit on until you make the next colour change* repeat from * to * five more times to end of round (132).
Round Six - as Round Four
Round Seven - as Round Three (138)
Round Eight - as Round Four
Round Nine - as Round Five (144)
Round Ten - as Round Four
Round Eleven - as Round Three (150)

Subsequent rounds continue knitting the twelve colour helix straight to form the body of the bag with no further increases. I knitted 108 rounds, which is nine bands of completed 12 row colour bands.

Reduction Rounds to form the base spiral.
First Round
*Knit 1 stitch, Knit 2 together, knit on to the next colour change, knit the following colour until you make the next colour change* repeat from * to * five more times to end of round (144).
Second round
Knit the helix, changing colours as you reach the next yarn waiting
Third Round
*Knit to the next colour change, then knit 1 stitch, Knit 2 together and knit on until you reach the next colour change* repeat from * to * five more times to end of round (138).
Fourth Round - as Second Round

Keep repeating these four reduction rounds. Once the tube of knitting gets too small to work easily on the circular needle, start using magic loop or change to double pointed needles until there are only 5 stitches of each colour left on the cord - total 60 stitches. Continue repeating the first and third reduction rounds without the second and fourth helix rounds in between. Once there are only 2 stitches of each colour, work a final round knitting 2 together all the way round to leave 12 stitches on the cord. Break the working yarn leaving a 20cm tail, thread it onto a darning needle and run it through the loops of all 12 stitches, removing the round marker and the circular needle cord.  Pull tight, fasten off and sew in the loose ends of all twelve colours. 


At the top of the bag, roll the cast on edge inwards and use the twelve loose ends to stitch the cast on edge against the first round of helix knitting, leaving a small gap to introduce a tie into the tube you have created at the neck of the bag. Use the darning needle to thread a piece of string inside the tube before washing the bag, spinning it dry and blocking it into shape by stuffing with dry towels and pulling the string to tie the top closed.


Using a 3mm crochet hook, use one of the colours to make a crochet chain long enough to go round the neck of the bag when it is wide open plus an extra 20cm. Before fastening off, tie the string to the starting end and pull the chain through the tube you have made at the neck of the bag, then crochet the two ends together to make a continuous crochet chain loop. 

I added a couple of small pebbles with holes in them to aid closing the top of the bag when pulling the chain tight and tying the loose loop in a half hitch.


"I bought this soft rope to make bag handles and I've dyed it in an indigo vat so it matches the bag, but now I'm not quite sure how to make them hard and fast. I want to be able to wear the bag on my back like a rucksack, so my hands are free if I'm climbing over rocks."
"A loop for a handle on either side ought to fit the bill, Beaut."
"Mmm, well, I can sew the rope onto the knitting, but the cut ends will be the weakest links."
My companion took the rope from my hands.
"Let's try a different tack. I'll take a turn and splice it into one long loop for you."
Following the instructions in this video, Elinor soon had the splice squared away.
The circle of rope was laid out in a long oval, the bag was laid on top and pinned into position, then the rope underneath it was sewn on to the body of the bag with some spare yarn.
"Wow, you know the ropes alright, Elinor."
"I certainly do and I hope you know what splicing the mainbrace means."
"Fiddly knotting?"
"It means it's time for a tot all round. Get that Blackberry Rum out." 
Elinor raised her glass and gave Friday's toast. "Here's to a willing foe and searoom."

Friday 2 November 2018

Bonfire Scarf - printed with Eucalyptus, Oak, Onion and Madder

My companion, Elinor Gotland, hurried to catch me as I returned indoors from taking the washing off the line.
 "Ooo, that's a very seasonal scarf, Beaut." Sliding it out of the laundry basket, she wrapped the wool round her neck. "Mmm, cosy. These prints look just like a bonfire, it's the perfect thing for me to wear to Firework Night."
I followed as she hoofed it upstairs to look at herself in front of the mirror. 
"Do try not to get ketchup all down it."
"Ketchup? Hardly. As the celebrity guest at a stylish gathering, I'm expecting Pulled Pork and Parkin Cake with my hot buttered rum."
"Well, just watch out for the bangers."
She smirked at her reflection.
"Don't panic, Beaut, I'm more of a sparkler girl, myself."


I have to say, I'm pretty pleased with this design. Most of my plant dye contact prints this autumn have been experiments, trying to work out which effects are given by different types of local leaves, before I can move on to any real attempt at artistry. This scarf was printed with more familiar materials and since it did come out the way I'd hoped, I've made quite a few.
If you would like to make one yourself, here's how I did it. The scarf is a lightweight woven wool fabric, mordanted by soaking for two days in a solution of 10% of its weight in alum crystals (aluminium potassium sulphate). After a rinse, it was wrung out gently, as it seems wool needs to be fairly damp to take prints well. I've also found the eucalyptus leaves from the florists give much more colour on wool than on silk or cotton - see this post for more details. To keep iron from seeping through all the layers, this scarf was smoothed out flat on top of a layer of clingfilm.

The cinerea and parvifolia eucalyptus branches had been dried out, so they needed half an hour's soak in a bowl of hot water to regain flexibilty before the big cinerea leaves could be laid along one edge of the fabric. The thin madder roots had been dug up and dried out last spring and were sprinkled on nearer to the midline of the scarf, to print red lines among the small, pointed and I think, flame-shaped parvifolia eucalyptus leaves. Dried onion skins were scattered over the cinerea to add their bronze-gold colour and texture to the bonfire base and a few oak leaves were dipped in very dilute iron solution and laid here and there to make grey, smokey outlines.


All of these plant materials will print from both sides, so only one edge of the scarf needed to be laid with dye materials, before folding the opposite edge of the fabric over to cover them. The scarf and the layer of clingfilm underneath it were rolled around a section of plastic pipe and tied firmly with string. 


The bundle was then stood on a trivet inside a large pot with a little water in the bottom and heated to steaming point for an hour or so. It was left overnight to cool and unrolled the following morning.


With the fold in the scarf pulled open, you can see how the plants have made mirror prints on its opposite side. The strong orange comes from the eucalyptus, yellow from onion skin, red from madder and grey from the iron dipped oak leaves.
Once the plant material has all been peeled off you can see that the two sides of the scarf are not identical, because where the materials overlapped, they have printed best on the side of the material against which they pressed directly. 
While all these dyes can give strong colour on wool, they will last much longer if you keep the scarf to cure for a week before washing it with a pH neutral wool wash liquid. After that, I've found their wash and lightfastness is pretty good, so I wasn't terribly anxious about Elinor getting her scarf grubby at the bonfire party this evening. Turns out, it's the least of her worries.

My companion had come back downstairs with a face like a boot.
"Problem with the outfit? Maybe you'd prefer a silk scarf for your soiree?"
"Hah." She tossed her phone onto the kitchen table. "That was my agent. She's only just seen fit to let me know that I'm not to be so much a guest at the do as a children's entertainer. Would I tell scarey stories round the campfire?" She looked quite fearsome as she added "I can think of a few I'd like to tell her."
I blenched. Whatever were the organisers thinking? Elinor is a fine raconteuse, but I'm not sure her tales are suitable for those of an impressionable age. Of one thing I am sure - there will be fireworks tonight.