Friday 26 January 2018

Japanese Indigo Plant Dye Results on Various Silk Yarns

Both these fingering weight 100% silk yarns were dyed with fresh Japanese Indigo leaves which I grew in my garden, then picked to make a vat, following a dye method specified on the Wild Colours website. I keep my Japanese Indigo plants well fed and watered, but the pale blue on these skeins reminds me there had been little sun to ripen the leaves in the early part of the summer. Their indigo content wasn't strong and even though I soaked all the silk  in water for a whole week before dipping it in the vat, the uptake of dye isn't perfectly even. 

My companion, Elinor Gotland, is something of a connoisseur where silk is concerned. 
'Might as well chuck out that stuff on the left, Beaut.'
'What, isn't it real silk?'
'Oh, it's silk alright, but it's just Tussah and not even good Tussah.'
'I could never chuck out silk -  as far as I'm concerned, pure silk still travels by camel, carried across the deserts from the mysterious Orient.'
'Silk is rarely pure and never simple. For a start, Tussah is made by worms that eat oak leaves and spin coarse brown cocoons that usually get dunked in bleach. After that, who knows what further horrors befell this drab collection of short, weak fibres.' Turning to the the other skein, Elinor sighed in satisfaction. 'Whereas this, my dear Fran, is Mulberry silk. From special worms fed only on mulberry leaves. They make cocoons of long, gossamer fine silk which is naturally white. On the long journey to you from the silkworms, these fibres have been carefully cleansed, tenderly unravelled and meticulously spun into glorious, gleaming yarn. Time to adjust your illusions, Beaut. Neither of these silks got here by camel train. Let's say, this Mulberry arrived by limousine and that Tussah waited 20 minutes in the rain for a bus.'
'Well, at least the Tussah took up the indigo dye better than the Mulberry. Mum bought it for a weaving project and I was planning to turn it a darker blue for her, once a bit more sunshine had built up the indigo in the plants for a better dye vat, only she got ill and died.'
'How awfully sad, such a mistaken purchase, the weaving would never have repaid her effort. A baby mouse could pull that Tussah apart. Never mind, you can make me something nice with the Mulberry.'


This single spun Tussah does indeed snap with a sharp tug, while you can pull on one strand of the plied Mulberry so hard it cuts into your hand and it still doesn't break. They say it takes a good friend to tell you an unwelcome truth, though as an ancient statesman once said, there is some self-interest behind every friendship. 


Putting both hanks of silk back in their bags and searching for another project, in my chest of stashed yarn, I found four 25g balls of Drops yarn, 77% brushed alpaca, 23% silk, - the label doesn't say what kind of silk. Originally, I bought two of the natural grey and two of the white. Early last summer, I dipped one of each into an indigo vat. The alpaca took up the indigo more strongly than the silk and I think the overdyed grey alpaca contrasts more dramatically with its silk core than the medium blue result on white alpaca does against the paler blue of the indigo uptake on the silk.


The brushed alpaca forms a cloud only loosely bound to the silk core of the yarn, which makes it very light and fluffy, though I generally expect silk to hang with great drape. I knitted it into a striped version of the Connections Cowl pattern. The original cowl, knitted in a silk/linen blend yarn, took 200m and weighed 100g, whereas this one needed a few extra pattern repeats to reach the same length and took 250m of yarn, but still only weighed 45g. Both yarns are categorised as worsted/double knitting at 9 wpi. I don't think the difference is simply grist, however it was prepared and spun, wool of the same grist as either would be unlikely to behave in the same way. Nature over nurture, a yarn's character must have much to do with its constituent fibres.


' Elinor, see how differently these cowls hang on me and my sister.'
'I see Pip can raise a smile with 100g of yarn around her neck. With less than half the amount of silk to carry, you look like a knackered camel. Come on, I'll put the kettle on. Reckon the old dromedary can still make it to the watering hole?'


Friday 19 January 2018

Connections Cowl Pattern

Sometimes, you see a ball of yarn and you know it was meant for a particular person. I found a couple of balls of this Rowan Silkystones in my Mum's stash and knew it must have been intended for my sister, Pip, because the colours are so much hers. The yarn is half tussah silk, half linen, giving it considerable weight. There are only 100m in 50g.
The tussah lends more of a sheen than a shine and though the yarn is soft, the linen gives it a stiffer handle than wool. Thinking two balls would be enough to become not so much a cosy cowl as a decorative one, my first idea was openwork crochet. This looked ok (bottom of photo), but the dense knottiness of crochet made the resulting fabric too rigid.

The second sample, knitted up in grand eyelet mesh stitch, turned out much more flexible and well able to drape in the way I had imagined. 
While I was trying it on, the finished cowl caught the attention of my companion, Elinor Gotland. No surprises, she is an absolute fiend for silk.
'Not a bad result. I shouldn't mind wearing something like that myself, Beaut.'
'I can knit another, though Rowan have discontinued Silkystones yarn. It's anyone's guess how long ago Mum bought it. '
Elinor slid an appraising eye over the cowl and then a covetous hoof.
'You know, I don't think your colouring can really take those turquoise tones.'
'Lucky I made it for Pip, isn't it?'

Connections Cowl Knitting Pattern

Connection - noun person who aids another in achieving goal
                   - noun something that connects, links
                   - noun something that communicates, relates

Materials

200m double knitting yarn
5mm knitting needles

Tension

After washing and light blocking, in grand eyelet mesh pattern
10cm squared is 15 stitches and 12 rows

Finished Cowl Measurements

25cm deep, 140cm circumference

Abbreviations

k = knit
k2tog = knit 2 stitches together
p = purl
psso = pass slipped stitch over
sl = slip as if to purl
st = stitch
yfwd twice = wrap yarn two times around right needle


Method

Cast on 40 stitches

Start by knitting pattern row 1 straight into the cast on row

Row 1   k2 *sl 1, k2tog, psso, yfwd twice, repeat from * to last 2 st and k2
Row 2   k2 *[p1, k1] into double yfwd, p1, repeat from * to last 2 st and k2
Row 3   k all st

Repeat these three rows 53 times in total.


On the 54th repetition, work rows 1 and 2 as normal
To finish and close the loop of the cowl, on Row 3, holding the other end of the cowl parallel to the live stitches and making sure there is no twist in the length of the cowl, pass the right needle through the first stitch on the left needle and then through the corresponding cast on stitch and knit one stitch through both edges. Repeat with the second live stitch and the second cast on stitch. There are now two new stitches on the right needle. Pass the first stitch over the second and off the needle, thus casting off one. Continue casting off in this fashion. Where there is a long single strand in the cast on edge, knit and cast off two of the live stitches through each long cast on strand. 

Wash and pin out on a towel to block dry.


My companion was not in the sweetest temper while the new cowl was being photographed.
'Pip, get your chin up, pin those wrinkles back.'
Elinor strutted about, tutting and sighing and pointing the camera at artistic angles.
'Candlelight would be kinder, still, let's just try to make the best of what you've got. Left a bit, away from me a little further ... one more step ...'
I leaped in to stop her, an instant before Pip went backwards into the water. 

That cowl really does suit her.


Edited to Add

Loose Connections - same pattern knitted up in Drops brushed alpaca/silk double knitting yarn. More details at the end of this post.

Friday 12 January 2018

Regeneration Jacket Knitting Pattern


I have been knitting box jackets much like this since my own kids were toddlers. In chunky yarn, they don't take long to make and are properly snug in cold weather; pockets and hoods don't get left behind or lost the way mittens and hats so often do. Twenty years ago, I would knit each section separately. These days, I am a great fan of circular needles. Revising my old pattern, I decided to knit the body and hood in one piece, flat, but on a long circular cord, leaving only the sleeves to sew in at the end.  The basic proportions are easy to scale up or down and simple stocking stitch does show off a gorgeous yarn. 
This is Sudbury Merino Chunky dyed with madder root, which I bought from Native Yarns several years ago as a birthday present for my Mum. Coming across the shrug she had knitted from it, the glorious depths and shades of a top quality madder root dye glowed like a beacon from amongst the other knitwear she left behind. It  clearly deserved a new lease of life.


Regeneration Jacket


Materials

5mm circular needle
pair of 5mm straight needles
4 x 100g skeins Sudbury Merino Chunky = 400m (I had about 20m left over)
Large tapestry needle for weaving in ends and sewing up sleeves
2 stitch markers
6 buttons

Tension

After washing, 10cm square = 10.5 stitches and 17.5 rows

Dimensions
My niece Emelia is seven years old, so hers is the size given below, plus a bit of growing room. The proportions are straightforward to adapt to any size of child and to other brands of chunky yarn - when swatching, I would choose a slightly smaller needle than the ball band recommends in order to get a dense jacket fabric.


Made to fit chest size 70 cm, once buttoned up, the actual jacket measures 80cm.

Method

Pocket lining (lowest section)

Using 5mm straight needles, cast on 11 stitches and knit 4 rows of stocking stitch, then break yarn leaving a long tail for sewing up the pocket later. Knit a second pocket lining, leaving it attached to the remainder of the ball of yarn. Keep both pocket linings on the straight needles.

Body

Using 5mm circular needle, cast on 85 stitches and going back and forth, make three rows of knit 1, purl 1 rib. The next four rows are stocking stitch
Row 4 knit
Row 5 purl
Row 6 knit
Row 7 purl

Row 8 knit 13 and turn, leaving the other stitches on the circular cord - you will now be knitting only the front of the right pocket, which has a sloping opening created by reducing one stitch every three rows.
Row 9 purl back to left edge
Row 10 knit 11, knit 2 together (12 stitches)
Row 11 purl
Row 12 knit
Row 13 purl 2 together purl to left edge (11 stitches)
Row 14 knit
Row 15 purl
Row 16 knit 9, knit 2 together (10 stitches)
Row 17 purl
Row 18 knit
Row 19 purl 2 together purl to left edge (9 stitches)
Row 20 knit
Row 21 purl
Row 22 knit 7, knit 2 together (8 stitches)
Row 23 purl
Leave these 8 stitches on a holder with the yarn still attached.

Making more of the body and completing the linings of the pockets. 
Take the straight needle with the second pocket liner on it and using the right side needle on the circular cord, knit across the 11 stitches using the yarn already attached to the pocket lining, then knit on across the main body stitches on the left needle of the circular cord to 13 stitches before the right edge. Take the straight needle with the first pocket lining and knit across these 11 stitches so that there are 81 stitches on the right hand side of the circular needle and on the left, the 13 stitches not yet knitted. These 13 can now be kept on a holder.
Purl back across the 81 stitches.
Continue working in stocking stitch for another 18 rows.
Cast off 6 stitches at the start of the next knit row and then cast off 6 stitches at the start of the following purl row (69 stitches). 
Break yarn leaving a long tail for sewing in the pocket lining.
Knit across the 8 stitches on the holder for the top of the right pocket then knit straight across the main body (77 stitches) until your work looks like this.


Using the straight needles and a new ball of yarn, return to the 13 stitches on the holder at the left edge. Attach yarn at pocket edge to knit the front of the left pocket.
Row 1 knit
Row 2 purl
Row 3 knit 2 together, knit to end (12 stitches)
Row 4 purl
Row 5 knit
Row 5 purl to last 2 stitches, purl 2 together (11 stitches)
Row 6 knit
Row 7 purl
Row 8 knit 2 together, knit to end (10 stitches)
Row 9 purl
Row 10 knit
Row 11 purl to last 2 stitches, purl 2 together (9 stitches)
Row 12 knit
Row 13 purl
Row 14 knit 2 together, knit to end (8 stitches)
Row 15 purl
Break yarn. Continuing from the left edge of the main piece on the circular needles, knit across the 8 stitches which form the top of the left pocket (85 stitches).

Continue knitting in stocking stitch until the work measures 25 cm, finishing with a purl row. After washing, my swatch shrank in height by about 8%, so to get a finished length of 25cm, I knitted 27cm. At this stage, sew in the edges of the pocket linings so as to stop them flapping and avoid having all the sewing up to do at the end.

Continuing Right Front

Using a straight 5mm needle, knit 17 stitches, knit 2 together, knit 2 and turn, leaving the remaining 64 stitches on the circular needle.
Purl back across the 20 stitches, using the other straight needle.
Continuing in stocking stitch, knit 2 together at two stitches before the end of the next four knit rows, reducing the stitch count to 16.
Continue straight until the armhole measures 14 cm ( to account for shrinkage, I knitted 15cm) 
Knit 12, turn and purl back.
Transfer all 16 stitches to a holder with the yarn still attached.

Continuing Back and Shaping Right Shoulder

Attach a new ball of yarn to the stitches on the circular needle, starting at the base of the right armhole.
Knit 2, slip 1, knit 1, pass slipped stitch over, knit 35, knit 2 together, knit 2 and turn, leaving remaining 21 stitches on the circular cord.
Purl back across these 41 stitches.
Continuing in stocking stitch, by the same method, reduce one stitch at each side of the next four knit rows, reducing the stitch count to 33.
Continue straight until the armhole measures 14 cm ( to account for shrinkage, I knitted 15cm).
Fold the right front over so that it lies against the matching part of the back with the wrong sides facing out.
Use a three needle bind off to cast off joining the right front and the back together, the first four stitches of the outside edge of the right shoulder. The working stitch left after casting off four should be transferred to join the stitches remaining on the holder for the top of the right front.
Continue knitting across the back until 4 stitches before the end. Turn and purl back.
Working with the wrong sides facing, use the three needle bind off to cast off joining the right front and the back together, the next four stitches at the outside edge of the right shoulder. 
Break yarn and slip the remaining 8 stitches of the right front onto the circular needle. Your work will look like this.


Completing Left Front

With the right side facing you, rejoin yarn at the base of the left armhole.
Row 1 Knit 2, knit 1, slip 1 and pass slipped stitich over, knit to end.
Row 2 Purl
Repeat these two rows four more times.
Continue in stocking stitch until the work measures 14cm (15cm to allow for shrinkage).
On the last purl row, purl 12 and turn.
Knit back to the front edge.
Purl across all 16 stitches.
Folding the right sides together and working from the wrong side, use a three needle bind off to cast off 8 stitches joining together the back and front of the left shoulder and break the yarn. Transfer the remaining 8 stitches of the left front onto the circular needle.

Hood

There will now be 31 stitches on the circular cord, 8 from the right front, 15 from the back and 8 from the left front.
Knit and purl to and fro in stocking stitch until the work measures 25cm (I knitted to 27cm to allow for shrinkage).
On the last purl row, place a marker on either side of stitch 16 (centre).
Row 1 Knit to 4 stitches before marker, knit 1, slip 1, pass slipped stitch over, knit 2, slip marker, k1, slip marker, knit 2, knit 2 together, knit to end.
Row 2 Purl
Repeat these two rows two more times.
Fold the hood in half with the wrong sides facing out. Use a three needle bind off to close the top of the hood, casting off while joining the two sides.

Button Band

Formed by picking up stitches continuously starting from the bottom of the right front, going up to the top of the hood and coming down to the bottom of the left front.
Use the spaces between the first and second column of stitches. Pick up a stitch through the first hole and then the second hole, miss the third, pick up from the fourth, miss the fifth - continue in this fashion, picking up 3 stitches from every 5 rows.
Row 1 (wrong side) work in knit 1, purl 1 rib.
Row 2 (right side) makes the button holes - by convention, these are on the left front edge for a girl and the right front edge for a boy, but I always do them on the right. Rib 3 * yarn over, knit 2 together, rib 6* repeat 5 more times and then rib to end.
Row 3 (wrong side)  work in knit 1, purl 1 rib.
Cast off in rib.
Sew on 6 buttons to match the button holes on the opposite border.

Pocket Edging

With right side facing, pick up and knit 13 stitches evenly across opening of pocket.
Cast off knitwise and sew down edges.
Repeat on the other pocket.

Sleeves (knit two)

Cast on 21 stitches.
Work 3 rows of knit 1, purl 1 rib.
Continue in stocking stitch, increasing one stitch at either end of of 7th and every following 8th row. I do this by knitting through the back then the front leg of the first and last stitch.
When there are 35 stitches on the needle, continue straight until the sleeve measures 35 cm (to allow for shrinkage, I knitted 38 cm) finishing on a purl row.

Row 1  Knit 2, slip 1, knit 1, pass slipped stitch over, knit to last 4 stitches, knit 2 together, knit 2
Row 2 Purl
Repeat these two rows four more times (25 stitches).
Cast off on a right side row in purl.

Sew sleeves into armholes, aligning the reduction rows with the matching reductions on the back and front. Turn inside out to sew up the long sleeve seams. Wash and smooth into shape before drying flat.

'Poor Emelia, what a boring Christmas present for a child. I expect she would have preferred a game for her new iPad.' My companion finished her tea and set down the cup with a sharp clink.
'She put that jacket on straightaway and when I told her madder roots were what they used to use to dye soldiers coats scarlet, she was really interested.' I put our cups into the sink and turned to speak over the noise of the taps. 'Emelia has plenty of imagination. High Tech isn't the only kind of gift that appeals to the new generation.'
'What was your most exciting Christmas present, then, Beaut? A new tea towel?'
'Actually, Elinor, my biggest thrill was unwrapping some extravagant, handmade French rubberwear. From himself, with love.'
My companion blinked.
'You would never wear anything like.'
'Oh but I do, often. Light weight and close fitting, never any chafing, no matter how much I run about. Easy to slip into any time.'
Her eyes were popping by now.
'You sit there a minute while I put my new French rubberwear on, then we'll go down the beach.'


Friday 5 January 2018

Backtrack Cushion Knitting Pattern

My companion, Elinor Gotland, turned up again last Tuesday and wished me a Happy New Year.
'You look rough, Beaut. Big party, was it?'
'I stayed home, actually. Would have gone to bed at midnight, only once the fireworks started, the dog went into meltdown and had to be hugged under a blanket til two in the morning.'
'Same social whirl here, then. Ooo, this is new.'
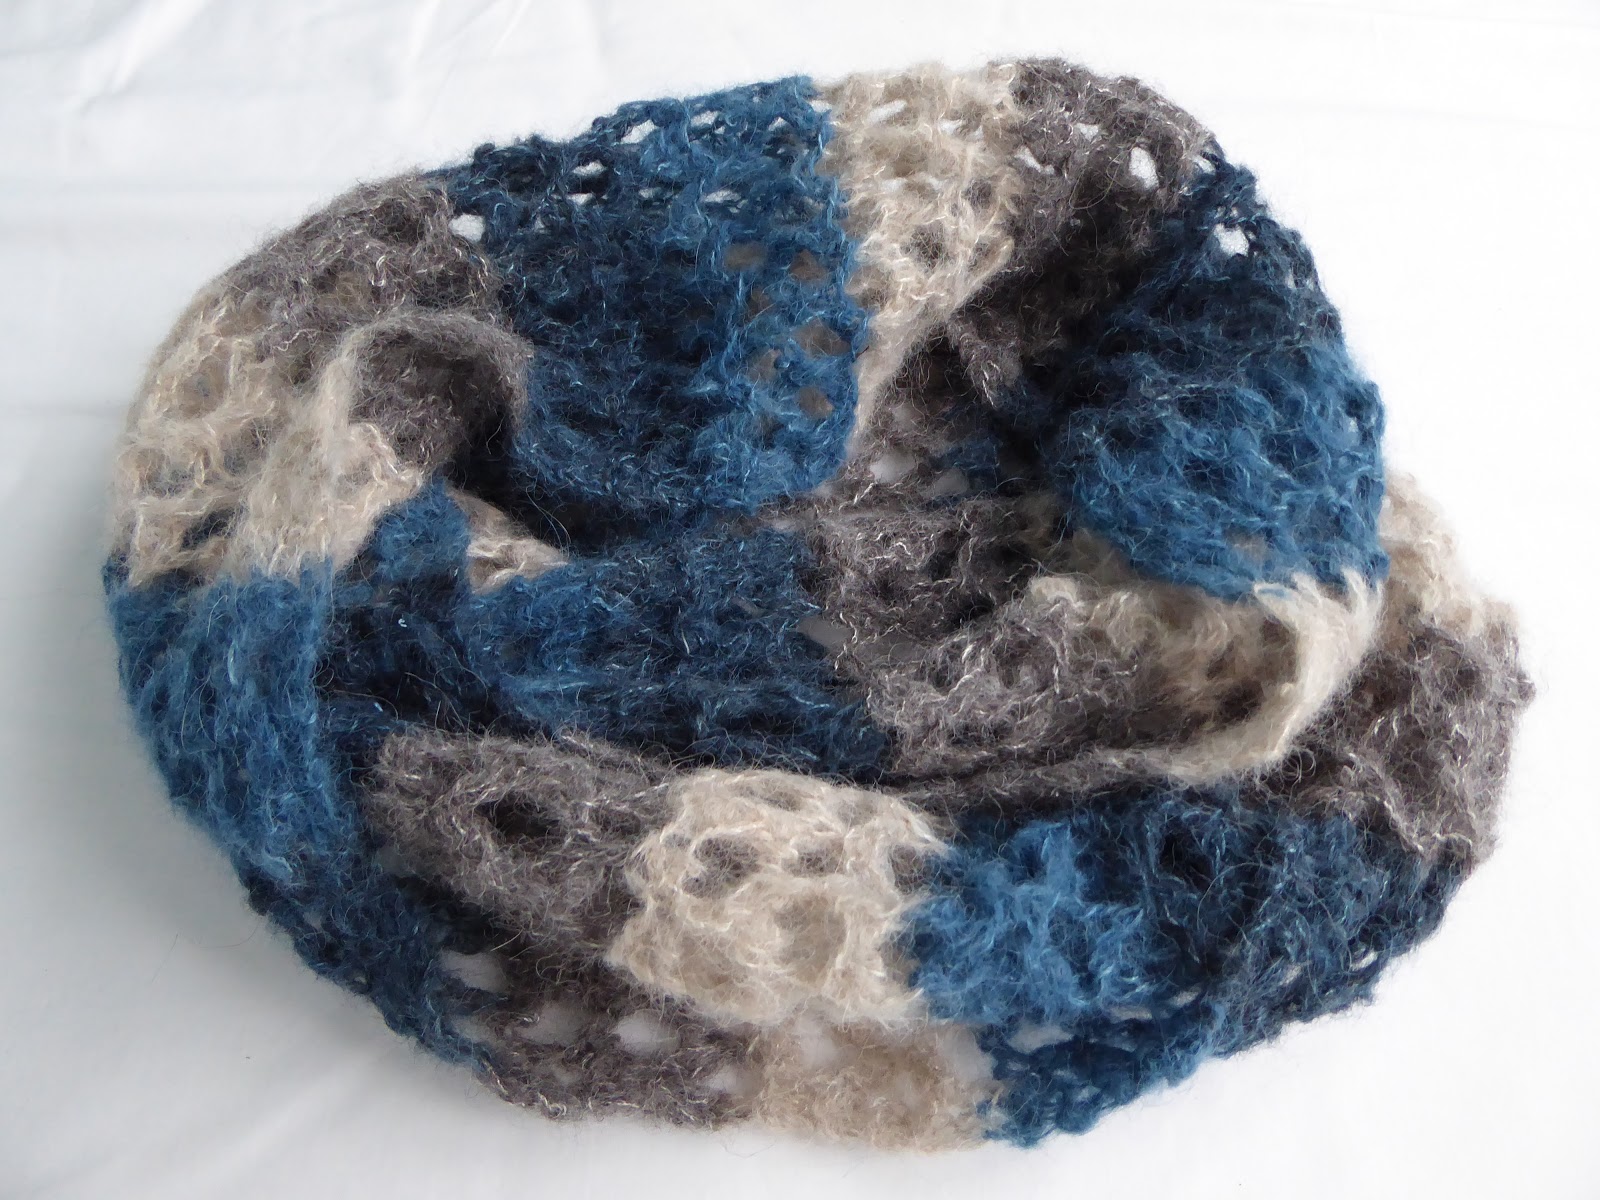
Elinor had settled herself into an armchair and was running a critical hoof over the fabric of my new cushion cover. She frowned. 'Not quite new. I'd guess Christmas knitting with recycled yarn?'
'Got it in one, Elinor. Cup of tea?'
'Don't mind if I do. Nice to be back, Beaut. Always very restful here, if a bit dull. Pass me a book to read, would you?'
By the time I'd boiled the kettle, she was fast asleep. Despite the yarn being a little pilled and felted, I think my new cushion was proved fit for purpose.


The wool was originally handspun from the fourth fleece I ever bought, which was a particularly soft Jacob. I well remember spending ages on my knees sorting out the dark brown and the white sections from the mixed shades and then dyeing the white yarn with daffodils. My Mum died last year and while my sister and I were clearing out her house, I couldn't quite decide whether the Jacob cardigan I knitted for her should go on the chuck or the charity pile. In the end, I brought it home and unravelled it back into balls. The spinning was much too low in twist, felting in the wash is probably what has held the yarn together. Though it is uneven, the thickness averages out around worsted weight or a heavy double knitting yarn.


Backtrack Cushion Knitting Pattern

Materials

4.5mm circular needle 80cm cord
a 4.5mm straight needle
tapestry needle to weave in ends
50cm closed end zip in colour to match your choice of yarn B
sewing needle and matching thread to set zip.
Yarn
Brown (B) 120g approx 240m
Variegated (V) 90g approx 180m
Yellow (Y) 50g approx 100m
Green (G) 50g approx 100m

Note - The dimensions of my final cushion are 50cm by 55cm. If you prefer a square cushion, or you happen to have a 50cm square cushion pad to fill the cover with, knit one less pattern repeat and two fewer plain rounds of brown at both the top and bottom.

Tension
In stocking stitch 10cm square is 17 stitches and 25 rows

Method

Cast on 160 stitches in B.
Join to work in the round, placing marker. Knit 10 rounds of stocking stitch. (8 for square cushion)

Pattern seen from wrong side
Note - once you have slipped the indicated stitches, keep the float of working yarn loose behind them when you start to knit the next stitch - I put my finger on the right needle behind the slipped stitches and bring the working yarn out behind it to make sure the floating yarn is slack. 
Once the knitting is washed and blocked, short, tight floats would make the fabric pucker instead of opening out flat to display the ovals.

Pattern Rounds
1 Knit all stitches in V
2 As round 1
3 Change to B *slip 2 stitches, knit 8* repeat to end of round
4 Change to Y slip 3 *knit 6, slip 4* repeat to last 7 stitches, knit 6 and slip 1
5 In Y knit as round 4
6 In B knit as round 3
As round 1
As round 1
9 Change to B knit 5 *slip 2, knit 8* repeat to last 3 stitches and knit 3
10 Change to G knit 4 *slip 4, knit 6* repeat to last 6 stitches, slip 4, knit 2
11 In G knit as Round 10
12 In B knit as Round 9

Slip stitch pattern at round 4

pattern mismatch along line of round marker
Note - At the round marker, a line of slightly disjointed ovals will form. I couldn't get my head round managing a jogless join and I decided it didn't really notice, being on the edge of the cushion. 

Repeat pattern rounds 1-12 a total of fourteen times. (13 for square cushion)

Change to B and knit 6 rounds. (4 for square cushion)

Flip the knitting so that the right side faces inwards. Using a straight 4.5mm needle, make a three needle bind off to close the top edge of the cushion. This is a helpful video tutorial. 

Weave in loose ends of yarn with a tapestry needle.Turn the cushion right side out.
Wash and block the fabric, pinning the width at 50cm.

Lay the cushion cover out flat. At the open end, pin the zip parallel to the bottom edge, with its right side facing the right side of the knitting and sew it to the front layer of the cushion. Flip the zip so its right side is facing you and turn in the bottom edge of the back layer of the cushion to match the front. Bend the fabric on the other side of the zip inward against the folded hem on the back of the cushion and fiddle in a couple of pins to hold it while you unzip the zip and then pin the loose side neatly against the fold at the back of the cushion before sewing it on. Put a cushion pad inside and zip it up.


'You like the cushion, Elinor?'
My companion woke up with a start and scrabbled to switch on her phone.
'Ych y fi, this tea's gone cold. Make us another one and put a drop of sloe gin in it, there's a love.'
From the kitchen, I could hear a flurry of text alerts arriving. 
'Here's your tea plus additives. Aren't you detoxing this January?' I peered over her shoulder. 'Are those messages about auditions for your next role on stage or screen?'
'No Beaut. This year I am resolved to have a bit more fun. Enjoy the good things. Spend time with old friends.'
I beamed at her.
'Oh, I am glad. I was thinking of going into Cardiff shopping tomorrow.'
Elinor tapped away on her phone. She looked up.
'Cracking. You can pick me up a box of patisserie, I've invited some chums to tea.'