Friday 30 December 2016

SPINOPOLY

SPINOPOLY.  In case you were wondering, this game is an adaptation of Monopoly, played backstage by a troupe of singing, dancing sheep, collectively known as the Blewe Belles.  
At Christmas, my companion, Elinor Gotland, sent me a ticket for the opening night of their latest musical, 'Shepherdesses' Watch'.  Since she herself would be starring in it, I sat alone in the stalls, rigid with nervous anticipation as the curtain went up. Act One opened with The Flock Sock Knit and Natter. Elinor descended from the clouds on the proscenium arch and within minutes, it was clear the show was going to be an absolute triumph.

There were roars of applause and a standing ovation for Elinor's first number, 'Thank Heaven for Knits and Purls.'  The Blewe Belles sang backing vocals whilst tap dancing, twirling their knitting needles in band majorette style. By the end of the routine, those socks had disappeared, leaving the stage encircled by a woven braid of coloured yarn.


For me, the highlight of the show was 'Baa-baa, Barn Barbeque' sung accapella. Afterwards, I rushed round to the Stage Door to congratulate them all. Struggled my way through the crowds of autograph hunters, flashing my backstage pass at the doorman, only to find Elinor's dressing room empty. Bleats and shrieks were coming from the room next door and there she was, in amongst the Blewe Belles, slinging her wings over the back of a chair, just as SPINOPOLY came out of its box.
"Right, I'll be the Wool Marketing Board this time. Hiya, Fran, enjoyed the show, did you?" Elinor barely glanced up from doling out the money. "Have a seat, Beaut, I'll deal you in." 


The familiar London street names had all been changed for fibres of varying price and quality, from Herdwick Lane to Cashmere Avenue via Blue Faced Leicester Square. After the first few rounds, all the properties had been sold and I found myself not with four stations, but four Wool Fairs, for which I could only charge admission. The others got busy buying up sheep tokens for each parcel of land they owned and it was not long before I was bankrupted - landing on Gotland Gardens with a whole flock grazing.  No surprise to find this was owned by Elinor.


The Blewe Belles put up some stiff opposition. Elinor got stuck in the Sheep Dip, then she was landed with vet's bills and for a while, luck seemed to be running their way.


However, it proved to be a game of two halves. After a series of chance set backs for the other players, Elinor's ruthlessly competitive attitude secured her the final victory and total domination of the fibre supply. 


They might have lost the game, but none of the Blewe Belles had wasted their time. Getting up from the table, I noticed all that yarn had been knitted back into socks, ready for tomorrow night's show. To a chorus of goodbyes and hugs from everyone,  I hurtled out of the theatre into the cold city streets with barely enough time to catch the last train back to Wales. 
A most memorable evening's entertainment. I'm shattered now, though and will be more than content to see the New Year in at home - just possibly, playing SPINOPOLY.

Friday 23 December 2016

Hyperbolic Crochet and the Pseudosphere


Warning - the author takes no responsibility for any sleep deprivation that may occur as a consequence of trying this at home.


I have a friend on Ravelry to thank for my hyperbolic journey into exponentially expanding surfaces. She posted a link to Gary Hayton's knitted felted Fibonacci Pseudospheres, which just beg you to imagine, wow, however did he make those? The title sent me off to rediscover the Fibonacci numbers and spend time pondering how they might be incorporated into a circular knitting pattern. 
Just as I was developing terminal brain ache, the same good friend explained that all you have to do to create a hyperbolic shape is to make increases at a constant rate. Starting with a magic loop of six double crochet stitches (single crochet in America), I began crocheting two stitches of heavy, inelastic tapestry wool yarn into every stitch, spiralling endlessly outwards.
The initially flat surface develops frills that wrinkle up together in three dimensions, mine formed a pseudosphere after about eight rounds. Watch this video and you'll see what I mean. Because I made two stitches into every one, the stitch count doubled with each round 6 - 12 - 24 - 48 - 96 - 192 - 384 - 768 - 1,526 - 3,072, so deciding to do the final round with crocheted picot edging in a colour change yarn took rather more time and yarn than I had bargained for. Running low toward the end, I finished the last stretch with a plain crochet edge.
Himself was pleased to refer to my new pet as 'The Golden Brain'. A bit more googling about led me through whole coral reefs created with crochet to the brilliant mathematician who made the leap from abstract hyperbolic geometry into tangible yarn constructions. In this lecture, she tells her story so simply, even I felt I understood negative curvature - until I tried to explain it to himself.

Much as I love my pet brain, I had no answer when asked what it was for. Daina made hers to teach students, the crocheted undersea world was intended to raise awareness of coral death due to pollution. Trying to dream up some function to justify my urge to go hyperbolic again, I crocheted a basic hat shape in coloured Romney handspun wool yarn.
Working two stitches into every one for a few rounds in a darker shade of the same wool created a frilly brim. All might have been well had I left it at that, only I carried on, using a wild skein of coreless corespun 'art yarn', only finishing at 2am, when I had used up the last of the wool.
Daina Taimina says in her lecture that Wolfgang Bolyai warned his son of the perils of pursuing non - Euclidean hyperbolic mathematics. 
The same might be said of hyperbolic crochet.
'For God's sake, please give it up. Fear it no less than the sensual passion, because it, too, may take up all your time and deprive you of your health, peace of mind and happiness in life.' 
Come on in, the water's lovely.

Friday 16 December 2016

Knitting Humdrum Helix Hats with Ten Colours

I designed the Humdrum Helix Hat Pattern to make use of small amounts of yarn. Until I started digging through my plant dyed yarn, I hadn't realised quite how much was stashed away. The oldest skeins at the bottom of the basket were varying weights of Texere 100% wool, which I used to buy by the cone before I started spinning. Since many of them predate this blog, I've no record of what plants I used for dyeing this selection, though the shades of beige reminded me how often I accidentally boiled dye baths, mysteriously failed to get the colours I expected or found they faded fast.


Helical hat knitting is quick and easy and quite fun. When my brother asked for a hat for Christmas, it sounded like a perfect stash busting opportunity - until he said he would like lots of colours. Well, beige is a colour, in my wool basket, 'beige' covers quite a variety of colours, so I gathered up ten balls of double knitting weight Texere wool and decided to see how they would look all knitted into one helix. With a gauge of 18 stitches to 10 cm, I cast on 90 stitches from the largest skein, aiming for a 50cm hat circumference. After knitting 8cm of brown brim, I added another colour every 9 stitches, working the same method as the original pattern for four colours. I was soon spending more time untangling yarn than I was knitting it. Things went better working with all the balls on a flat basket in my lap, periodically turning the whole basket in the reverse direction to the knitting.


Having such frequent colour changes requires a little more concentration than I gave this hat. Once or twice, I must have missed a colour change and picked it up in the next round, because the sequence of stripes changes. Nonetheless, I was pleasantly surprised by how how much interest and subtlety the stripes of beige added to each other and how well they enhanced the brighter colours. The accidental changes of sequence also gave me pause for thought about the importance of which colours are put next to each other.


Once I got to the reductions for the crown, I reduced five stitches each round by knitting one then knitting 2 together on the even colour changes in one round and the odd numbered colour changes in the next. Having ten colours makes a far more dramatic helix than only four. It also means you need very little yarn in each colour - apart from the brim, there only has to be enough of each to knit five rounds. Having plenty of small skeins to use up, I've decided all my male relatives are getting a helix hat for Christmas this year.  Plus four bottles of excellent Welsh microbrewery beer. Here's the next Happy Helix, there's yarn for many more to come.


Friday 9 December 2016

Making Iron Prints with Leaves on Silk

"Wow, Elinor, come and look at this photo!" 
"Turn off that computer at once. I'm not being funny, Beaut, but it's only a couple of weeks and all your family will be arriving."
My companion has been channeling her pent up energy into a pre-Christmas cleansing of the kitchen. Which would be fine, if only she didn't also want to involve me.

Elinor could not be persuaded to admire the glorious works shown on a facebook eco-dyeing group I joined recently. I had to leave the virtual world for the harsh realities of grot busting, but not without protest.
"You wouldn't catch those eco-dyers with a bottle of bleach. I think we should stop struggling with it and 'give nature a home' underneath the dishwasher."
"That's not eco-friendly, Beaut, it's just lazy. Put your back into it."
"I wish I could work out how to get such incredible leaf prints onto fabric, and without alum mordant. The descriptions are short on detail - there are obviously processes too familiar to the group to bother documenting in full. I saw a mention of soaking dried leaves in iron and vinegar. What can an iron blanket be?"
"Oh, get a grip, you rusty old hippy." Her look was pure steel. "Plug the hoover in - no, forget that - you'll want to save the electricity and use a dustpan and brush."

I have been musing upon plant dyeing with iron while wiping out crusty corners. Though I've been dabbling with it for a couple of years, there is very little I fully understand. I have noticed my jam jars of iron solution don't last forever. Even though they still look brown, after a while, they have stopped making such satisfactory dye effects as they did at first.  This failing strength occurred again a few weeks ago. It was the same for a home made jar of iron acetate solution created by soaking rusty nails in water and vinegar as it was for the latest jar, made by dissolving ferrous sulphate powder in hot water.  Since I add iron to each of my bundles of silk or linen by soaking the string I use to tie the roll up in the jar of solution, the actual amount of iron I've been using is pure guesswork. The best I can say is that dissolving about 10-15g iron powder in a large jar has lasted me one summer.

Jenny Dean writes in Wild Colour that it is fine to pour an occasional dose of iron into the earth. Doing this before didn't seem to upset any of my plants, so I emptied out the old jar onto the compost heap and made up a fresh solution. I brewed up a dye bath by simmering some dried coreopsis flowers and added a teaspoon of soda ash to make the orange come out brighter. All the silk scarves I possess have already been mordanted with 10% alum, because I try to use up all the mordant by doing a long cold alum soak for one batch, then another batch of half the weight, then quarter the weight, day after day for three days (midweek, when himself can make do with a shower instead of using the bath). Unmordanted fabric experiments will have to wait til next year. 


I tried dipping some small red bramble leaves in the new jar of iron before laying them on wet silk, adding a few weld leaves from an overwintering clump, also dipped in iron, and some scraps of onion skin.


Soaking the string in the iron jar, I rolled the scarf round a plastic pipe, tied it up and simmered it in the dye bath for an hour or two, left it overnight and waited a day or so for it to dry on the radiator before unrolling. The weld leaves had printed green, the onion skins had made brown blodges and the bramble leaves had left a tracery of iron to show where they had lain.

The edges and the outermost layer of the silk on the roll had taken up coreopsis orange colour, made browner by the presence of iron and rippled with resist and iron marks left by the string.


Not brilliant, but it proved the newly made jar was definitely providing better iron effects than the old one. Next, I thought I would try NOT soaking the string - a bold departure from my usual process. There had to be quite a bit of iron left in the coreopsis after bath, so I thought I would try a variety of leaves dipped in iron and laid on two scarves. One would go in the coreopsis pot, the other would be simmered in plain water. Onto the silk went iron dipped bramble, alpine strawberry and hardy geranium leaves, which have all produced prints for me before, some bits of fern and big green lycestra leaves and finally, fallen yellow gingko leaves. I have seen pictures of successful prints with these, though not got any myself.
As a bit of insurance that there would be some colour on both scarves, dried Dyers Chamomile and yellow cosmos flowers were rehydrated in warm water and dropped in among the leaves.  When peeled off the dried silk scarf out of the coreopsis bath, the bramble leaves had made clear traceries and the chamomile flowers had left deep golden shapes. Without an iron soak, the string had left pale lines in the orange/brown background of coreopsis dye.


Rather to my surprise, the scarf that had been simmered in plain water turned out better. On the pale background, lycestra leaves showed up as green prints, the flower colours were better displayed and even the fern left pale impressions. No sign of a gingko print, I was fed up with them, no gratitude, to think I grew that ginkgo tree from a seed.


I started guiltily as my companion came into the kitchen to find me idly sitting staring at the latest silk scarf.
"Oh, nice work, Beaut." She wrapped the silk around her shoulders, gave me an arch look and swung her britch as she sashayed across the room.  "I might take this one to London with me."
"Elinor!  Did you get that part you auditioned for?"
"You are looking at this Christmas's West End Singing Sensation."
"You're going to be in a musical?"
She twirled out of the scarf and into a curtsey.
"A musical called 'Shepherdesses' Watch'. Fabulous song and dance routines."
"Shepherdesses' Watch? Is it a Nativity Play - are you to be a sheep in the flock?" As soon as the words were out of my mouth, I knew I'd put my foot in it.
"This, my poor, dear Fran, will be no ordinary Nativity Play, but an Extravaganza." She sniffed. "And an actress of my stature is not wasted on crowd scenes around a manger. I have my own solos and special choreography for flying on a wire."
She swept off upstairs to pack her bags, leaving me to wonder how a sheep of her stature could possibly get airborne.
Once I had waved Elinor off on the train, I walked home among bare trees, dry and crumpled leaves littering the pavement.  Darkness was closing in and not even tea time yet. At least with madam gone, I wouldn't have to spend the evening cleaning.

Ginkgo leaves still lay bright yellow on the garden path. One more try. I gathered a handful and left them to soak overnight in a diluted bowl of iron solution with a slug of vinegar.  In a vase were some dessicated branches of eucalyptus which a neighbour cut from her garden for me last year. Used fresh, they had made little green circles on alum mordanted silk. The dried leaves snapped off with a brittle click, but by morning, had absorbed enough fluid to regain some pliability. At the break points, there were dark lines - must be picking up the iron.


Acidifying a dye bath seems counter intuitive when you are used to flower dyes which generally improve in colour with soda ash to alkalinise them. I couldn't quite bring myself to add any more vinegar, though I did layer the silk with overlapping leaves of green bramble and lycestra dipped in the iron jar. Tied up with plain string, the whole roll has been boiled, not the usual simmering to avoid destroying a fragile flower dye, a proper low boil, for several hours. I did leave it in the pot overnight, though I haven't let it dry before unrolling. In the videos on facebook, the eco-dyeing group seem to be unpeeling wet leaves from their cloth.

Here it is, hanging out to dry. No marks at all from the ginkgo leaves. It occurs to me that in this process, the use of iron is apparent in two different ways.  Dipping weld leaves meant they printed green instead of yellow as a contact dye shape, though they did not hold iron to leave dark marks on silk. The same plant dye colour modifying effect probably accounts for the green prints made by lycestra leaves. Soaking dried eucalyptus leaves in iron has given pinkish brown prints instead of green, plus a dark iron corona, most apparent where the upper surface pressed againt a layer of the silk. The bramble leaves hold iron in a pattern more detailed on their under surface, though they add no apparent dye colour of their own.
I'll have to keep watching that facebook group and wait til next year to try some more eco techniques.  I might skip growing soy beans to make soy milk, but there's no shortage of local cow dung. The Turner Prize awaits.


Friday 2 December 2016

Making Christmas Tree Angels with Tinsel Yarn Halos

"Ooo, I've never seen handspun, 
100% wool, eyelash yarn dyed gold with plants. Who'd have thought!" 
My companion has been rather a trial to live with this week. I pretended I hadn't heard her.
"Have you heard back from your agent about that audition yet?"
She remained apparently absorbed in marvelling over the tinsel yarn.
"Wonderful work. Such craft."
"Elinor, you know as well as I do that's just King Cole polyester."
"Oh, I don't take a dim view of a bit of sparkle, Beaut. You're the dreary eco-warrior round here." She let go of my three balls of shiny tinsel in order to push her specs up her nose and give me one of her looks. "I see the worm has not so much turned, as tied itself in a bow."


I bought this tinsel yarn with a view to adding halos to my usual wool fairy making process, in order to turn them into Christmas angels. 
Wrap most of the length of a long pipecleaner with white roving, just as you would for the arms. Now tie on the tinsel yarn near to one end and twist the pipecleaner to wrap a diagonal of tinsel around it, simply knotting it again when you get toward the other end. Bend the decorated, middle section into a circle, leaving a few centimetres of straight pipecleaner on either end.  Pass the wool roving meant for the head and body through this loop before you tie up the fairy's neck and it works a treat. Once the waist is also tied over the dress, the hidden straight part of the halo loop has been fixed in two places, making the whole thing firm, ready to be bent into its final position while you are adding hair.


I also made bigger, angel style wings, by folding two decent strips of white wool roving in half and tying them together about two thirds of the way up, then needlefelting them into a butterfly shape before knotting them around the fairy's waist.
I think these angels hang better with a thread suspending them from the waist, rather than the top of the head.


Next day, I spotted Elinor out in the frosty garden, deep in an angelic conflab. Tirion and Seren were bending low over her head. They were talking in Welsh and I couldn't make out what they were saying.


Elinor came back into the kitchen stamping her hooves against the cold.
"Did you hear any tidings of comfort and joy, then?"
"No, Beaut, I did not.  Fair play, Seren and Tirion are nice girls, but they tell me angels don't do wishes." She sighed as she unwound her scarf. "Never can find a fairy when you need one."
I reached for the tea bags.
"Put the kettle on, shall I?"

Friday 25 November 2016

A Trial of Dyeing with Dyers Chamomile Leaves

Another long, mild, dry autumn kept the plants in my dye garden flowering until I stopped picking flowerheads to let them set seed. By the end of October, the perennial Dyers Chamomile plants were still flourishing against a backdrop of faded annuals.
I did once try contact dyeing with whole stems of Dyer's Chamomile rolled in a silk scarf. The prints made by the leaves were a just pale blur of colour, definitely greener than the golden yellow you get from dyeing with the flowers. After clearing this border at the beginning of November, I had a huge pile of Chamomile clippings and once the leaves had been stripped off and crammed into a dye pot, they weighed about 1.5kg. After simmering for a couple of hours and sieving the greenery out, the water in the pot had turned a greenish yellow, deeper and more golden when I added some soda ash to alkalinise a sample in a jam jar.  
Not much sign of green in either jar, still, I added to the main bath a 50g skein of Polwarth wool yarn, which had been premordanted with 10% alum, then gave that an hour or so to simmer with a teaspoon of soda ash, just in case alkaline conditions helped. Considering there was a ratio of 30/1 plant to fibre weight, little colour seemed to have been taken up during the simmering, yet in the morning, when I pulled the wool out, it was definitely green. Must have happened with the residual heat in the pot working overnight. Even so, it seems the leaves only contain a fraction of the dye found in the flowers.  This photo shows the 30/1 skein of leaf dyed yarn (though the camera hasn't done justice to the green I see in real life) together with some locks of sheepswool dyed in a solar jar with only twice their weight in fresh flowers.


I forgot all about the Chamomile Leaf dye afterbath sitting in a pot on the patio. Rediscovering it this week while clearing up after bad weather, I was surprised to see no mould and sniff no evil smell. The leaves must have the same astringent properties as the flowers, which never seem to rot, even after months in solar jars.


Since the recent rainstorms have stripped the trees, I could gather any number of freshly fallen oak leaves while taking the dog for a paddle in the fields. Laying on top some of the madder stems I have been cutting back, the leaves were rolled in a silk scarf mordanted with alum, tied up with string soaked in iron solution
and simmered for several hours in the chamomile leaf afterbath. There was enough dye left in there to turn the exposed silk a muted green, stronger with the added iron than it had been on the wool with no iron.  Once it was unrolled though, I was disappointed to find that the oak leaves had not given me much of a dark iron tracery.


While I was rinsing and ironing the silk, my companion, Elinor Gotland, returned from her trip to London.
"You'd think Bridgend was an island if you listened to British Rail.  I've been on train diversions up and down the valleys, getting past those floods."  She threw herself down on the sofa and shut her eyes. I hastened to put the kettle on.
"You do look shattered.  How did your audition go?"
"Don't ask, Beaut, don't ask. 'Don't ring us, we'll ring you.'"
I put her cup of tea beside her.  She didn't even stir.  I added a slug of sloe gin.
"Lots of people have been delighted with your picture on our 2017 Plant Dye Calendar. I must show you all their messages, once you've rested."
Elinor opened one eye.
"See, I said that thing needed a bit of star quality.  Sold a few, have you?" 
She took a sip of her tea.
"More than a hundred, posted all around the world.  It's been amazing. I've ordered another hundred sets of calendar pages from the printer. Only trouble is, the colour hadn't come out quite right the second time, so I've had to take them back and get a new print run.  The printers think I'm a real fuss pot and say they won't be ready til Tuesday."
Elinor was no longer drooping like a dandelion in a drought. She had perked up and now noticed what I was ironing.
"Shame you aren't as picky with good silk. Didn't get much colour onto that scarf, did you?"
"I don't think there was enough strength left in my iron solution.  The oak leaf prints have left their brown dye, but no pretty iron pattern."
"Can't take the scarf back to the print shop, can you Beaut?"
"Never mind, there's always overdyeing."
"Or shopping.  Christmas is only four weeks away and I am a ewe on a mission to make High Street traders happy.  I bet you haven't even started sorting out presents.  You can drive us up to Cardiff in your car tomorrow, Beaut."
It's lovely to have her home.  Really.


Friday 18 November 2016

The Humdrum Helix Hat Pattern

I've never had two batches of plant dyed yarn turn out exactly the same.  Even with careful weighing, measuring and equal time spent simmering, flowers picked one week won't have quite the same dye content as those picked the next week.  To get it all the same shade, yarn has to be dyed in one batch and you'd have to have a really big pot to fit in enough for a jumper. I did once manage to get some curtains dyed, but it was a Herculanean struggle. I bet most people who try plant dyeing have a load of small skeins sitting in baskets, waiting for the day they commit to a Fair Isle knitting project. 

Helix knitting in the round allows you to use many small skeins of different colours at the same time, without having to carry the yarn up the sides of the work, as you must with ordinary stripe patterns. I learned the technique from Margaret Radcliffe's Essential Guide to Colour Knitting, which is a completely brilliant book. This link takes you to an older post which includes the principles for knitting the Humdrum Hat, my personal pattern for knocking out a basic hat shape, which can be adapted to knit with any weight of yarn. The following Helical version of the Humdrum is given for aran weight yarn, but I've discovered that with helix knitting, you can even use balls of varying yarn thickness and they seem to average out without distorting the shape. It is for four colours, but you could knit this hat with even more, just divide your cast on stitch count by the number of colours you want to use. Addendum See this post for helix hats with ten colours.


The Humdrum Helix Hat Pattern

Materials
4.5mm circular needle with a short 50cm cord, or a long cord, using magic loop
Aran yarn, about 33m x 4 in different colours, A, B, C and D - total 132m
Using my 100% wool yarn, this weighs 75g
Darning needle for sewing in ends

Tension
Knit in stocking stitch on a circular needle,16 stitches and 20 rows measures 10 x 10cm (to adapt the stitch counts in this pattern for a different weight of yarn, read this post)

Sizing
For a snug fit, a hat should measure up to 5cm less in diameter than the person's head. Knitting this pattern, it is easiest to start with a multiple of four stitches.  The 84 stitch cast on is intended for an average person with a 56cm diameter head, wearing a 52.5cm diameter hat. 

Working to a gauge of 16 stitches to 10cm, 80 stitches cast on would make a hat measure 50cm diameter for a smaller head, 88 stitches result in a 55cm hat for a larger head and so forth. Just remember, for a bigger size, you need to start with more yarn.

Method
The long tail cast on gives a neat, elastic start, but any cast on method will do. The brim rolls up, so you won't see the cast on row once the hat is finished. 
Cast on 84 stitches using Colour A. Place a stitch marker and join to work in the round, taking care not to have a twist in your cast on row. This is a helpful video.

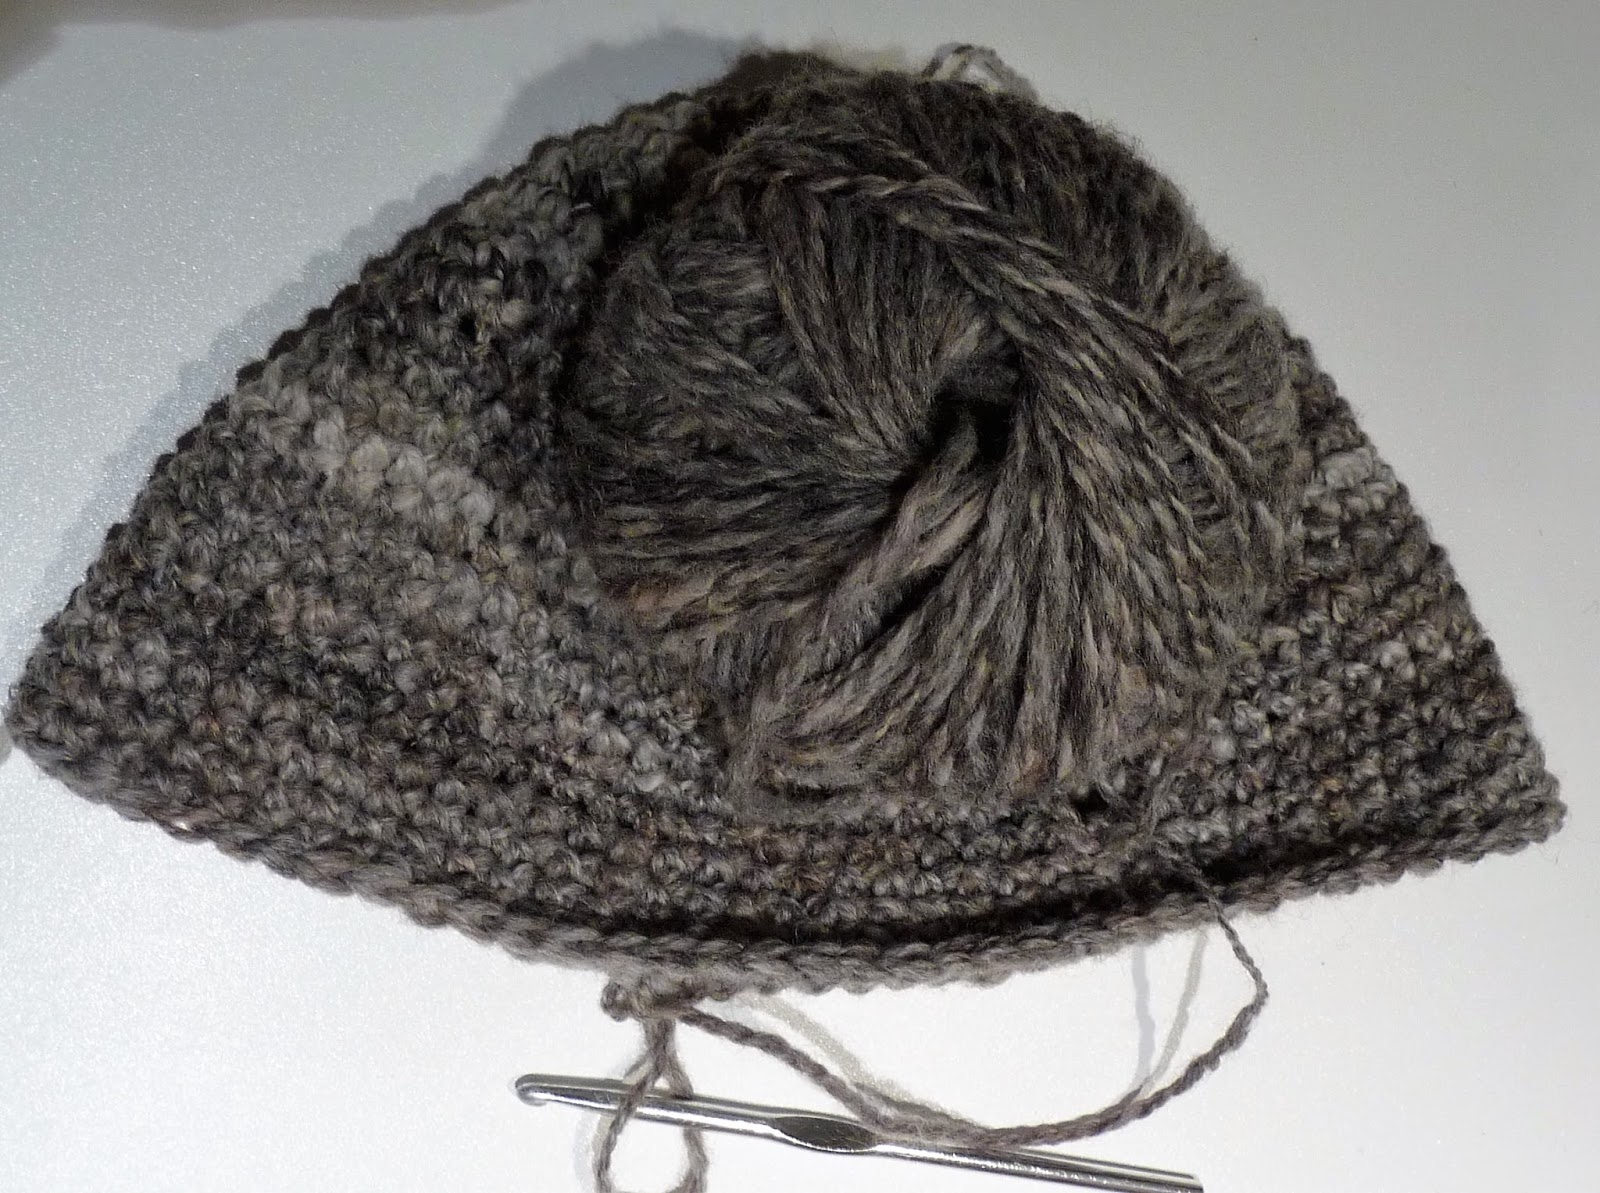
To make a single colour brim, like the hat in the photo at the start of this blog, knit round after round in Colour A until the work measures approximately 8cm long.  Let the fabric curl up on itself to form a roll with the first 8cm, exact measurements are less important than having the width of brim you prefer.

For a multicoloured brim like the ones on these two Humdrum Helix hats, knit two rounds in the first colour and then start your helix.


Helix
First Round
From the stitch marker at the beginning of the round, continue knitting in colour A for 21 stitches. Now use colour B to knit the next 21 stitches, colour C to knit the next 21 stitches and colour D to knit the last 21 stitches back to the marker.
Second Round
Continue knitting with colour D for 21 stitches.  Here, you will find the yarn from the ball of colour A dangling below the 21st stitch. No twisting the yarns round each other, just drop colour D, lift up colour A and adjust the tension on the last colour A stitch so it is just the same as all the other stitches.  If you leave it too loose or pull it tight as you start to use it again, you will end up with a seam running vertically up the knitting. Knit 21 stitches with Colour A, to where you find Colour B dangling down.  As before, check the tension on the last stitch of colour B and use B to knit 21 stitches, pick up and use Colour C to knit 21 stitches, arriving back at the round marker.

Subsequent rounds
Always continue knitting with the same colour you are using at the end of the round for another 21 stitches starting from the round marker, then pick up and use each colour in turn for 21 stitches.


When the total, unrolled length of your work measures about 18cm, begin these reductions to form the crown of the hat.


Continue to work with the four yarns in a helix throughout the crown.


Reduction Rounds
From the stitch marker, knit 1, knit 2 together, continue knitting til you reach the next colour. With the next colour, knit 1, knit 2 together, continue knitting til you reach the following colour. Repeat til you get back to the stitch marker again, then continuing in the same colour as you were using for the end of the last round, knit 1, knit 2 together and knit to the next colour.

Continue with these reduction rounds.  Once the tube of knitting gets too small to work easily on the circular needle, start using magic loop or change to double pointed needles until there are only 3 stitches of each colour left on the cord - total 12 stitches. Break the working yarn leaving a 20cm tail, thread it onto a darning needle and run it through the loops of all 12 stitches, removing the round marker and the circular needle cord.  Pull tight, fasten off and sew in the loose ends of all four colours. Wash, spin dry and block into shape. I wear hats while they dry to get a perfect fit.

Update read this post for humdrum helix hats knitted with ten colours of dk yarn