Fresh Madder Root Contact Dye Prints and Dye Vat
A couple of weeks ago, I emptied out a whole barrel full of madder plants, which had been growing in there for three years. There were long roots of pencil thickness, lots of thinner rootlets ending in masses of fine fibres, as well as bright yellow shoots running up toward the surface. After washing, the fresh material weighed 2.7kg. I laid out just over 2kg of roots on towels on the spare bed to dry.
I had saved the yellow shoots and the clumps of very fine rootlets more in hope than in expectation that they would contain much alizarin red dye. Once they were washed, I chopped up a portion of each and a little piece of solid root for comparison, poured boiling water over all three and waited a couple of minutes to see what colour would be released. The fine rootlets turned the water the same orange as the big root chunks while the yellow shoots turned red and released a more pinky orange.
Within a week, the roots had shrivelled down to a weight of only 500g. The roots weren't chopped up into small pieces, as is recommended before drying, because in the past, I have had more consistent success using whole root shapes to make red patterns on contact dye bundles than I have had getting good reds out of chopped madder dye baths. I used portions of the fresh harvest for trying out both methods once again.
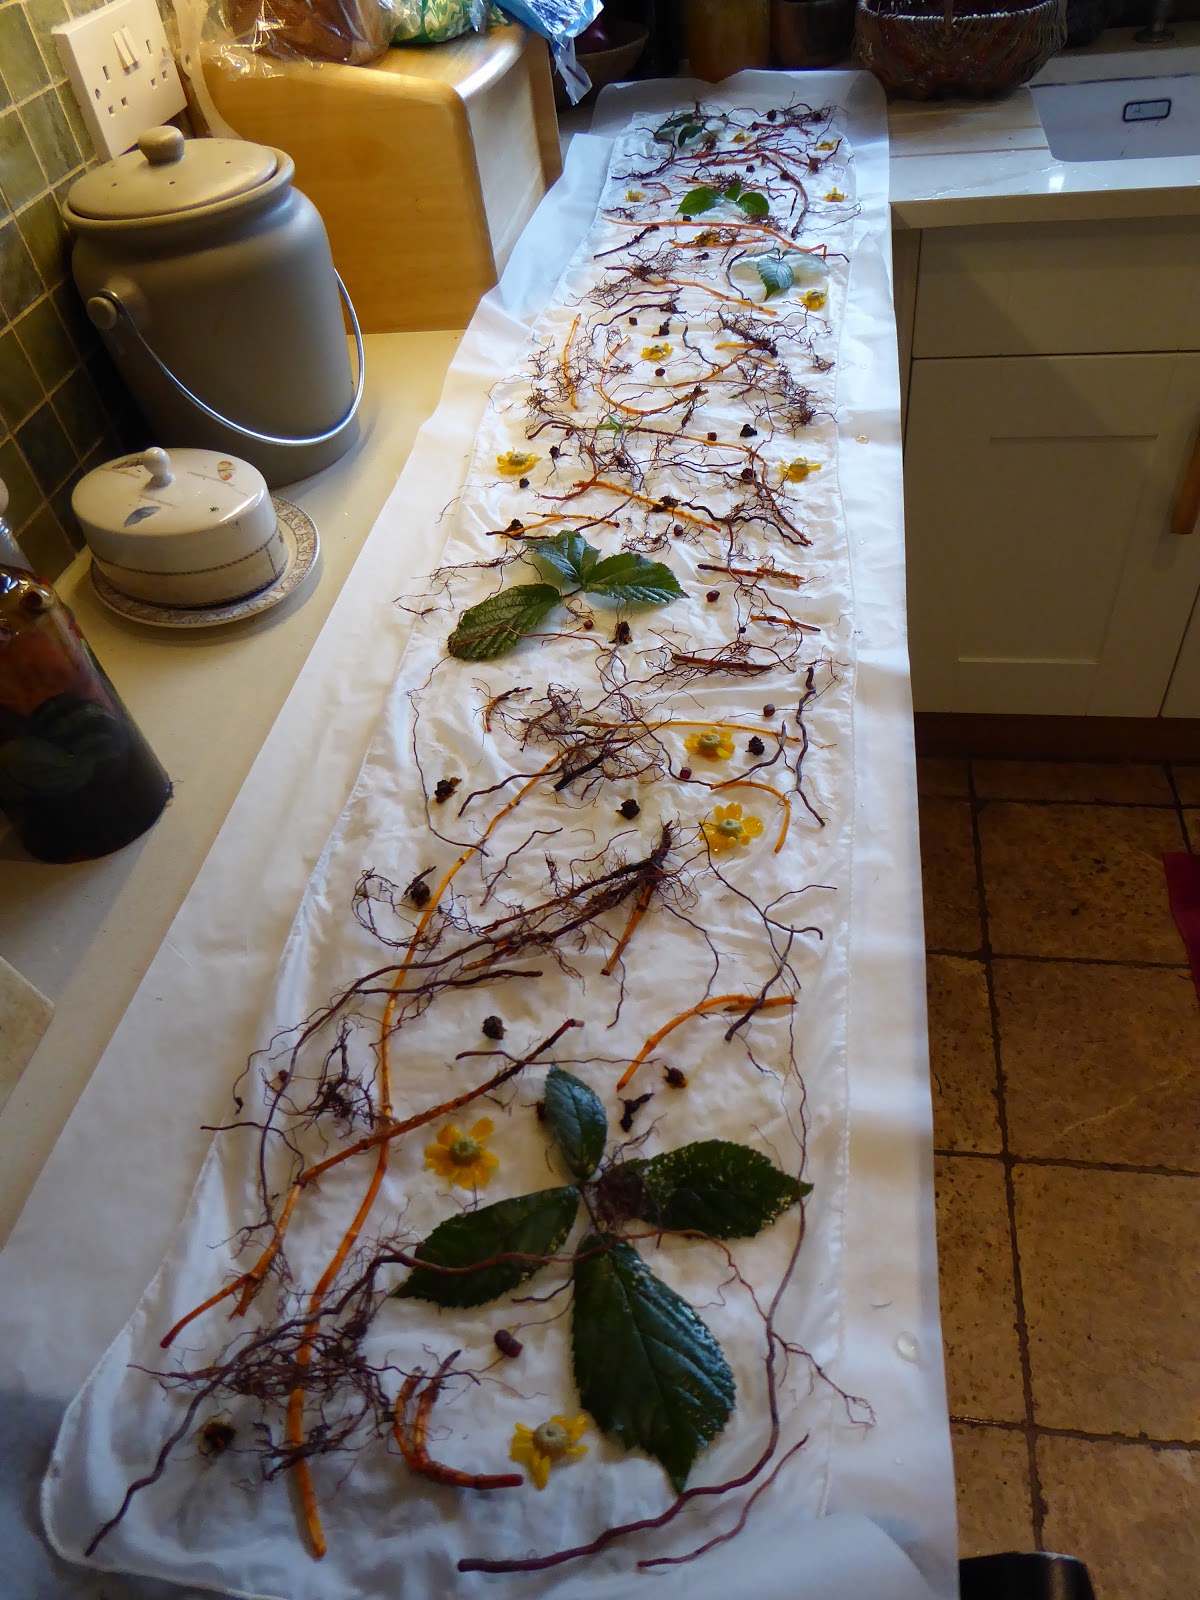
It seems ages since I made my last plant contact dye bundles. These were laid out on a length of baking parchment before rolling, to keep the prints from going right through the layers. With no other fresh dye plant material available, I sprinkled some dried coreopsis tinctoria and dyers chamomile flowers on the fabric along with plenty of the finer madder roots and some madder shoots. Some battered bramble leaves were dipped in iron water and laid on the silk scarf and I added some loose brown onion skins to the wool. Both silk and wool gauze had been mordanted with 10% alum.
Rolled around a plastic drainpipe and tied firmly with string, they were both simmered in plain water for a couple of hours. Containing my curiosity, I left them in the pot overnight and allowed them to dry out for a week before unrolling. .
The wool bundle looked a better red, those yellow shoots giving more scarlet, straighter lines, compared to the darker red of the wriggly rootlets. Onion skin and chamomile provided the orange and yellow splodges, making a really good effect on the wool fabric.
The iron dipped leaves did not make much of a print on the silk, maybe there just wasn't enough life left in them at this time of year. Not sure if the iron darkened the whole silk bundle or the madder colour is simply different on silk. Here are both scarves after washing and ironing.
Meanwhile, I had made a cold madder dye vat in a bucket, using 400g fresh roots and leaving it to keep warm on the underfloor heating in the bathroom. On the sixth day, my companion remarked
"Beaut, it's a good thing you've got a downstairs toilet. Otherwise visitors would think you'd been having a very hard time with the menopause."
I thought I'd ignore that.
"I suppose the vat is getting a bit whiffy, Elinor. I'll take it downstairs and try heating the madder up in a dye pot, see if I can get some more colour out of it." Stumping downstairs with the bucket, I wasn't feeling hopeful. "Even though they were partly brown alpaca in the first place, the pieces of wool tops I've been taking out each day haven't gone a really deep red. Don't know what I'm doing wrong. The vat is fermenting, but I keep adding in more soda ash so it stays alkaline and I'm following exactly the steps I used for my first, most successful attempt at this."
My companion skipped sideways as the bucket sloshed into a dye pot.
"That's not quite true, is it? You've kept all the chopped up roots in that big net bag instead of letting them float in among the fibres."
"Well, there was just that one difference in the method, because I just couldn't face picking endless tiny bits of root out of the tops before spinning them. I'm still going to leave them in the bag while I heat them up now. Watch out for the long thermometer, this pot mustn't go over 80 degrees."
"Next time, dye yarn you've already spun. The bits will come off that easy enough. And do me a favour, no more cold madder vats. A steamy afternoon in the kitchen is one thing, showering next to a blood bath is quite another. Puts me right off my tea."
As if.
Here is the final madder vat outcome.
The top row are the pieces which were taken out of the cold vat at intervals over six days. The middle row were heated to 80 degrees centigrade for an hour with the same roots still in a net bag. The bottom row pieces were heated in the dye bath after the roots had been boiled with a couple of lemons to provide acid, then taken out to the compost heap. Bottom right is an undyed piece of the original alpaca/merino blend tops.


Wonderfully graphic results! And i bet those wool tops are going to spin into a marvellous colour range yarn. One thing i do wonder, is there still any colour left in the roots after contact printing with them? Can you then use them in a vat, like an exhaust bath?
ReplyDeleteThanks. I've spun some samples and so far, achieved only disappointing variations on a brown theme. Hey ho. I have tried using roots for a second contact print and they left only pale pink marks, so I am not optimistic there is much more to be had from them. Worth a go though, considering how long it takes to grow them.
DeleteI'm hoping to grow madder this year but I'll probably get into quite a mess when I try to use it!
ReplyDeleteI love the colours you got from the roots :D
Slaughterhouse effects in the vat :)
DeleteVery fine results you have got, interesting ones. Her in Finland gallium species are used for dyeing since ancient times. Also Madder, which belongs to Rubia family, but have counted to Galiums. For them all have recommended to store the roots at least one year before using them. The idea has been that the roots 'mature' in color content. Of the small and young roots I think they are simply too young to have any significant dye content, so are not useful in dyeing. I use not myself dye works cause of circumstances – may be in next life …. But perhaps you were interesting to store some and try again next year?
ReplyDeleteThanks very much :) I'd say you are right about the dried roots giving stronger colour, but actually, I have found that the young roots do give good contact dye prints. I have been experimenting with a plant only six months old and though the roots are thin and orange, I was delighted to find they have printed a beautiful red.
Delete