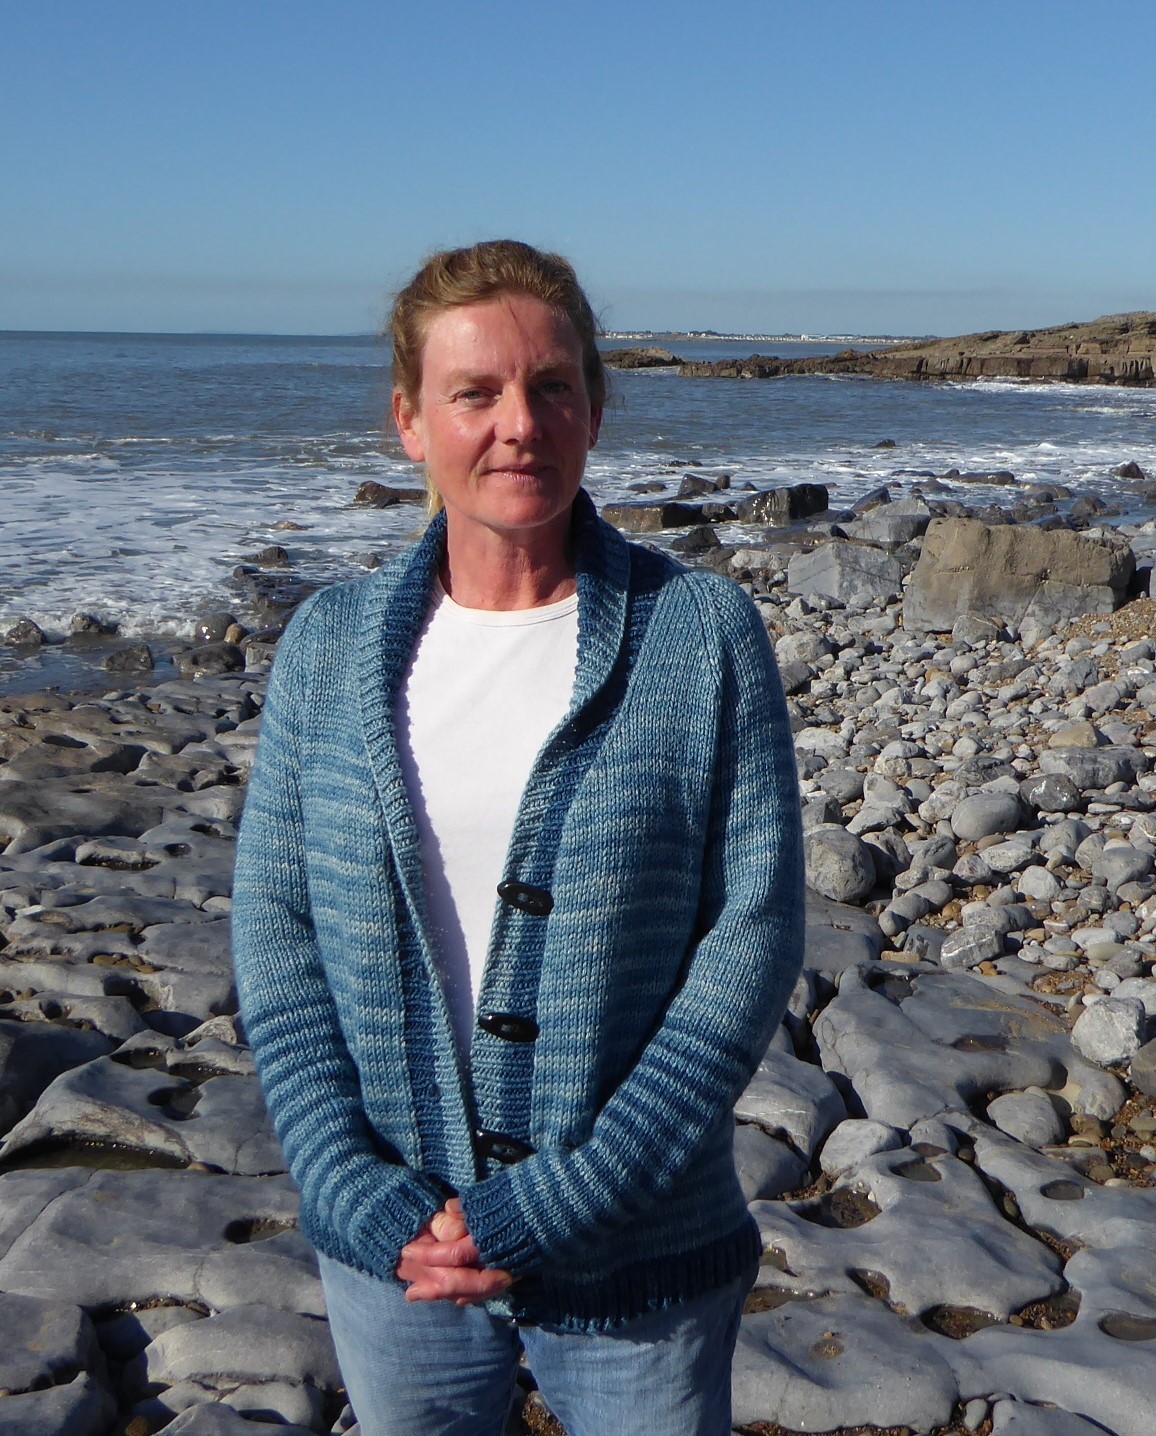


After repeated dips in two Japanese Indigo leaf vats, inevitably, all eight ended up slightly different colours. The two darkest skeins were intentionally dyed deeper for the trim. For the rest, rather than have blocks of knitting jumping from one shade to the next, I started with the two mid blues that were deepest and palest and knitted this cardigan in two row stripes of each. When a ball ran out, I carried on with the next nearest shade, ending up with a gradient of diminishing mid blue contrasts. The sleeves were knitted both at the same time, working with the same yarn from either end of a centre pull ball, to keep the colour changes matching. The sleeves were knitted flat then seamed, because trying to make jogless joins for stripes knitted in the round does my head in.
Shorelines Shawl Collar Cardigan Knitting Pattern
 Materials
1000m chunky yarn - 200m contrast and 800m main colour (I had 90m left over)
4.5mm and 5.5mm needles - I used a long circular cord
4 stitch markers
Darning needle for sewing up and weaving in ends
5 buttons ~ 2cm diameter
Tension
After washing and smoothing flat to dry, 10cm squared = 14.5 stitches and 18 rows in stocking stitch. Using the yarn described, washing slightly increased the size of my swatch in both length and width, rather than shrinking it a bit - I suppose that's what 'superwash' yarn treatment does.

Size of Finished Item
One size
108cm bust
(which fits me - 102cm chest/40" bust)
45cm sleeve
(I like the option to turn up tthe cuff)

k = knit
k2tog = knit 2 stitches together
M1L = make 1 stitch angled left
M1R = make 1 stitch angled right
p = purl
PM = place marker
RS = right side
sl1, K1, psso = slip as if to purl, knit 1, pass slipped stitch over the stitch just knitted
SM slip marker
st = stitch
w&t = wrap yarn around needle and turn to work back in the other direction
WS = wrong side
yo = wrap yarn over needle before working next stitch
Method
BODY
Using 4.5mm needle and contrast colour, cast on 143 st
(WS) Row One P1, *P1, K1* repeat from * to * to last two st, P2
(RS) Row Two K1, *K1, P1* repeat from * to * to last two st, K2
Work this pattern for 9 rows to make ribbed edging, ending on a WS row.
Change to 5.5mm needle and main colour and work in stocking stitch until piece measures 40cm ending on a WS row. If you are making stripes, change colour every two rows, carrying yarn up alongside fabric edge. Leave st on needle with yarn still attached.
SLEEVES (Work two)
Using 4.5mm needle and contrast colour, cast on 33 st
(WS) Row One P1, *P1, K1* repeat to last two st, P2
(RS) Row Two K1, *K1, P1* repeat to last two st, K2
Work this pattern for 9 rows to make ribbed cuff, ending on a WS row.
Change to 5.5mm needle and main colour and work in stocking stitch for 8 rows, ending on a WS row. If you are making stripes, change colour every two rows, carrying yarn up alongside fabric edge.
Sleeve Increase Row K1, M1L, K to last 2 st, M1R, K1
Work increase row on ninth row and every following tenth row until you have 49 stitches on the needle. Continue working stocking stitch until sleeve measures 45cm. Place first two stitches and last two stitches on safety pins, cut yarn allowing an end for weaving in and leave remaining 45 st on needle.

YOKE
Starting with a RS row on 5.5mm needles, knit 34st across body, place 4st on a safety pin and PM. Knit the 45st of one sleeve and PM. Knit 67st across body, place 4st on a safety pin and PM. Knit the 45st of the other sleeve and PM. Knit the remaining 34st of the body. (225st)
Purl back across all st, slipping markers.
Decrease Row for Neck and Yoke
K1, K2tog (neck decrease) *K to 3st before marker sl1, K1, psso, k1, SM, k2tog, K to 2 st before marker, K1, sl1, psso, SM, K1, K2tog* repeat from * to *, K to 3st before end, K1, sl1, psso (neck decrease), K1
Purl back across all st, slipping markers.
Repeat these two rows 9 times in total (135st)
Decrease Row for Yoke only
*K to 3st before marker sl1, K1, psso, k1, SM, k2tog, K to 2 st before marker, sl1, K1, psso, SM, K1, K2tog* repeat from * to *, K to end
Purl back across all st, slipping markers.
Repeat these two rows 12 times in total (39st)
Final decrease row
K1, Sl1, K1, psso, K1, remove marker, K2tog, K1, SM, K1, K2tog, K19, sl1, K1, psso, K1, remove marker, K1, sl1, K1, psso, remove marker, K1, K2tog, K1 (33st)
Purl back across all st, slipping 1 remaining marker and leave st on needle.
 BUTTON BAND AND COLLAR
Using 4.5mm needle and the contrast colour yarn, with RS facing, starting at the bottom of the right front edge and working through the spaces between the first and second columns of stitches, pick up one st through the first four row interspaces, miss a space, continue picking up 4st from every 5 rows up the front, along the neck angle and up the straight edge of the neck, knit the first 5 live st from the needle, SM, K28, pick up 4st from every 5 rows of the straight edge of the neck, from the angled edge of the neck and from the left front edge.

First Row (WS) P1, *K1, P1* repeat from * to * until you reach the marker. Remove marker. If you just made a purl stitch, w&t now, if you just made a knit stitch, P1, w&t.
Second Row (RS) *K1, P1* repeat from * to * for 24 st, w&t
Short Rows for Collar
Working in the established rib pattern, when you reach the wrapped yarn, knit it together with the next stitch, P1, w&t. Repeat this for 28 short rows.
Next Row
Working in the established rib pattern, when you reach the wrapped yarn, knit it together with the next stitch, then continue P1, K1 rib to the end of the row at the bottom of the right front.
Next Row
Working in the established rib pattern, when you reach the wrapped yarn, knit it together with the next stitch, then continue P1, K1 rib to the end of the row at the bottom of the left front.
Work in rib for 3 full length rows
 Buttonhole Row (RS) Work 3 st in rib, yo, sl1,K1, psso *work in rib for 12st, yo, sl1, K1, psso* repeat from * to * three more times to make 5 buttonholes, continue working in rib to end.
Change to Main Colour. Work 5 rows in rib, then cast off in rib, working more loosely around the edge of the collar to let the knitting fan out.
FINISHING
Graft together using Kitchener Stitch the four safety pinned stitches from the sleeve with the four stitches from the body at each underarm. Sew up the sleeve seams. Weave in all loose ends. Sew five buttons onto the left front edging in alignment with the buttonholes.
Notes to self - If I make another, think about making it sit on the hip rather than below it - maybe 10cm shorter in the body, and narrower around the hips with increases to reach this circumference above the waist, add in pockets like the ones in the Regeneration Jacket and make the shawl collar bigger by continuing with more short rows encompassing all the stitches of the neck. Would need 300g contrast and 700g main colour - hopefully ...
That's a gorgeous cardigan - well done. Yep, superwash wools do tend to behave like alpaca and grow rather than full. But I bet it feels lovely. Beautiful blues.
ReplyDeleteThanks - it does feel very luxurious. Time will tell how fast the merino pills...
DeleteI love the way you arranged the colors to get the gradient effect! Beautiful planning, and gorgeous result!
ReplyDeleteI was fed up not to get the colours closer, but in the end, the endless variety of plant dyes has proved more interesting than uniformity, after all :)
DeleteSo much nicer than a sweater in one solid color! Your plan really got the most out of the color variations. Brava!
ReplyDeleteThanks very much :)
DeleteThis is a beautiful use of smallish quantities of yarn of the same colour we natural dyers usually produce. Your Cardigan makes me wish knit one from my skeins of gradient colours.
ReplyDeleteI am pleased - pretty sure I'll do this again and glad you like it :)
DeleteI love all the blues, only, horizontal stripes are a no-go for me.... so I'd need to knit from side to side - maybe start at both arms and knit in to spread the colours evenly? but I have a similar problem with dyeing - even the biggest dye pot can only take about 800 g to dye evenly - if I stuff in a full kilo, I can be sure that I'll end up with blotchy yarn:( I try to overcome that problem by knitting yoke sweaters, fair isle or other colour works:) or dye, blend and manage a large amount that way! if I am desperate enough for single colour - I just have to buy in....
ReplyDeleteNice idea, knitting side to side - think I'd need a less drapey, more elastic woollen yarn to reduce droop, but that could be a cracking effect :)
DeleteHow kind of you to share this pattern! And a clever idea
ReplyDeleteYou are very welcome - it's only a one size basic shape that people would have to adjust for their own fit. Writing it up properly means I shan't lose the piece of paper I kept my notes on :)
DeleteYour wonderful calender has just arrived, thank you! & I'm so inspired by this beautiful cardigan! Off to see what yarn I have to dye blue! Thank you!
ReplyDelete:) My pleasure. I'm so glad you like the calendar.
Delete