
"Pipe down, Beaut, doesn't look like it's going to be all plain sailing. Ready by teatime, you reckon? Or should I say, the 'dog watch'?"

"Well, ok, it won't be finished today, but I'm edging forward on the right tack and this seabag is definitely in the offing."
My companion, Elinor Gotland, regarded my basket of knitting with some scepticism.
"You can tell that to the marines, Beaut."
I had the devil to pay working twelve balls of wool in every round of a twelve colour helix, but I fought and I conquered, again and again. I enjoy the helix knitting technique, it gives a pleasing spiral effect and is an effective way of combining colours and using up lots of small amounts of yarn to make one larger item.

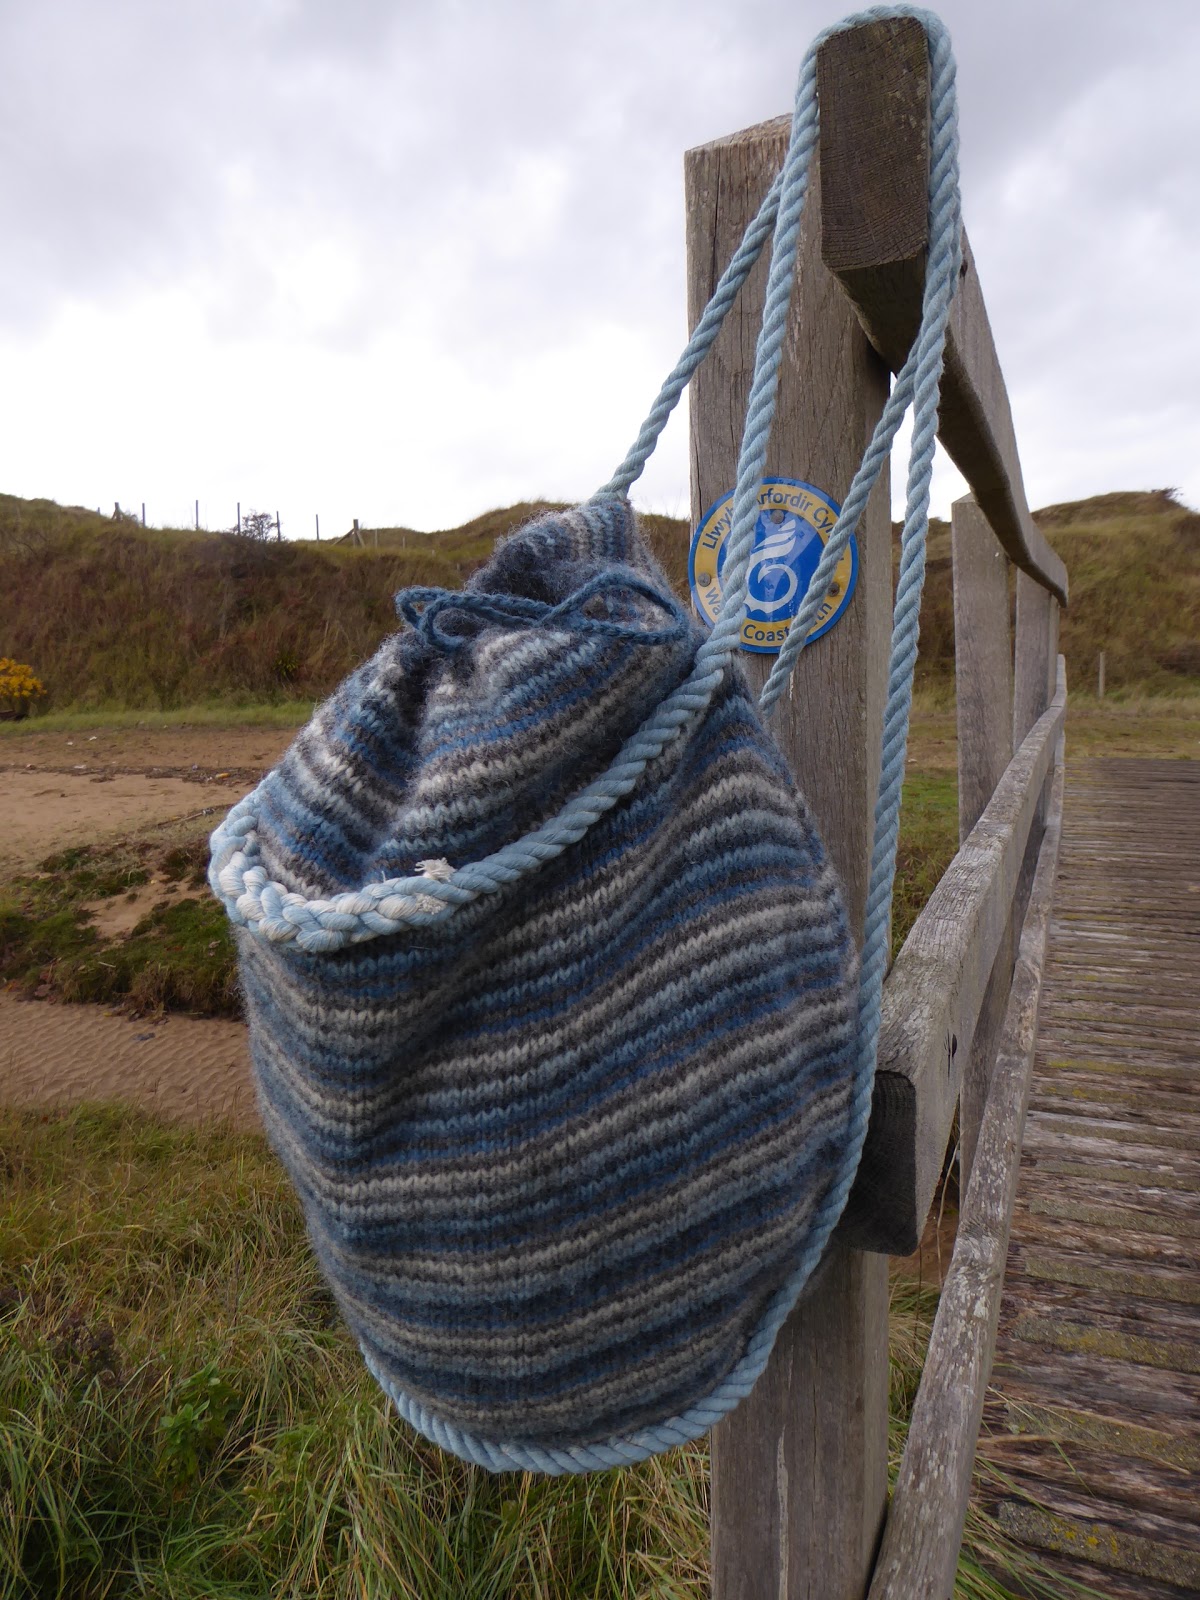
Mainbrace Kitbag Knitting Pattern
12 x 50m double knitting yarn.
3.5mm circular needle on a 50cm cordDarning needle
3m soft rope cord for the handles
3mm crochet hook
My yarn was originally 100g white Llanwenog and 2 x 100g Llanwenog/Black Welsh Mountain wool blended to make two shades of grey, which I had overdyed with Japanese Indigo. I didn't have to knit to the bitter end, there was 70g left over, so I think you could get away with 40m of each colour except Colour A, which has to knit the neck and the fastening cord as well as the helix.

After washing, 20 stitches and 30 rows = 10cm square
I knitted a swatch of 24 stitches and 35 rows then a few rows of 2x2 rib and sewed it inside the finished bag to make a pocket for phone, keys and so forth.
Size
The finished bag is approximately 45cm long and 70cm in circumference
Method
Starting at the top opening of the bag, in Colour A, cast on 120 stitches, place a marker and join to work in the round.
Knit 4 rounds.
Working The Helix
First Round
From the stitch marker at the beginning of the round, continue knitting in colour A for 10 stitches. Leaving a 20cm tail of each new colour for the sewing up at the end, use colour B to knit the next 10 stitches, colour C to knit the next 10 stitches and and so forth until you use the twelfth colour L to knit the last 10 stitches back to the marker.
Continue knitting with colour L for 10 stitches. Here, you will find the yarn from the ball of colour A dangling below the 11th stitch. No twisting the yarns round each other, just drop colour L, lift up colour A and adjust the tension on the last colour A stitch so it is just the same as all the other stitches. If you leave it too loose or pull it tight as you start to use it again, you will end up with a seam running vertically up the knitting. Knit 10 stitches with Colour A, to where you find Colour B dangling down. As before, check the tension on the last stitch of colour B and use B to knit 10 stitches, then pick up and use Colour C to knit 10 stitches, continuing in this fashion until you arrive back at the round marker with colour K.
Always continue knitting with the same colour you are using at the end of the round for the start of the following round, then pick up and use each colour in turn as you reach it.
Rounds 3 to 11 will increase the diameter of the bag from 120 to 150 stitches by increasing one stitch in alternate colour intervals on alternate rounds.
Third Round
*Knit 5 stitches, make one stitch left, knit on to the next colour change, knit the following colour with no increases to the next colour change* repeat from * to * five more times to end of round (126).
Fourth round
Knit the helix, changing colours as you reach the next yarn waiting
Fifth Round
Knit to the next colour change, with the new colour, knit 5 stitches, make one stitch left and knit on until you make the next colour change* repeat from * to * five more times to end of round (132).
Round Six - as Round Four
Round Seven - as Round Three (138)
Round Eight - as Round Four
Round Nine - as Round Five (144)
Round Ten - as Round Four
Round Eleven - as Round Three (150)
Subsequent rounds continue knitting the twelve colour helix straight to form the body of the bag with no further increases. I knitted 108 rounds, which is nine bands of completed 12 row colour bands.

First Round
*Knit 1 stitch, Knit 2 together, knit on to the next colour change, knit the following colour until you make the next colour change* repeat from * to * five more times to end of round (144).
Second round
Knit the helix, changing colours as you reach the next yarn waiting
Third Round
*Knit to the next colour change, then knit 1 stitch, Knit 2 together and knit on until you reach the next colour change* repeat from * to * five more times to end of round (138).
Fourth Round - as Second Round
Keep repeating these four reduction rounds. Once the tube of knitting gets too small to work easily on the circular needle, start using magic loop or change to double pointed needles until there are only 5 stitches of each colour left on the cord - total 60 stitches. Continue repeating the first and third reduction rounds without the second and fourth helix rounds in between. Once there are only 2 stitches of each colour, work a final round knitting 2 together all the way round to leave 12 stitches on the cord. Break the working yarn leaving a 20cm tail, thread it onto a darning needle and run it through the loops of all 12 stitches, removing the round marker and the circular needle cord. Pull tight, fasten off and sew in the loose ends of all twelve colours.


I added a couple of small pebbles with holes in them to aid closing the top of the bag when pulling the chain tight and tying the loose loop in a half hitch.

"A loop for a handle on either side ought to fit the bill, Beaut."
"Mmm, well, I can sew the rope onto the knitting, but the cut ends will be the weakest links."

"Let's try a different tack. I'll take a turn and splice it into one long loop for you."
Following the instructions in this video, Elinor soon had the splice squared away.
The circle of rope was laid out in a long oval, the bag was laid on top and pinned into position, then the rope underneath it was sewn on to the body of the bag with some spare yarn.

"I certainly do and I hope you know what splicing the mainbrace means."
"Fiddly knotting?"
"It means it's time for a tot all round. Get that Blackberry Rum out."
Elinor raised her glass and gave Friday's toast. "Here's to a willing foe and searoom."

I love that.
ReplyDeleteIt's a comfortable bag to carry :)
Deletestunning bag, thank you for the pattern
ReplyDelete:)
Delete